Flush Mount Template
Found 10 free book(s)
LCN Installation Instructions/Templates Index
www.allegion.ca419 flush adapter 72012 1450T Series Mounting/Document Template Number Track mounts 72042 Drop plate 72043 1460 Series Mounting/Document Template Number Pull, Top Jamb mounts 28011 PA mount 28012 EDA mount 28013 CUSH and Spring CUSH mounts 28014 Drop Plate 28460 Designer Series cover 28090 1460T Series Mounting/Document Template …
GPSMAP 400/500 Series Installation Instructions - Garmin
static.garmin.com• Flush Mount—use an optional flush mount kit to mount the chartplotter into a flat panel. For more information on the optional flush mount ... Using the swivel base as a template, mark the location of the three holes that secure the bracket to the …

377ECHOMAP!' UHD Installation Instructions - Garmin
www8.garmin.comYou can mount the device in your dashboard using the flush-mount template and appropriate hardware. 1. Trim the template and make sure it fits in the location where you want to mount the device. 2. Secure the template to the mounting location. 3. Using a 9.5 mm (3 / 8. in.) drill bit, drill one or more of the holes

Electric Vehicle Charging Station for Toyota
toyotaade.snapon.comapplications only per NEC 625. For surface mount applications order EVB40-SPT. For EVB40-5PT (flush mount) and EVB40-SPT (surface mount) the NEMA 6-50R receptacle can not be greater than 12” from the bottom of the box. Measurement taken from the bottom of the mounting bracket to the middle of the receptacle. See mounting template in EVK05-M ...
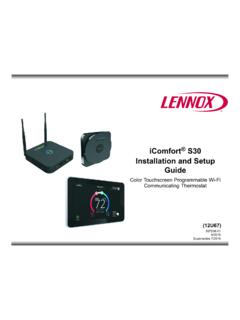
iComfort S30 Installation and Setup Guide - Lennox
static.lennox.comthe proper mag-mount terminals use mag-mount or wall plate as template to mark desired mounting hole locations on wall. d drill 3/16” holes at marked locations on wall for anchors e insert anchors until flush with wall. insert provided wall anchors in holes. f g h use a level to align either mag-mount or wall plate on wall horizonally. secure ...
INSTALLATION INSTRUCTIONS - FREESTANDING GAS RANGE
pdf.lowes.commay use the wall or floor mount method. If molding is installed and does not allow the bracket to fit flush against wall, remove molding or mount bracket to floor. For wall mount (Fig. 4), locate the bracket by placing the back edge of the template against rear wall and the side edge of template on the mark made referencing the side of the range.
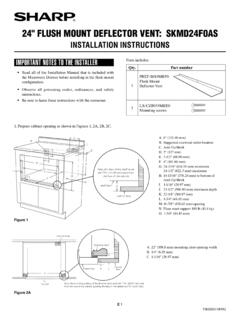
24 Flush Mount DeFlector Vent: sKMD24F0As
content.syndigo.com24" Flush Mount DeFlector Vent: sKMD24F0As INSTALLATION INSTRUCTIONS 1. Prepare cabinet opening as shown in Figures 1, 2A, 2B, 2C. CL Top view A Anti-Tip block Mounting cleat Drawer face B C Cabinet face Note: the mounting surface of the finished cleat must sit 1 1/16" (26.97 mm) back

EMS Template Protocol for COVID-19 Monoclonal Antibody ...
www.ems.gov• After infusion is complete, flush the line to ensure complete medication administration per protocol. • Take vital signs for 60 minutes after infusion or completion of all four subcutaneous injections. EMS Template Protocol for COVID-19 Monoclonal Antibody Administration: Treatment and Post-Exposure Prophylaxis of
69-2631ES 03 - HE360 Humidifier and Installation Kit
www.honeywellstore.com— Mount the humidifier in a conditioned space to prevent freezing. Fig. 1. Typical humidifier installation locations. Selecting Water Supply Location • Use either hard or soft water in the humidifier and either hot or cold water. The water flow rate, with the humidifier running, is 3.5 gal/hr (13 liters/hr) to flush the pad

Retrofit Steering Column - ididit
www.ididitinc.com1955-56 Chevy installation with stock under dash mount 1) Slide cluster seal up the steering column tube to the upper limit of the column. 2) Attached the mount to the upper dash. 3) Place the column in designated place and affix the mount into position making sure the tab of the mount is inside the column. If no hole is in the tube, drill