Please read before printing
Found 9 free book(s)
PLEASE READ BEFORE PRINTING - Home - Circadiance
www.circadiance.comPLEASE READ BEFORE PRINTING Print page 2 and 3 of this document at 100% to ensure you are sizing yourself properly! To double check your printing accuracy, compare the

PRODUCT CATALOG - Old Trail Printing Company
www.oldtrailprinting.comproduct catalog for handy reference please write in your area/store number or franchise account number old trail fulfillment 100 fornoff road, columbus, ohio 43207

2018 OREGON COMMERCIAL RENEWAL INSTRUCTIONS …
www.oregontruckingonline.com2018 oregon commercial renewal instructions please read important: we no longer process commercial registration by phone. renewals will only be accepted via mail, in …

PLEASE READ INSTRUCTIONS CAREFULLY - tcsheriff.org
www.tcsheriff.orgQuestions? Call: 844/274-7457 * Indicates Required Field DRIVER’S CRASH REPORT (Please read instructions on reverse side) Form CR-2 (Rev. 04/15) Page 1 of 1
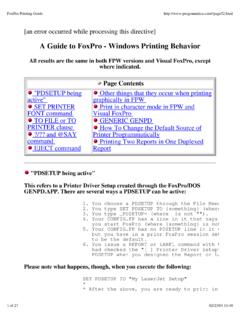
A Guide to FoxPro - Windows Printing Behavior
www.herrold.comFoxPro Printing Guide http://www.programatica.com/fpage52.html 6 of 27 02/23/04 11:40 IF this is the very first bit of output IF printing with @SAY
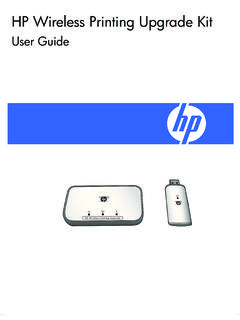
HP Wireless Printing Upgrade Kit
www.hp.comContents of the package Welcome 5 1Welcome Congratulations on the purchase of your Wireless Printing Upgrade Kit. The Kit was designed to provide a simple and

General Instructions on Printing Checks - rfmsonline.com
www.rfmsonline.comGeneral Instructions on Printing Checks: Blank Check stock: 1) Go to the Admin tab and select the Preferences menu. In the Checkbook section, select “Use
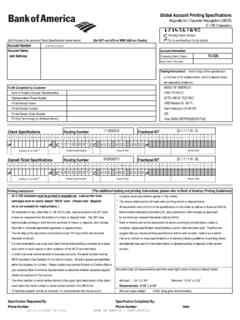
Global Account Printing Specifications - internationalpcg.com
www.internationalpcg.comRouting Transit Symbol (ACH format is the same as Check Specifications format below) (Do NOT use ACH or WIRE ABA on Checks) On-Us and Auxiliary On-Us Symbol Account Number Account Name Account Information and Address Processing State or Region New Order or Re-order

H O W T O D E T E R M I N E Y O U R R I N G S I Z E Please ...
www.order-of-the-engineer.org1. Carefully cut along the outline of the sizer. Make a small slit in the left end of the sizer. 2. W 3. Slide the pointed end of the sizer through the slit.