
Creo Dimensioning Tutorial - Brighton Area Schools
Creo Dimensioning Tutorial Step 1: Layout Views Already done for Intro CADD DWG 1-4 Step 2: Placing Dimensions 1. Go to Annotate Tab The annotate tab will allow a user to dimension parts in various ways. We are only going to use a couple of buttons here. a. Linear Dimension Tool: Places dimensions on the part b.
Download Creo Dimensioning Tutorial - Brighton Area Schools

Information
Domain:
Source:
Link to this page:
Documents from same domain
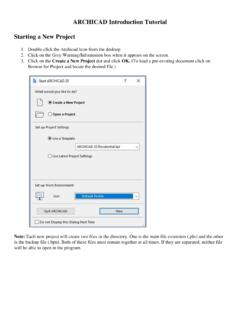
ARCHICAD Introduction Tutorial Starting a New Project
www.brightonk12.comStep 4: Drawing the House Outline Set Up the Grid: By now, you’ve probably noticed that there is a predefined grid in the background of your workspace. When using Archicad to draw a floor plan, you will use this grid to aid you as the designer. The software’s default size for the grid is 4’-0” x 4’-0” for each square space.

Creo: Counterbore and Countersink ... - Brighton Area Schools
www.brightonk12.comBrighton High School Brighton, MI This tutorial is designed to show how to create a Counterbore hole in two different ways. 1. Creating 2 Extrudes 2. Using the Hole Tool Types of Holes . Counterbore Holes Option 1: Extrudes When creating a Counterbore hole it does not matter which hole you cut first when using CADD

Robot C Programming Tutorial By ... - Brighton Area Schools
www.brightonk12.comBrighton High School 3. Write the following Program a. May type all of the code or begin typing and drop down menus will appear to predict desired command I.E 4. Compile the program to make sure there are no errors or bugs in the program 5. Connect the EV3 Brick to the PC using the USB cable > Select the Download to Robot > First time button is

Micro800 Programming Basics Tutorial 2: Variables and ...
www.brightonk12.comMicro800 controllers also have System Variables of varying data types that reference internal system values of the controller that a user may want to use in their programming, or for troubleshooting purposes. System Variables start with the prefix __SYSVA. An example of a system variable that is commonly used is the __SYSVA_FIRST_SCAN variable.
Related documents

Crime and Punishment: An Economic Approach
www.nber.orgThis PDF is a selection from an out-of-print volume from the National Bureau of Economic Research Volume Title: Essays in the Economics of Crime and Punishment

Parametric vs Nonparametric Models
mlss.tuebingen.mpg.deParametric vs Nonparametric Models • Parametric models assume some finite set of parameters .Giventheparameters, future predictions, x, are independent of the observed data, D:

Creo® Installation and Administration Guide - PTC
support.ptc.comThe Creo design software package encompasses the CAD, CAM, CAE, CAID, and Visualization applications of PTC. It provides flexibility to add new interoperable capabilities such as 2D modeling, direct modeling, and BOM-driven assemblies to your software tools. This guide describes how to generate and

PTC Creo 4.0 - Student Edition - Quick Installation Guide
apps.ptc.com### represents the build code of Creo you downloaded. The actual number will vary as additional Creo builds are released. Right -click the downloaded zip file, select Extract All and then select a location the DVD will be unzipped to. Select a location …
Creo: Counterbore and Countersink Tutorial
www.brightonk12.comCreo: Counterbore and Countersink Tutorial By Matthew Jourden Brighton High School Brighton, MI This tutorial is designed to show how to create a Counterbore hole in two different ways. 1. Creating 2 Extrudes 2. Using the Hole Tool Types of Holes

PTC Creo 7.0 Hardware Support – Hewlett Packard
support.ptc.comDec 07, 2021 · PTC Creo 7.0 Hardware Support – Hewlett Packard Last updated: December 7, 2021 All drivers listed in this document available from your workstation manufacturer. Do not attempt to search AMD(ATI) or NVIDIA websites as those hardware vendors often will only have current (latest) drivers available which in most cases HAVE NOT BEEN TESTED by PTC.

Mobil Polyrex EM Series (PDF)
www.chemcorp.co.ukExxonMobil Lubricants & Specialties All products may not be available locally. For more information, contact your local sales office or visit www.exxonmobil.com.

PTC Creo 8.0 - Student Edition - Quick Installation Guide
apps.ptc.com### represents the build code of Creo you downloaded. The actual number will vary as additional Creo builds are released. Right-click the downloaded zip file, select Extract All and then select a location where the files will be unzipped to. Select a location you …

INNEO Security Advisory
www.inneo.deCREO SICHERHEITSHINWEIS BETROFFENE RELEASES • Creo Parametric 4.0 to 8.0 • Creo Schematics 4.0 to 8.0 • FLEXnet Admin License Server • FlexLM • PTC License Server: FlexNet Publisher BESCHREIBUNG (ENGL.) • Does the CVE-2021-44228 - Apache Log4j Vulnerability impact Creo Parametric or related Creo applications, such as Creo Schematics?