
Electric Unit Heaters - Trane
Series 50 with tamper-resistant cover removed. Series 20 and 50 with tamper-resistant thermostat cover plate which is included with each heater. Louvered Grille Heavy-duty welded steel for maximum impact resistance. Closely spaced (pencil proof), tamperproof. Motor Shield Protects motor by separating return air from heated air. Motor
Download Electric Unit Heaters - Trane

Information
Domain:
Source:
Link to this page:
Documents from same domain

Chiller perormancf e testing program - Trane
www.trane.com2 Chiller performance testing Trane is the global chiller leader Trane has manufactured centrifugal chillers in La Crosse since 1938. Much more than a

Water-Cooled Liquid Chiller Model CVGF 400 to …
www.trane.comIntroducing Trane’s Model CVGF Centrifugal Water Chiller Introduction The basic gear driven centrifugal water chiller design was introduced in 1976 and has been
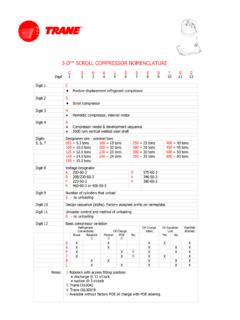
3-D™ SCROLL COMPRESSOR NOMENCLATURE - …
www.trane.com3-D™ SCROLL COMPRESSOR NOMENCLATURE C S H A 1 5 0 K 0 * 0 0 Digit1 23 456789 101112 Digit 1 C ♦ Positive displacement …

Trane® Voyager
www.trane.comTrane combines technological innovation with legendary reliability and performance to create the lowest cost of ownership. Trane® Voyager™ rooftop units not only offer the lowest installed cost, they also can reduce
Packaged Cooling with Electric Heat Rooftop Units
www.trane.comPackaged Cooling with Electric Heat Rooftop Units Voyager™ 12½ - 25 Tons - 60 Hz December 2003 RT-PRC002-EN
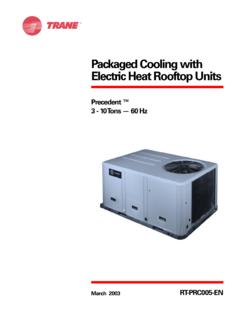
Packaged Cooling with Electric Heat Rooftop Units
www.trane.comPackaged Cooling with Electric Heat Rooftop Units Precedent ™ 3 - 10 Tons — 60 Hz March 2003 RT-PRC005-EN
Air Conditioners - Trane
www.trane.comThe XV20i shown is for illustration purposes only. Please note that features and components may vary by model. As part of our continuous product improvement, Trane reserves the right to change specifications and design without notice.
Split System Heat Pumps
www.trane.comSSP-PRC001-EN 5 Odyssey air handler versatility is fur-ther increased by a complete line of accessories designed to match and install smoothly:
Split System Cooling Units - Heating and Air …
www.trane.comSplit System Cooling Units TTA075A-TTA200B Air Handlers TWE050A-TWE200B 50 Hz Split System Cooling Units December 2000 SS-PRC003-EN

Trane Packaged Systems - Heating and Air …
www.trane.comFlexible enough to install where you need it. Tough enough to be a Trane. Trane packaged heating and cooling systems give you everything in one.
Related documents
CV17-CV25, CV620-CV730, CV740, CV750 Service Manual
www.kohlerengines.com24 690 07 Rev. B KohlerEngines.com 1 CV17-CV25, CV620-CV730, CV740, CV750 Service Manual 2 Safety 3 Maintenance 5 Specifi cations 15 …
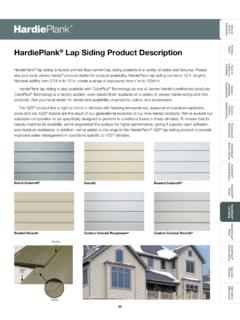
HardiePlank Lap Siding Product Description
www.jameshardiepros.comnailing, each course covers the fasteners on the course below, which provides a better looking installation. For blind nailing HardiePlank lap siding, James Hardie recommends driving fasteners 1 in. from the top edge of the plank. Additionally fasteners should be Although blind nailing is recommended by James Hardie, face nailing may

CH18, CH20, CH23, CH25, CH640, CH730, CH740 Service Manual
www.kohlerengines.comSpecifi cations 24 690 30 Rev. D KohlerEngines.com 7 TORQUE SPECIFICATIONS3,5 CH18/CH20/ CH640 CH23 CH25/ CH730/CH740 Crankcase Breather Cover Fastener 7.3 N·m (65 in. lb.)

SPECIFICATIONS AND STANDARD DRAWINGS
meridiancity.orgThis section covers duplex lift stations which have a single pumping capacity that meets one of the following criteria: ... All interior fasteners, anchors, and miscellaneous hardware shall be stainless steel. 7. Flow meter ... The aluminum cover must be equipped with a …

M-6004-462V 4.6L 2V Timing Kit INSTRUCTION SHEET
performanceparts.ford.comSTEP 1: Once the valve covers, damper, front cover, and impulse ring are removed rotate the crank to a 9 o’clock ... Torque all fasteners to 10 Nm. M-6004-462V 4.6L 2V Timing Kit INSTRUCTION SHEET NO PART OF THIS DOCUMENT MAY BE REPRODUCED WITHOUT PRIOR AGREEMENT AND WRITTEN PERMISSION OF

Wheel Accessory Products Catalog - Alcoa Wheels
www.alcoawheels.com000500 000500SP Cap Nut Cover Wrench for Ball Seat Hug-A-Lugs®, for 001551 000600 000600SP Cap Nut Cover Wrench for Hub Piloted Hug-A-Lugs®, for 001851 and 001881 Hub Cover System Hug-A-Lug® Nut Cover Wrenches Hug-A-Lug ® Nut Covers for 33mm Hex Two-Piece Flange Nuts(Hub Pilot Wheels) Part No. Description For Nut Heights

First Extended - Assurant
www.assurant.comharmonic balancer and retainer bolt, crankshaft pulley, valve covers, oil pan, engine oil cooler hoses, oil filter adapter/housing, engine oil sending unit, engine mounts, water pump, temperature sending unit, thermostat and housing, expansion (freeze) plugs, fuel supply pump, vacuum pump, dipstick and tube, and fasteners for these components
Operator Manual - Cummins Inc.
www.cummins.comIf the cover pins and rubber grommets do not line up, check that the edging on the top edge of the base tray lies flat and is pushed down all the way. If the cover feels loose, one of the rubber grommets probably pushed through. If so, remove the cover, insert the grommet back into its hole and try again. 6 983-0101 (Issue 6)
EVERGUARD TPO/PVC MECHANICALLY ATTACHED
www.gaf.com2.04 Fasteners 39 2.05 Adhesives, Sealants, Primers & Cleaners 39 2.06 Traffic Protection 39 2.07 Insulation 39 2.08 High Traffic Applications 40 2.09 Cover/Re-cover Boards 40 2.10 Base Sheets 41 2.11 Slip Sheet/Protection Layer 41 2.12 Other Accessories 41 Part 3: Execution 3.01 Site Conditions 41

MICROWAVE HOOD COMBINATION INSTALLATION …
www.whirlpool.com1.Remove screws attaching vent cover B, C and D to top of microwave exterior. Slide out vent covers B, C and D. Keep the vent cover C for step 2 use. 2.Place the vent cover C (removed from step 1) to area A, and rotate 180 degrees. 3. Attach the vent covers located in the upper polyfoam (see item J in "Parts Supplied" section). 4.