
Installation & Programming Manual
3 2. Remove cover and battery case. 3. Install Exterior Assembly. a. Remove cover from assembly by sliding cover up and off, see figure. 3 b. Remove the battery case from
Download Installation & Programming Manual

Information
Domain:
Source:
Link to this page:
Documents from same domain

GUIDE D’INSTALLATION - weiserlock.com
www.weiserlock.com1-1/2" 38 mm Test if latch bolt fully extends and retracts. Chisel out area inside hole as needed so latch can operate smoothly. Vérifier que le pêne demi-tour s…

SmartKey Instructions eng - Weiser
www.weiserlock.comTitle: SmartKey_Instructions_eng Created Date: 2/25/2010 11:12:03 AM

pb eng install - Weiser
www.weiserlock.comRemove access cover I from Power Board H. Feed power strip G through large square hole Line Power Board H up to the 3 small holes Install 4 new AA Alkalin

WS Powerbolt ENG
www.weiserlock.comENGLISH User Guide Installation instructions are located on the reverse side of this document. Weiser USA: 1-800-677-5625 Canada: 1-800-501-9471 www.weiserlock.com

GCD9471 - Weiser
www.weiserlock.comThe saying “What’s old is new again” certainly has relevance in today’s design trends, and at Weiser there is no exception. Weiser is proud to offer three additional

Touchpad Electronic Deadbolt Installation & …
www.weiserlock.comEnglish Français Español Touchpad Electronic Deadbolt Installation & Learning Instructions Electronics Division Owner’s Manual A Black & Decker Company

Instructions for Removing and Replacing Cylinder of Entry ...
www.weiserlock.comInstructions for Removing and Replacing Cylinder of Entry Knob. WARNING: This Manufacturer advises that no lock can provide complete security by itself. This lock may be defeated by forcible or technical means, or evaded by entry elsewhere on the property. No lock can substitute for caution, awareness of your environment, and common sense.

61021 / 01 GED1490 Parts in the Box 1 2 Check dimensions ...
www.weiserlock.comENGLISH A B C M S R (3x) J If needed, re-key the lock to work with your existing key. See the supplied SmartKey Re-key instructions for more information.

Programming and Troubleshooting Guide Mastercode 2 ...
www.weiserlock.comProgramming timeout: If no button is pressed for fi ve seconds, the system will time out (indicated by three beeps and a red fl ashing keypad), and you will need to restart the procedure. 1. Keep door open. Press and HOLD the Program button until the keypad fl ashes green (about 5 seconds). 2. Enter new Mastercode. 3. Press Lock button once. 4.

Installation & Programming Manual - Weiser Lock
www.weiserlock.comInstallation & Programming Manual Interior Assembly Interior Cover Exterior Assembly Adapter Bolt Mounting Plate Mounting Bolts Interior Assembly Exterior Assembly. 2-3/8" (60mm) or 2-3/4" (70mm) ... Keypad will now light red/green when buttons are pressed. CAUTION: Prevent unauthorized entry. This lock can be opened
Related documents

Digital HD Video Getting started Camera Recorder
als.lib.wi.us4-531-548-11(1)HDR-CX240/CX240E/PJ240/PJ240E/PJ270/PJ270E/PJ275 Getting started Recording/Playback Saving images Customizing your camcorder Others Digital HD Video

Getting Started - Fluke
assets.fluke.comFluke 192B - 196B/C - 199B/C Getting Started 2 Warning To avoid electrical shock or fire: • Use only the Fluke power supply, Model BC190 (Battery Charger / Power Adapter).

Users Manual - Fluke Corporation
assets.fluke.com789 Users Manual 2 To view, print, or download the latest manual supplement, visit http://us.fluke.com/usen/support/manuals. Safety Information

PowerChute Business Edition - APCGuard.com
www.apcguard.comContents i Getting Started Guide 1 PowerChute Business Edition Components 2 Installation Procedure 3 STEP 1: Install the PowerChute Business Edition Agent 3

CCPWM30A Installation Manual - HHO PLUS
www.hho-plus.comCCPWM30A – Installation Manual 2 HHO Plus, Alternative Energies, Lta – Travessa das Serras 33, Vieira de Leiria, Portugal – Tel. 00351244697116 – Email: info@hhhoplusgas.com

PICAXE Manual www.picaxe
www.picaxe.comPICAXE Manual www.picaxe.com revolution IMPORTANT! This PDF is designed to be used with the shortcut links (document outline) visible on the left

GETTING STARTED battery installation …
www.upm-marketing.comGETTING STARTED battery installation COUNTDOWN TIMER PROGRAM ON/OFF CD SET RANDOM RESET 1 4 2 1 1 2 2 remove the battery cover from the back of the timer place two button cell batteries
Getting Started Guide - Minelab
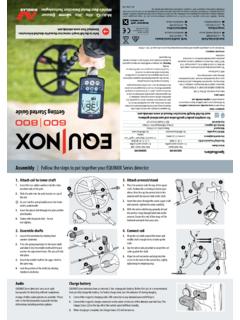
www.minelab.comFor complete product specification and operational guidance, read the full-length Instruction Manual at www.minelab.com. 2 2 3 3 4 1 3 1 4 1 2 3 1 2 Refer to the full-length Instruction Manual for detailed information.
Related search queries
Digital HD Video Getting started Camera Recorder, Getting Started, Digital HD Video, Battery, Manual, PowerChute Business Edition, Installation, CCPWM30A Installation Manual, CCPWM30A – Installation Manual, GETTING STARTED battery installation, Complete product specification and operational guidance