
Installation, Operation, Technical Service and Replacement ...
Jul 14, 2021 · KOLD DRAFT INTERNATIONAL 1525 East Lake Road Erie, PA 16511-1088 U.S.A. (800) 840-9577 FAX: (800) 548-9392 www.kold-draft.com July 14, 2021
Download Installation, Operation, Technical Service and Replacement ...

Information
Domain:
Source:
Link to this page:
Documents from same domain
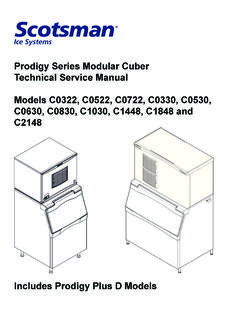
Prodigy Series Modular Cuber Technical Service …
www.scotsman-ice.comProdigy Series Modular Cuber Technical Service Manual Models C0322, C0522, C0722, C0330, C0530, C0630, C0830, C1030, C1448, C1848 and …

Sce275m - | Scotsman Ice Systems
www.scotsman-ice.comIntroduction To the owner or user: This service manual is intended to provide you, and the maintenance or service technician, with the information needed to

Use & Care Guide - Scotsman Ice
www.scotsman-ice.com4 It is recommended that a separate circuit, serving only your ice maker, be provided. Use a receptacle which cannot be turned off by a switch or pull chain.
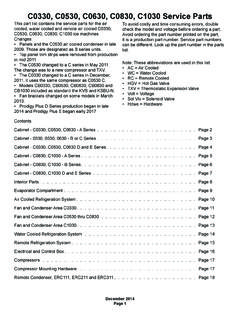
C0330, C0530, C0630, C0830, C1030 Service Parts
www.scotsman-ice.comC0330, C0530, C0630, C0830, C1030 Service Parts December 2014 Page 1 This part list contains the service parts for the air cooled, water cooled and remote air cooled C0330,
Bins, Condensers, and Accessories Service Parts
www.scotsman-ice.comHTB250/350 & BH250/350 & BH450 Bins, Condensers, and Accessories Service Parts February 2009 Page 3 17 Item Part Number Number Description 1 02-2806-01 Shoulder screw

DCE33 SERVICE PARTS - Scotsman Ice
www.scotsman-ice.comDCE33 SERVICE PARTS August 2014 Page 2 1, includes items 2,3,4,5,6, & 7 2 9 17 22 14 13 16 20 10 4 21 15 3, includes 5 8 11 7 19 7 6 18 5 8a 8b 23 Item Part Number Number Description
HID312, HID525 and HID540 Service Parts - Scotsman Ice
www.scotsman-ice.comHID312, HID525 and HID540 Service Parts April 2016 Page 3 HID525 Cabinet Item Part Number Number Description 1 A40213-002 Right side panel 2 02-4801-21 Chute holder

ICE MACHINE SERVICE HANDBOOK
www.scotsman-ice.comproduction from 1985 to 1994. Stainless steel cabinet in 1994.-6-Ice production 118 to 82 lb. per 24 hours Water use* 32 gallons per 24 hours BTUs per hour* 4,600 Refrigerant type R-12 Refrigerant charge 17 oz Refrigerant pressures, freeze 125 hi; 5 low just before harvest Average amps, freeze 8.3 Cube count 84 Water solenoid valve flow rate.48 ...

CU50 Service Manual - SCOTSMAN; ICE
www.scotsman-ice.comThis ice machine is the result of Scotsman’s decades of experience as an industry leader in the ... machine will cause water to back up into the ice storage bin and melt the ice. Gravity drain tubing must be vented, have no kinks and slope to the building drain. Air …

C1448, C1848, C2148 Service Parts - SCOTSMAN; ICE
www.scotsman-ice.com6 02-4067-04 Side panel support - AC 7 03-1645-01 Screw 8 A38741-001 AC bracket - A Series A39590-001 AC bracket - B and E Series 9 A38797-001 Back panel, AC only Air Cooled Fan Area 6 4a 1 2 4 3 9 5 7 8
Related documents

MPFI FUEL INJECTION SYSTEM - Holley
documents.holley.com3 1.0 INTRODUCTION Holley Performance Products has written this manual for the installation of the TERMINATOR X™ MPFI fuel injection system.This manual contains the information necessary for the installation of the hardware contained in this kit, which includes the ECU, wiring, and 3.5” touch

INSTALLATION INSTRUCTIONS 27 (68.6 CM) AND 30 (76.2 …
images.thdstatic.comINSTALLATION INSTRUCTIONS Prepare Built-In Oven 1. Decide on the final location for the oven. Avoid drilling or cutting into house wiring during installation. 2. To avoid floor damage, set the oven onto cardboard prior to installation. Do not use handle or any portion of the front frame for lifting. 3. Remove the shipping materials and tape ...

400W SERIES INSTALLATION MANUAL - Garmin
static.garmin.com400W Series Installation Manual Page i 190-00356-02 Rev. E This manual reflects the operation of main software version 3.10. Some differences in operation may be

Installation 5 Wiring. Section C: 4-Way
www.lutron.comallows a wall control without a grounding connection to be installed as a replacement, as ... For this type of installation, cap or remove the green ground wire on the timer and use an appropriate wallplate such as Claro ... For any procedure other than routine bulb replacement, power must be disconnected
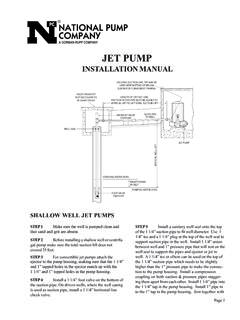
JET PUMP INSTALLATION
www.nationalpumpcompany.comConnect ground wire to ground terminal on pressure switch. STEP 8 Start pump! If pressure does not build after a reasonable time, stop the pump. Reprime and start again. Allow pump to operate briefly to purge air from the system. This procedure may have to be repeated until pump builds up pressure. STEP 9 Make connection on discharge of pump to ...

Aboveground Tank Application and Installation Guidelines
www.oregon.govconnection. For tanks with a top fill connection, spill containers shall be noncombustible and shall be fixed to the tank and equipped with a manual drain valve that drains into the primary tank. For tanks with a remote fill connection, a portable spill container shall be provided. Venting (normal and emergency)

Wire Harness Installation Instructions
www.painlessperformance.com6 pre-installation & routing 7 general installation 9 harness attachment 10 grounding 10 terminal installation & making connections 11 re-using-factory connectors 12 specific circuit connections 12 headlight section b engine section 16 midi fuse 16 ignition, start/run system 19 blower motor 19 neutal safety/reverse switch

OUTDOOR GAS GRILL INSTALLATION GUIDE
www.subzero-wolf.comInstallation must comply with all applicable electrical codes. The electrical outlet must be located within reach of the power cord. A separate circuit, servicing only this appliance is required. IMPORTANT NOTE: A ground fault circuit interrupter (GFCI) is required to reduce the risk of electrical shock. ELECTRICAL REQUIREMENTS