
Pavement Marking Handbook
and pavement marking installation a nd inspection (Chapter 3). Each chapter is designed to serve as a stand-alone document. The handbook provides TxDOT engineers and inspectors with informa-tion that will help them better select pavement marking materials and inspect the installation of markings.
Download Pavement Marking Handbook

Information
Domain:
Source:
Link to this page:
Documents from same domain

Roadway Design Manual (RDW) - Texas …
onlinemanuals.txdot.govManual Notice 2018-1 From: Camille Thomason, P.E Manual: Roadway Design Manual Effective Date: April 26, 2018 Purpose Roadway Design Manual updates to provide vertical clearance guida nce for roadways on the Texas

Geotechnical Manual (GEO) - Search
onlinemanuals.txdot.govManual Notice 2018-1 From: Gregg A. Freeby, P.E., Director, Bridge Division Manual: Geotechnical Manual Effective Date: March 01, 2018 Purpose This manual provides guidance to districts in geotechnical investigation and design for project
Traffic Data and Analysis Manual - Search
onlinemanuals.txdot.govTraffic Data and Analysis Manual 1-1 TxDOT 9/2001 Chapter 1 Traffic Estimation and Forecasting Contents: Section 1 — Overview.....1-4
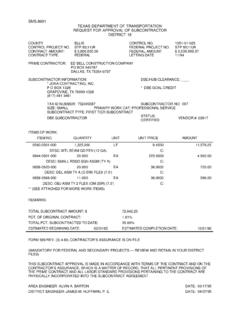
SMS.8901 TEXAS DEPARTMENT OF …
onlinemanuals.txdot.govsms.8901 texas department of transportation request for approval of subcontractor district 18 county ellis control no. 1051-01-025 control project no.

Bridge Design Manual - LRFD (LRF)
onlinemanuals.txdot.govManual Notice 2018-1 From: Gregg A. Freeby, P.E., Director, Bridge Division Manual: Bridge Design Manual - LRFD Effective Date: July 31, 2018 Purpose This manual documents policy on bri dge design in Texas. It assists Texas bridge designers in apply-

Procedures for Establishing Speed Zones Manual
onlinemanuals.txdot.govManual Notice 2015-1 From: Carol T. Rawson, P.E Manual: Procedures for Establishing Speed Zones Effective Date: August 01, 2015 Purpose The purpose of this revision is to update information in Chapter 3 of Procedures for Establishing
Maintenance Management Manual (MMT)
onlinemanuals.txdot.govManual Notice 2017-1 From: C. Michael Lee, P.E., Director, Maintenance Division Manual: Maintenance Management Manual Effective Date: July 01, 2017 Purpose The Maintenance Management Manual has been revised to include a link to the Occupational Safety Manual for more information about TxDOT’s hazardous material cleanup policy …
ROW Vol. 3 - Relocation Assistance
onlinemanuals.txdot.govManual Notice 2017-1 From: Gus Cannon, CTCM, Right of Way Division Director Manual: Right of Way Manual Vol. 3 - Relocation Assistance Effective Date: May 01, 2017 Purpose This revision is intended to update the manual to …
Construction Contract Administration Manual (CAH)
onlinemanuals.txdot.govManual Notice 2015-1 From: John F. Obr, P. E., Director, Construction Division Manual: Construction Contract Administration Manual (CCAM) Effective Date: August 28, 2015 Purpose This manual notice transmits revi sions to the manual and provides clarification a nd additional guid-

Concrete Repair Manual (CRM)
onlinemanuals.txdot.govManual Notice 2017-1 From: Gregg A. Freeby, P.E. / Director, Bridge Division Manual: Concrete Repair Manual Effective Date: January 01, 2017 Purpose This manual includes step-by-step repair procedures for use on new and existing concrete members cast
Related documents

Check for Proper Ring End Gap - Wiseco
www.wiseco.comRing Installation (See Illustration 1) 1. Check each ring in its corresponding piston groove to ensure proper axial and radial clearance. (See Illustration 2) 2. Oil ring expander: Place the oil ring expander into the oil groove with the butted tips of the expander 90° from …

INSTALLATION & OPERATING INSTRUCTIONS FOR US …
s3.supplyhouse.comBefore Beginning Installation Carefully read all instructions for the installation prior to installing product. Make sure each step or procedure is understood and any special considerations are taken into account before starting installation. Assemble all tools, hardware and supplies needed to complete the installation.

Agilent 7890B Gas Chromatograph
www.agilent.comGC/MS User Manuals & Tools DVD. If your site complies with all si te preparation specifications, the average installation time for the GC is about 2 hours. Allow more time for any additional products (for example, an ALS), add-ons, and software. About Agilent’s installation service The installation service does not include:

Installation Instructions - Painless Performance
www.painlessperformance.cominstallation manual from front to back before installing the PERFECT TORC system. Due to the variables in modifications done to transmissions and vehicles; reading this manual will give you considerable insight on the proper installation of this product. It is …

Wire Harness Installation Instructions - Painless Performance
www.painlessperformance.com5.2, GENERAL installation instructions in Section 6.0, and precise instructions concerning the electrical connections you will have to make in beginning in Section 7.0. To help you begin thinking through the installation of your wire harness, read the following sections:

Megaflo Eco Installation Manual - Heatrae Sadia
www.heatraesadia.commanuals provided with the appliance. ` Carry out installation in compliance with the prevailing legislation and standards. ` Perform the initial start up and carry out any checks necessary. ` Complete the commissioning checklist. ` Explain the installation to the user. ` If maintenance is necessary, warn the user of the

Ascertia Go Sign Desktop Installation Guide
www.ascertia.com5. Once the installation is successful then user will be shown following screen: Figure 4 - Windows OS Installer Wizard Summary 6. Click on the Finish button to close the installation wizard. 7. After successful installation, you can view the ADSS Go>Sign Desktop application Icon in Windows System Tray: Figure 5 - Windows System Tray