
PowerFlex 40 Adjustable Frequency AC Drive
time to discharge after removal of mains supply. Before working on drive, ensure isolation of mains supply from line inputs [R, S, T (L1, ... national and international codes, standards, regulations or industry guidelines.! ... 200% hardware limit, 300% instantaneous fault Over Voltage: 100-120V AC Input ...
Download PowerFlex 40 Adjustable Frequency AC Drive

Information
Domain:
Source:
Link to this page:
Documents from same domain

Studio 5000 Logix Designer Level 2: Basic Ladder …
literature.rockwellautomation.comControlLogix/Studio 5000 Studio 5000 Logix Designer Level 2: Basic Ladder Logic Programming Course Description Photo, screen capture or image Course Number
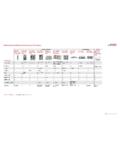
Stratix Industrial Networks Infrastructure At-a-Glance
literature.rockwellautomation.comStratix Industrial Networks Infrastructure At-A-Glance Switching and Routing Security Appliance Wireless 1783-NATR Network Address Translation Router

PowerFlex 40 Configured AC Drives Installation …
literature.rockwellautomation.comImportant User Information Read this document and the documents listed in the additional resources section about installation, configuration, and

PRODUCT SECURITY VULNERABILITIES - Literature …
literature.rockwellautomation.com1 PRODUCT SECURITY VULNERABILITIES Frequently Asked Questions Vulnerabilities WHAT IS A VULNERABILITY? A vulnerability is a flaw or weakness in a product or system that can be exploited to compromise the product or
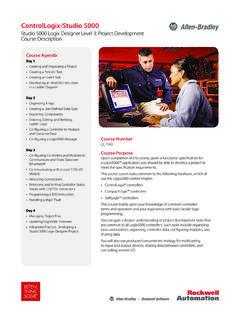
Studio 5000 Logix Designer Level 3: Project …
literature.rockwellautomation.comControlLogix/Studio 5000 Studio 5000 Logix Designer Level 3: Project Development Course Description Course Number CCP143 Course Purpose Upon completion of this course, given a functional specification for
1395 Digital DC Drive - Rockwell Automation
literature.rockwellautomation.comChapter 1 Understanding the Basic Principles General This guide is intended to help you define troubleshooting techniques and procedures and help simplify servicing of the Bulletin 1395 DC Drive by identifying likely causes for malfunction.
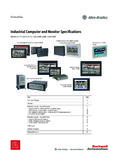
Industrial Computer and Monitor Specifications …
literature.rockwellautomation.com2 Rockwell Automation Publication IC-TD001I-EN-P - December 2017 Industrial Computer and Monitor Specifications Summary of Changes This publication contains new and updated information as indicated in the following table.
MicroLogix 1100 Programmable Controllers - …
literature.rockwellautomation.comMicroLogix 1100 Programmable Controllers Bulletin 1763 Controllers and 1762 Expansion I/O User Manual
MICROLOGIX PROGRAMMABLE CONTROLLERS - …
literature.rockwellautomation.comMICROLOGIX PROGRAMMABLE CONTROLLERS SELECTION GUIDE BULLETIN 1761 - MicroLogix 1000 BULLETIN 1763 - MicroLogix 1100 BULLETIN 1762 - MicroLogix …
5069 Compact I/O Modules with EtherNet/IP …
literature.rockwellautomation.com[PROJECT NUMBER] [PROJECT NAME] [DATE] [PROJECT LOCATION] I/O Modules with EtherNet/IP Architecture Rockwell Automation 5069-SR002A-EN-P 5 1.08 …
Related documents

HP ProBook User Guide
h10032.www1.hp.comTo see a list of hardware installed in the computer, follow these steps: 1. Select Start > My Computer. 2. In the left pane of the System Tasks window, click View system information. 3. Select Hardware tab > Device Manager. You can also add hardware or modify device configurations using Device Manager. Top components TouchPad Identifying hardware 1

Residential Construction Standards - South Carolina
www.llr.sc.govCodes; or, B. The 1997 edition of the Standard Building. C. Mechanical, Plumbing and Gas Codes, the 1996 edition of the National Electrical Code and the CABO Model Energy Code. 2. If the house was constructed after July 1, 2002; A. The edition of the International Residential Code adopted and in effect at the time construction was started.

CSI MASTER FORMAT 2012 SAMPLE COST CODES
www.quantity-takeoff.com21. The most detailed codes are suggested in Divisions 01, 03, 06, where traditional GC's are likely to self‐perform work. ... 36 01‐5523 Snow Removal ... 232 08‐7000 Hardware ...

Wallplates and accessories | Designer Claro /Satin Colors
www.lutron.comand have no visible hardware; the front plate securely snaps into the alignment adapter plate • Full line of wiring devices in designer style opening • Blank inserts available for Gloss colors (DV-BI-) and Satin colors (SC-BI-) • Customize your designer wallplate with engraving, contact customer service to get started at 1.888.LUTRON1

New Jersey Business Codes - Government of New Jersey
www.nj.gov2765 Snow Removal 2716 Social Club (Dating, etc.) 2605 Sporting Goods & Related Merchandise 2906 Steam 2770 Surveying 2902 Telegraph 2901 Telephone 2624 Telephones, Telecommunications Equipment 2203 Tires 2211 Towing 2632 Toys & Games 2703 Trailer Parks & Camps 2210 Trailers 2214 Transmissions 2734 Transportation (Limousines, Chauffeurs, …

Dell OptiPlex 9010 All-In-One (Touch) Owner's Manual
downloads.dell.com• A component can be replaced or--if purchased separately--installed by performing the removal procedure in reverse order. WARNING: Before working inside your computer, read the safety information that shipped with your computer.

OptiPlex 7050 Micro Owner's Manual - Dell
dl.dell.comA component can be replaced or, if purchased separately, installed by performing the removal procedure in reverse order. About this task NOTE: Disconnect all power sources before opening the computer cover or panels. After you finish working inside the computer, replace all covers, panels, and screws before connecting to the power source.