
User Guide - Whirlpool
3 Electrical Requirements Observe all governing codes and ordinances. Required: A 120 volt, 60 Hz, AC only, 15- or 20-amp electrical supply with a fuse or circuit breaker. Recommended: A time-delay fuse or time-delay circuit breaker. A separate circuit serving only this microwave oven. Settings Clock The Clock is a 12-hour (12:00-11:59) clock, with A.M. and P.M. Touch
Download User Guide - Whirlpool

Information
Domain:
Source:
Link to this page:
Documents from same domain
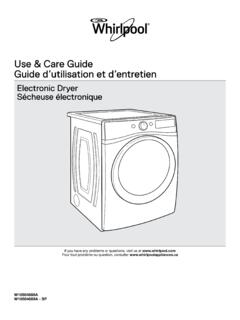
Use & Care Guide - Whirlpool
www.whirlpool.comUse the Automatic Cycles to provide the most energy savings and enhanced fabric care from the dryer. During Automatic Cycles, drying air temperature and moisture level are sensed in the load.

INSTALLATION INSTRUCTIONS AND OWNER’S …
www.whirlpool.comINSTALLATION INSTRUCTIONS AND OWNER’S MANUAL Top Mount Refrigerator Do Not Throw Away — Additional important safety information included. Para las instrucciones en español, visite nuestro sitio de internet.

MICROWAVE HOOD COMBINATION …
www.whirlpool.comMICROWAVE HOOD COMBINATION INSTALLATION INSTRUCTIONS MICROWAVE HOOD COMBINATION SAFETY This product is suitable for use above electric or gas cooking products up to 36" (91.4 cm) wide.

Use & Care Guide - Whirlpool
www.whirlpool.comW10607424B W10607425B - SP If you have any problems or questions, visit us at www.whirlpool.com Pour tout problème ou toute question, consulter www.whirlpool.ca Use & Care Guide

Use & Care Guide - Whirlpool
www.whirlpool.comW10680139D W10680140D - SP If you have any problems or questions, visit us at www.whirlpool.com Pour tout problème ou question, consulter www.whirlpoolappliances.ca Use & Care Guide Guide d’utilisation et d’entretien
DISHWASHER USER INSTRUCTIONS - Whirlpool
www.whirlpool.comTHANK YOU for purchasing this high-quality product. If you should experience a problem not covered in TROUBLESHOOTING, please visit our website at www.whirlpool.com for additional information. If you still need assistance, call us at 1-800-253-1301.
WHIRLPOOL CORPORATION MAJOR APPLIANCE LIMITED …
www.whirlpool.com2/14 WHIRLPOOL CORPORATION MAJOR APPLIANCE LIMITED WARRANTY ATTACH YOUR RECEIPT HERE. PROOF OF PURCHASE IS REQUIRED TO OBTAIN WARRANTY SERVICE. Please have the following information available when you call the
ELECTRIC RANGE USER INSTRUCTIONS - Whirlpool
www.whirlpool.comTHANK YOU for purchasing this high-quality product. If you should experience a problem not covered in TROUBLESHOOTING, please visit our website at www.whirlpool.com for additional information. If you still need assist ance, call us at 1-800-253-1301.

REFRIGERATOR USER INSTRUCTIONS - Whirlpool
www.whirlpool.comYour safety and the safety of others are very important. We have provided many important safety messages in this manual and on your appliance. Always read and obey all safety messages. This is the safety alert symbol. This symbol alerts you to potential hazards that can kill or hurt you and others.

ELECTRIC DRYER OWNER’S MANUAL GUIDE D’UTILISATION …
www.whirlpool.comELECTRIC DRYER OWNER’S MANUAL GUIDE D’UTILISATION DE LA SÉCHEUSE ÉLECTRIQUE Table of Contents Dryer Safety.2 Dryer Safety.2 Dryer Maintenance and Care.5 Cleaning the Dryer Location.5 Cleaning the Dryer Interior.5 Removing Accumulated Lint.5 Cleaning the Lint Screen.5 Changing the Drum Light (on some models).6 Check Your Vent …
Related documents

S7-400 - Hardware and Installation - Siemens
cache.industry.siemens.com7.7 Replacing the Fuse of the Fan Subassembly 7-13..... 7.8 Replacing Fans in the Fan Subassembly During Operation 7-14..... 7.9 Replacing the Filter Frame of the Fan Subassembly During Operation 7-16.. 7.10 Replacing the Power Supply PCB and Monitoring PCB of the Fan Subassembly 7-18.....

Hall Effect Experiment Manual
d2n0lz049icia2.cloudfront.net2. Open the fuse cover and remove the fuse. 3. Replace the fuse(s). Use the same type fuses. 4. Reconnect the power cord and turn on the instrument. 5. If the problem persists, contact PASCO for service. Note: Replace the burned fuses with new fuses of the same type, or buy them from the manufacturer .
Operation ManualComputerized Sewing Machine - Brother
download.brother.comIn the event of replacing the plug fuse, use a fuse approved by ASTA to BS 1362, i.e. carrying the mark, rating as marked on plug. Always replace the fuse cover, never use plugs with the fuse cover omitted. WARNING DO NOT CONNECT EITHER WIRE TO THE EARTH TERMINAL WHICH IS MARKED WITH THE
Operation Manual - Brother
download.brother.com• In the event of replacing the plug fuse, use a fuse approved by ASTA to BS 1362, i.e. carrying the mark, rating as marked on plug. • Always replace the fuse cover. Never use plugs with the fuse cover omitted. • If the available electrical outlet is not suitable for the plug supplied with this equipment, you

Distribution System Protection - University of Western Ontario
www.eng.uwo.cacurrent before a series fuse (i.e. the nearest source‐side fuse) is blown, which would cause the transient fault to become permanent. Permanent faults are those which require repairs by repair crew in terms of:

T12 Operator Manual - Tennant Co
www.tennantco.comSAFETY PRECAUTIONS 4 T12 9009910 (11−2019) 3. When using machine: −Use only as described in this manual. −Use brakes to stop machine. −Go slowly on inclines and slippery surfaces. −Do not scrub on ramp inclines that exceed 7% (4 ) grade or transport (GVWR) on ramp inclines that exceed 14% (8 ) grade.

GreenSmart™ 1 and GreenSmartTM2 - Travis Dealer
www.travisdealer.com2 Press down on the on/off button and mode button while replacing the battery. Make sure to keep the on/off button depressed during the following steps. HINT: The easiest way to do this step is to place the top battery in the holder, slightly ajar. Then hold the the buttons down as you press the battery into place.