Transcription of DN2042-1208 CONFIGURING ENTRAPASS FOR …
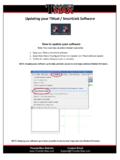
1 * 8641 S Warhawk Rd * Conifer, CO 80433 Tel: 303 670 1099 * Fax: 303 679 8949 * DN2042-1208 CONFIGURING ENTRAPASS FOR THE MOBILE APPLICATION The purpose of this application note is to describe the steps required to configure the ENTRAPASS software in order to use the mobile application. Requirements: ENTRAPASS Global or Corporate Edition, version or later The mobile application (Apple App Store or Google Play Store) Kantech Smart Service and SmartLink running Opened 8801 port (TCP) Note: SmartLink and WebStation applications must have been previously registered in ENTRAPASS for the SmartLink WebStation tab to be available. Please refer to the ENTRAPASS Reference Manual for more information. Steps to Set Up Your Mobile Application: 1. Login to the Server Workstation. 2. Select Devices | Application. 3. From the Application drop-down list, select SmartLink. 4. Click the SmartLink WebStation tab. 5. Ensure that the Use Web Service checkbox is checked.
2 * 8641 S Warhawk Rd * Conifer, CO 80433 Tel: 303 670 1099 * Fax: 303 679 8949 * How To Configure a Port with an SSL Certificate: If you are running Windows Server 2003 or Windows XP, use the tool (this tool is installed with Windows Server 2003). For more information, see Httpcfg Overview. The Windows Support Tools documentation explains the syntax for the tool. Requirements: Opened 8801 port A valid SSL certificate on IIS Administrator privileges for the server Note: Modifying certificates stored on the computer requires administrative privileges. Getting a Certificate Thumbprint Viewing certificates in the MMC snap-in : 1. Open a Command Prompt window. 2. Type mmc and press the ENTER key. Note that you must be in the Administrator role to view certificates in the local machine store. 3. On the File menu, click Add/Remove Snap In. 4. Click Add. 5. In the Add Standalone Snap-in dialog box, select Certificates. 6. Click Add. 7.
3 In the Certificates snap-in dialog box, select Computer account and click Next. Optionally, you can select My User account or Service account. If you are not the * 8641 S Warhawk Rd * Conifer, CO 80433 Tel: 303 670 1099 * Fax: 303 679 8949 * administrator of the computer, you can manage certificates only for your user account. 8. In the Select Computer dialog box, click Finish. 9. In the Add Standalone Snap-in dialog box, click Close. 10. In the Add/Remove Snap-in dialog box, click OK. 11. In the Console Root window, click Certificates (Local Computer) to view the certificate stores for the computer. 12. Optional: To view certificates for your account, repeat steps 3 to 6. At step 7, instead of selecting Computer account, click My User account and repeat steps 8 to 10. 13. Optional: On the File menu, click Save or Save As. Save the console file for later use. Retrieving a certificate s thumbprint: 1. Open the Microsoft Management Console (MMC) snap-in for certificates (see How to: View Certificates with the MMC Snap-in ).
4 2. In the Console Root window's left pane, click Certificates (Local Computer). 3. Click the Personal folder to expand it. 4. Click the Certificates folder to expand it. 5. In the list of certificates, note the Intended Purposes heading. Find a certificate that lists Client Authentication as an intended purpose. 6. Double-click the certificate. 7. In the Certificate dialog box, click the Details tab. 8. Scroll through the list of fields and click Thumbprint. 9. Copy the thumbprint of the certificate into a text editor, such as Notepad. 10. Remove all spaces between the hexadecimal characters. One way to accomplish this is to use the text editor's find-and-replace feature and replace each space with a null character. 11. In Windows Server 2003 or Windows XP, follow the procedure required using the tool to support clients that authenticate with certificates at the transport layer, as shown in the following example: * 8641 S Warhawk Rd * Conifer, CO 80433 Tel: 303 670 1099 * Fax: 303 679 8949 * 1.
5 Click the Start button. 2. Click on Run. 3. Type CMD and then OK. (httpcfg set ssl -i :8801 -h 0000000000003ed9cd0c315bbb6dc1c08da5e6 -f 2) Note: To view httpcfg settings, type the following command: httpcfg query ssl. In Windows 7 Server 2008, follow the preceding procedure to support clients that authenticate with certificates at the transport layer, but with an additional parameter, as shown in the following example: 1. Click the Start button. 2. Click on Run. 3. Type CMD and then OK. (netsh http add sslcert ipport= :8801 certhash=0000000000003ed9cd0c315bbb6dc1c 08da5e6 appid={BEC17D90-C568- 4670-8F09-57C496631605} clientcertnegotiation=enable) Note: To view httpcfg settings, type the following command: netsh http show sslcert Information furnished by Kantech is believed to be accurate and reliable. However, no responsibility is assumed by Kantech for its use, nor any infringements of other rights of third parties which may result from its use.
6 No license is granted by implications or otherwise under any patent rights of Kantech.