Transcription of VENEPUNCTURE - NHS student programme Lancashi
1 VENEPUNCTUREE ileen Whitehead 2010 East Lancashire HC NHS Trust1 VENEPUNCTURE Definition The term VENEPUNCTURE describes the procedure of inserting a needle into a vein, usually for the purpose of withdrawing blood for haematological, biochemical or bacteriological analysis2 VENEPUNCTURE It is one of the most commonly performed procedures which, carried out skilfully, carefully and accurately, will provide high quality blood samples without causing discomfort to the patient To perfect the technique of VENEPUNCTURE , you should have a good understanding of the arteries, veins and associated nerves within the arm 3 VENEPUNCTURE The superficial veins of the arm are usually chosen for VENEPUNCTURE , namely basilic, cephalic and median cubital veins in the antecubital fossa These veins are recommended as they as they are well supported by muscle and connective tissue, visible and easy to palpate4 VENEPUNCTURE5 The walls (outer structure) of veins consist of three layers of tissues that are thinner and less elastic than the corresponding layers of arteries Veins include valves that aid the return of blood to the heart by preventing blood from flowing in the reverse directionVENEPUNCTUREVENEPUNCTURE There are two stages to locating a 7 VENEPUNCTURE Visual Inspection The scrutiny of the veins in both arms is essential prior to choosing a vein Veins to avoid.
2 Veins close to an infection Veins close to bruising and phlebitis Oedematous limbs as there is danger of stasis of lymph, predisposing to such complications as phlebitis and cellulites8 VENEPUNCTURE Areas of previous VENEPUNCTURE should be avoided as a build up of scar tissue can cause difficulty in accessing the vein and can result in pain Avoid veins that are thrombosed Do not use the affected arm in CVA or mastectomy patients A vein sited in the region of a drip site should neverbe used as it may result in the collection of a diluted samples9 VENEPUNCTURE Palpation is also an important assessment technique as it: determines the location and condition of the veins distinguishes veins from arteries and tendons identifies the presence of valves 10 VENEPUNCTURE Healthy veins feel soft and bouncy and will refill when depressed11 VENEPUNCTURE Improving venous access There are a number of methods to improve venous access, for of a Tourniquet -Promotes venous distension The tourniquet should be tight enough to impede venous return but not restrict arterial flow The tourniquet should be placed about 7 8 cm above the VENEPUNCTURE site13 VENEPUNCTURE The tourniquet should not be left on for longer than 1 minute as it may result in haemo-concentration or pooling of the blood , leading to inaccurate blood results 14 VENEPUNCTURE2.
3 Opening and closing of the fist The muscles will force blood into the veins and encourages distension. However this action may affect certain blood results, potassium3. Light tapping of the vein May be useful but can be painful and may result in the formation of a haematoma in patients with fragile veins 15 VENEPUNCTURE4. The use of heat In the form of warm pack to encourage venodilatation and venous filling5. Lowering the arm below the level of the heart16 VENEPUNCTURE Skin preparation Asepsis is vital when performing VENEPUNCTURE as the skin is breached and a foreign device is introduced into a sterile circulatory system Skin cleaning is a controversial subject and it is acknowledged that a cursory wipe with an alcohol swab does more harm than good as it disturbs the skin flora17 VENEPUNCTURE However.
4 Where time permits and alwaysfor blood culture sampling or if the patient is at increased risk of infection the skin should be cleaned with an alcohol swab BUT you must allow at least 2 minutes for the area to dry thoroughly before proceeding with venepuncture18 VENEPUNCTURE19 VENEPUNCTURE Hand hygiene Is the single most important activity for reducing the spread of disease, yet evidence suggests that many health care professionals do not decontaminate their hands as often as they need to, or use the correct technique which means that areas of the hands can be missed20 VENEPUNCTUREEFFECTIVE HANDWASHING TECHNIQUEWet hands, apply liquid soap and wash as follows:(please note, with practice this procedure only takes 10 -15 seconds)1. Rub palm to palm2. Rub backs of both hands3.
5 Rub palm to palm with fingers interlaced4. Rub backs of fingers (interlocked)5. Rub all parts ofboth hands6. Rub both palms with finger tipsRinse hands under running water and dry thoroughly, preferably using paper towelsBased on procedure described et al. J Clin. Path. 1978;31:923 Produced by Community Infection Control Team, Hambleton and Richmondshire PCT, Station Road Business Park, ThirskYO7 1PZ Tel 01845 573819(Based on procedure described by Ayliffe et al. Path. 1978; 31: 923)21 VENEPUNCTURE Improper drying can recontaminate hands that have been washed. Wet surfaces transfer organisms more effectively than dry ones and inadequately dried hands are prone to skin damage. Disposable paper hand towels of good quality should be used to ensure hands are dried thoroughly22 VENEPUNCTURE Safety of the practitioner It is recommended that well-fitting gloves are worn during any procedure that involves handling of blood and body fluids, particularly with VENEPUNCTURE .
6 This is to prevent contamination of the practitioner from potential blood spills 23 VENEPUNCTURE Whilst it is recognised that gloves will not prevent a needle stick injury, the wiping effect of the glove on a needle may reduce the volume of blood to which the hand is exposed, thereby reducing the volume inoculated and the risk of infection 24 VENEPUNCTURE Used needles should always be discarded directly into an appropriate sharps container, without being re sheathed Specimens from patients with known suspected infections such as hepatitis or HIV should be double bagged in clear polythene bags with a biohazard label attached25 VENEPUNCTURE The accompanying request forms should be kept separate from the specimen to avoid contamination (two pockets in bag)26 VENEPUNCTUREC omplications Inability to obtain specimen due to: Inappropriate choice of vein Thrombosed vein (due to previous or repeated attempts) Inexperience of operator Patient shocked, cold or dehydrated causing vasoconstriction27 VENEPUNCTURE Formation of haematoma due to: Poor technique Pressure not being applied to puncture site following removal of needle Puncture of an artery If an artery is punctured: release the tourniquet, remove the needle and apply firm pressure for a minimum 5 minutes.
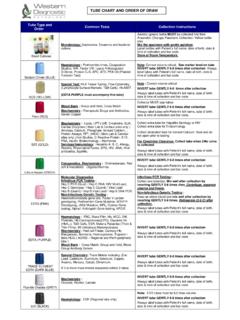
7 Cover the site with a dressing once bleeding has stopped. Re-check for signs of bleeding in 20 PracticeVENEPUNCTURE Approach and Communication Introduce yourself & check patient s ID Explain what you would like to do & why. Gain consent for the procedure and check for allergies, shunts, etc. Review the treatment plan & individuals past history as necessary Talk the patient through it in a considerate and courteous manner30 VENEPUNCTURE Sterility Wash hands Clean and prepare procedure tray according to ANTT guidelines Collect equipment into the tray taking care not to contaminate key parts31 VENEPUNCTURE Equipment Skin cleansing wipes Tourniquet Gloves Gauze swabs Adhesive dressing Needles blood collection tube(s) Sharps container32 VENEPUNCTURE Assemble the vacutainer & needle (or other system) as per manufacturer s instructions Prepare gauze swab etc for easof use during procedure33 VENEPUNCTURE Preparation: The patient should sit in a suitable chair or be lying down.
8 Support arm on pillow or in other suitable manner & position the patient s arm as needed34 VENEPUNCTURE Check for any contra-indications infection or trauma Select suitable vein Clean site for 30 seconds (DO NOT TOUCH AGAIN) Leave to dry Release Tourniquet 35 VENEPUNCTURE Procedure Put on gloves and reapply tourniquet With your non-dominant hand; grasp the patient s arm firmly using your thumb to draw the skin taut and anchor the vein beneath proposed puncture site Insert the needle at approx 30 angle with bevel up. Aim to insert the needle swiftly through the skin and into the lumen of the vein, avoiding trauma and excessive Connect each specimen tube in turn, in order of draw, onto the assembly ( blood culture, no additive, gel, liquid) As each tube is filled, remove it from the vacutainer assembly by gentle rotation and traction, whilst supporting the vacutainer assembly in the vein Invert each tube as required Continue until all tubes have been used 38 VENEPUNCTURE When the final tube is drawn, release the tourniquet, remove the tube from the needle and then remove the needle from the vein using a swift backward motion Dispose of any sharps, connector or other assembly promptly into a sharps container Apply gauze and ask patient to apply firm pressure for 2 minutes if required Apply sterile plaster to puncture site if required 39 VENEPUNCTURE Completion and organisation Clear up.
9 Dispose of rubbish and clean tray Remove gloves and wash hands Label the tubes correctly at the bedside (Tell examiner) Ensures that the samples are sent to the lab Thank the patient and ensure they are well Document in the patients notes40 VENEPUNCTUREAny QuestionsLets Practice 41