Transcription of HEAT PRESS MANUAL - uscutter.com
1 heat PRESS MANUALT able of ContentsNEED HELP WITH YOUR NEW heat PRESS ?For Sales & Support: (425)481-3555 6:15am-4:45pm PST Monday - FridaySubmit a Service Ticket at: transfer vinyl, transfer paper, teflon sheets, vinyl removal solution, spare parts, and more available at documentation is copyright 2016 USCutter. No duplication, republishing or reposting of this material in whole or in part is authorized without express written consent.
2 Product design, logos, brand names for various media, and product photos are owned by the and Support you of your heat to operate your heat to PRESS heat Transfer Vinyl (HTV).Settings & you for purchasing this heat PRESS from USCutter. The following are important things you need to know before you begin: Intended usage of this heat PRESS : This heat PRESS is designed to PRESS heat transfer vinyl (HTV), sublimation and transfer papers onto soft garments. Do not attempt to set the temperature on this device at higher than 480 degrees Fahrenheit as it will burn out the heating element. Also avoid use of this heat PRESS for other activities such as food preparation or extraction of oils from plant materials and other alternative uses.
3 Use of this heat PRESS in a manner other than intended will void the warranty, will damage the machine, and may constitute a fire hazard. Preserve the shipping carton: Please do not discard or disassemble the carton this heat PRESS came in. It was designed to hold the weight of this machine during shipping. Should you need to return the equipment due to warranty or repair, you will need it. Do not attempt to ship this equipment in a different container. Follow manufacturer instructions on materials you PRESS : Always use recommended settings from the manufacturer for any material used in this PRESS . Those instructions are usually always available on-line from the material maker.
4 Instructions on the most common and recommended materials are enclosed within this documentation. Test before you PRESS : We encourage you to always do a test of your fabric and HTV or transfer paper together using a small sample of the materials before you do volume production. If possible your test should include actually washing and drying a pressed garment to assure that the media has properly adhered to the garment using the heat and pressure setting you have selected. Use extreme care during operation: Please also be careful as you operate the heat PRESS . During operation the platens will get hot enough to do serious injury to you should you touch them, and surrounding metal parts will also reach high temperatures.
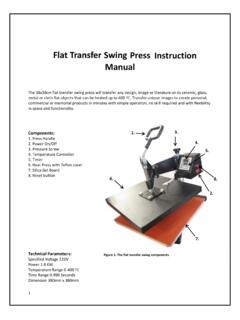
5 Please educate children and others around this equipment that it is not a toy and can cause severe burns and/or injury if the unit is closed onto fingers or other body parts. Electrical Source: This heat PRESS is designed for the North American market and is designed to plug into a standard household 3 prong outlet. (110-120V/60Hz.) Do not attempt to use this PRESS with a two prong electrical cord or otherwise use it without proper of Your heat Press1. Pressure Adjustment Knob2. Digital Time/Temperature Control3. Open/Close Control Arm4. Top Platen5. Bottom Platen6. On/Off switch7. Fuse8. Power cordThe Pressure Adjustment Knob controls the amount of force that will be used to push the transferred image into the fibers of the garment.
6 Clockwise increases pressure. Counter clockwise decreases Time/Temperature Control Panel on the left upper face of the casing is where you will set heat and time requirements of your project. These will vary depending on the vinyl or transfer paper Control Arm opens & closes the top & bottom Heated Platens of the clamshell fuse housing is accessible with a standard phillips head screw driver. This is a standard household fuse available from any hardware Power switch must be set to the on position and the Cord must be plugged in before to calibrate your new heat PRESS :Instructions from manufacturers of heat transfer vinyls and transfer papers will instruct you to use Low, Medium or High Pressure during the application process.
7 Here s how to calibrate your machine and identify those settings. (Do this while the platens are cold.) 1. Turn the pressure knob counterclockwise a few times to lower pressure on the Place a piece of paper onto bottom of the platen3. Close the clamshell PRESS using the Pull on the If the paper moves at all, turn the knob clockwise and try Try again and repeat until the paper doesn t move at all. This is your Medium the Medium setting, High pressure will be clockwise one to two turns. Low pressure will be counterclockwise one to two turns. (The number of turns will depend the thickness of the that using Medium and High pressure will make it just a bit difficult to close the heat PRESS .)
8 During the pressing process, the goal is to PRESS the heated material into the fibers of the to Calibrate the temperature of your new heat PRESS :On a new heat PRESS , it is not unusual for the temperature settings to be off by 18 to 20 degrees. To fix this, follow these simple steps: 1. Set the heat PRESS temperature settings to 380F on the control panel. (See info on this below)2. When the PRESS heats to about 100F, PRESS the down arrow on the control panel for 5 heat PRESS will go into Calibration Mode. It may take as long as 20 minutes to finish this process. Do not turn off or unplug the PRESS during this time. To ensure total accuracy, you might also want to test the heat PRESS using an Infrared Thermometer Gun.
9 (available at most hardware stores.)Setting the Time and Temperature on your new heat PRESS : 1. Using the control panel screen, PRESS the Set button then the up or down arrow to the desired PRESS the Set button again and set the timer using the up and down PRESS the Set button and arrows again to choose Fahrenheit or PRESS the Set button again to confirm these PRESS the Set button and use arrows one more time to set an alarm that will notify you in advance when it is time to open the Using Sure Cuts A Lot, this option will appear on your Cut Setting menu as a click box With Vinyl Master, when you send your design to the cutter, you will find the selection for the Mirror option in the Send to be Cut window.
10 How to PRESS heat transfer Vinyl (HTV):1. Use a vinyl cutter to cut your heat transfer vinyl material. Remember that unless otherwise instructed by the manufacurer, you will want to MIRROR the design so that when it cuts, it appears backwards2. Use a pair of scisors or cutting tool to trim around the image to make it a manageable Weed your design, removing the excess material. Remember to remove any material inside the cavity such as the inside of the letters O and A. (Tip: If you heat up the material using the bottom platen or your unclosed heat PRESS for 2 to 3 seconds, it will be a lot easier to weed most materials.)4. Find the appropriate heating instructions for the material you are using either online or in the chart in this MANUAL , and set your heat PRESS time and temperature using manufacturer recommended settings.