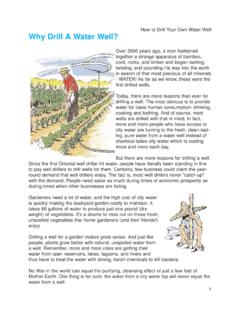
Transcription of How to make rock thin sections, without much equipment
1 How to make rock thin sections, without much equipment ! What you need: petrographic glass slides and cover slips. Epoxy. small diamond saw (a tile saw will do fine). lap for grinding -- a 10 to 12" square of plate glass will work if you don't have a wheel lap. coarse, medium, and fine carbide grit powders, about 400, 800, and 1200 if you can get them. cover slip mounting media, or epoxy can be used. nice to have: a small warming plate -- I use a little hot plate made for keeping my coffee mug wam. a steady hand and abundant patience! sells slides, cover slips, epoxy, and some other supplies, but regular store-bought epoxy works almost as well. Petrographic slides are only about 1" by 1 7/8" in size, or much shorter than biological slides. This makes them easier to handle. On the other hand, petrographic cover slips cover most of the slide, not just a puny little central section .
2 I used to frost the sample side of the glass to assist adhesion, but in fact epoxy sticks well to polished glass (older types of mounting media were not so strong). You can get grinding grits from various faceting and jewelry supply companies. Begin by breaking your rock sample into a size small enough to cut on your diamond saw. Then, holding it tightly (use a sliding brace if you have it), cut the rock into a rectangular block with dimensions smaller than a slide. If you are just learning, make it quite a lot smaller. You actually only need one flat surface of that size, which you will be cementing onto the glass. Put a little coarse grit and water onto the lap, making a slurry in the middle of the plate, and grind the flat sample side on it to make it very flat and smooth. Use a figure-8 pattern and cover all of the lap to prevent the lap surface from eroding into a dish shape, which would ruin it.
3 When the rock surface looks as smooth as it will get, clean the lap and grind it again with the medium grit. After that, clean it and grind again with the fine grit, to make a very smooth and flat rock sample surface. Wash the sample clean and set it on the hot plate for a while -- it needs to become perfectly dry. After the sample is dry, mix a little epoxy, and put a slide on the warming plate (set for pretty warm, but not too hot to touch). Put a large drop of mixed epoxy on the center of the slide, and watch to see that the bubbles come out of it as it warms (it needs to become perfectly clear). Carefully set the smooth side of the rock sample onto it. You want the epoxy to spread evenly across the slide under the sample, so press it very gently. Not too hard or too much epoxy will ooze out and air will come back from the sides into the cement, not good. Set the sample aside so the epoxy will cure -- or if you are in a hurry you can cure it quickly on the warm plate (not too hot, or bubbles will form).
4 With a sharp blade, carefully clean off any hardened epoxy residue from the glass. Next you need to cut off as much of the rock sample from the slide as possible. It will be tricky to hold, so you might use a block of hardwood that is cut with a shallow recess to hold the glass part of the slide while you trim off the rock. Try to leave just a thin layer of rock on the slide. Save the rock chip in case you ruin the slide and need to try again! Next, back to the lap. Holding the rock side down with a few fingers in the center of the back of the slide, grind the sample thin , using 400 grit. your goal is exactly 30 microns ( mm) of thickness across the entire sample. How to tell? Use a geological microscope with the polarizing lenses "in" or crossed. Geology departments use one of their old junker scopes because dirt and grit will be an issue, so if yours is a good one, take care to clean and dry the glass slide as you check it over and over again (except you will need to wet the rock surface to see its grains well).
5 The best mineral to use as a thickness gauge is feldspar, which is present in many rocks . As the sample gets thinner, the interference colors or birefringence of feldspar will go from bright colors to yellow to medium-light gray. Gray is good -- much thinner will be too thin . If quartz is present as well, it will be orange or deep yellow when a little too thick, becoming "straw" or very pale yellow when just right. You might need an optical mineralogy reference to help identifications. Also as you get close, you will see more and more light passing through the slide. Light colored granites become almost transparent, so use extra care as it becomes so thin . A few swipes on the lap can turn an almost-done into half-ruined. A hard, quartz-rich rock like granite or gneiss will take longer than a softer sedimentary or metamorphic rock. I mostly make thin sections of basalt, which is the dark gray type of lava.
6 It is fine-grained with little or no quartz, so basalt grinds down quickly and evenly. To finish, cement a cover slip onto the rock, being careful to once again make the cement free of bubbles with the warming plate. You might wish to use something besides epoxy. If you have one, use a carbide-tip pen to scratch an code or name onto the end of the back of the slide. This whole process might take a few hours from start to finish, but with practice you can make thin sections in batches, so per slide it might become a lot less than an hour. Practice is the key, this is more art than science. Greg McHone, PhD, CPG, Stones2 Gems ( )