Transcription of Router-CIM Application Notes
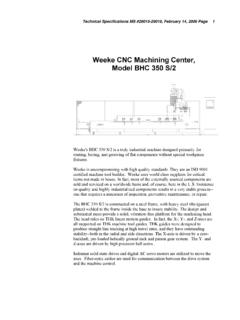
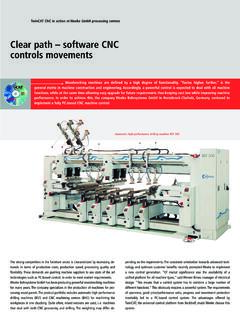
1 2010 Komo Machine, Application NotesRouter-CIM Weeke ABD Post ProcessorI 2010 Komo Machine, of ContentsPart IRouter-CIM Application Notes1 Part IIWoodWOP and Router-CIM2 Part IIIPost Processor Installation3 Part IVSelecting The Correct System4 Part VTool Numbers and Sample Knowledges5 Part VIRouter-CIM Considerations9 Part VIIPart 111 Starting the drawing session .. 132 Making the Toolpaths .. 173 Creating a Sequence Part VIIIU sing woodwop to Verify a Program22 Router-CIM Application Notes1 2010 Komo Machine, Application NotesWeeke ABD Boring Doweling MachinePost ProcessorRouter-CIM Weeke ABD Post Processor2 2010 Komo Machine, and Router-CIMWoodWOP and Router-CIMThe Weeke and Homag machines have woodwop software loaded on the machine tool and use thatsoftware to display and run the toolpath programs that Router-CIM creates. Router-CIM will createan .MPR file which is the file that woodwop uses for the purpose of creating a part on the are some considerations to keep in mind when using Router-CIM with this post processor toinsure successful programs are created.
2 Even though the Weeke or Homag can be point to point boring machines, there is no PatternRecognition used with this machine. woodwop will re-optimize the drill holes on it own and choosethe patterns that fit with the tools that are set up in the machine. There are several knowledges supplied with the system to allow you to make all different types ofcuts successfully with this post processor. Each of these are set with all the corresponding toolnumbers, and tasks set up to make the correct cut. Some of the data may be changed, but most willbe left intact to insure a successful cut. The material or blank size must be supplied to the program in order for woodwop to display theprogram correctly. There are several methods in Router-CIM to help you input those sizes, andfailure to do so will result in an .MPR file that will not work properly with woodwop . The knowledges for the Weeke or Homag cannot be used with other types of machine tools.
3 TheWeek or Homag post is very specific to these machines and will not interact with other CNCmachines that use more conventional NC and Router-CIM3 2010 Komo Machine, Processor InstallationPost Processor InstallationBefore starting the tutorial, we should be sure the post processor is installed properly. Follow thedirections here to install the post processor if it is not already XP Pro & Windows Vista:To install Router-CIM Custom Application , insert the installation CD into the CD drive and click onSTART, then RUN and then either pick on or type: (xx is your CD drive letter) then pressOK or <enter>. This will copy the necessary files to the proper recommend that you use the default directory structure for Router-CIM which will install the mainfiles to the \ Router-CIM directory and the working directory as \rcim_work. You can specify any drive,but if you change the directories you must specify the specific directory during Weeke ABD with standard tool calls, use the ABD Weeke ABD Post Processor4 2010 Komo Machine, The Correct SystemSelecting the Correct SystemABDWhen you start Router-CIM , the Configuration Wizard will appear and from here you may select amachine to program.
4 We have provided you with the wizard file for the ABD. If you select Database,you should see the ABD as a choice in the list of machines to program. If you do not, it is typicallybecause the Router-CIM program is not installed in the default location and that is where the wizard islooking for the file. It is set to look in C:\ Router-CIM \Ncdwgs\ If you installed tosome other drive or directory, then you can do one of two things. Either edit the wizard file, or simplymake a new one. To make a new wizard file, click on Import, then browse to the \ Router-CIM \ncdwgs folder and selectthe file that we created for you. A new wizard will be created using that drawing as a edit the existing wizard file, using Windows Explorer, browse to the \ Router-CIM \Ncpost folder andopen the file with NOTEPAD. Edit the last line to point to the drive and directory that youhave installed Router-CIM to.
5 For instance if you installed to the D: drive, then change the line from:("SOURCE DRAWING" ("C:\\ Router-CIM \\Ncdwgs\\" "ABD")) to("SOURCE DRAWING" ("D:\\ Router-CIM \\Ncdwgs\\" "ABD"))then save the file. When you restart Router-CIM , you should find the Weeke as a choice in thedatabase The Correct System5 2010 Komo Machine, Numbers and Sample KnowledgesTOOL NUMBERS and SAMPLE KNOWLEDGESAll the possible tool numbers for any of the possible tools are listed below. Follow the tool selectionslisted for your applicable tool are also sample knowledges in the default knowledge drawing ( ) that will allow youto use the cycles with the cut tasks set up properly for the type of tools TypeTool Number inRouter-CIMV ertical Drilling reference to Side 1"101"Vertical Drilling reference to Side 2"102"Vertical Drilling reference to Side 3"103"Vertical Drilling reference to Side 4"104"Horizontal Drilling on Face 1"201"Horizontal Drilling on Face 2"202"Horizontal Drilling on Face 3"203"Horizontal Drilling on Face 4"204"Vertical Drills:Vertical Drills use tools 101-104 depending on which side you want referenced for the operation.
6 Thereference should be set to the closest side the hole can be reached from, or the side that the rest ofthe pattern will be able to be reached from."101" is for Vertical Drills made from side 1 reference"102" is for Vertical Drills made from side 2 reference"103" is for Vertical Drills made from side 3 reference"104" is for Vertical Drills made from side 4 referenceRouter-CIM Weeke ABD Post Processor6 2010 Komo Machine, Knowledges:A sample knowledge is provided for each of the 4 edges referenced. Use these to start with as it setsthe cut tasks use the four different drill types place a number 1 - 4 in the Type field on the status page and thecode will place the following types in the Code:Type 1 (LS) = "SLOW-FAST" to depthType 2 (SS) = FAST-FAST to depthType 3 (LSL) = "SLOW-FAST-SLOW" throughType 4 (SSS) = "FAST-FAST-FAST" throughIf no code is placed in the Type field, the default of 1 will be created in the code.
7 This is onlynecessary for vertical is now done according to the size of the tool selected, so NO error checking for a proper toolsize is available. Whatever tool is selected will drill the hole Drills:The four edges of the part are drilled with 4 different tool numbers, depending on the face they are on. The tool numbers are extremely important to this setup, as are the tasks for the cut. You can changethe size of the tool, feed rate, etc. To use these tools you must draw a circle on the correct FACE ofthe part. There are tools in Router-CIM to help you create geometry on the correct tools are 201 to 204"201" is for drilling on Face #1."202" is for drilling on Face #2."203" is for drilling on Face # Numbers and Sample Knowledges7 2010 Komo Machine, Inc."204" is for drilling on Face # Knowledges:There are sample knowledges named Horizontal_1, Horizontal_2, Horizontal_3, and Horizontal_4 forexamples of how to set up these and DOWELSTo use the Glue and Dowel functions, you can place a number in the Category slot on the ControlPanel.
8 You can use the following numbers:0 = No Glue and No Dowel1 = Glue and Dowel2 = Dowel and No GlueRouter-CIM Weeke ABD Post Processor8 2010 Komo Machine, Numbers and Sample Knowledges9 2010 Komo Machine, ConsiderationsRouter-CIM ConsiderationsDuring the Sequence, there are options boxes to set the material X dimension, the material Ydimension and the material thickness. If those are filled in, you will not be prompted for the size of thepanel. If they are not filled in then you will be prompted for each of the sizes with a screen pick. Youwill have to pick the opposite ends of the part to get the material size and you can either pick or enter anumber for the material thickness. You MUST have the panel sizes for the program to work these are not in the program, it will not display on the machine control AutomationIn the Automation software, the cuts may be set to use M for Material thickness.
9 If you are using thispost processor in automation, you will not be prompted for the material sizes if you are nesting as thesheet X, Y, and Z dimensions will be read by the program. If you use the Code as Single Part option inRouter-CIM, the part dimensions will be read by the program and placed in the code Weeke ABD Post Processor10 2010 Komo Machine, mentioned there are several knowledges in the system to set up the cutting conditions for each typeof tool. You may edit these with the knowledge editor. From the control panel select the Edit button byKnowledge and you will see the following screen:You can select a knowledge from this list and then either make it current, rename, or delete it. If youdelete it, and save the drawing there is no way to get the cut cycle settings back if they are modified. Be careful deleting wanted TutorialWhat follows will be a short tutorial on making a part program with the Weeke post processor systemin Router-CIM .
10 It will use many of the built in knowledges to create the part program and there will alsobe some explanation of how to display the .MPR file in woodwop and show that the cuts are part created will look like the picture Tutorial11 2010 Komo Machine, will use horizontal drills on all 4 sides, vertical drills on the of these cuts will use the standard knowledges provided in the the drawing sessionTo begin, open the drawing named from the C:\Rcim_work folder. It was placedthere during the installation of this part should look like this on the screen in AutoCAD: Router-CIM Weeke ABD Post Processor12 2010 Komo Machine, the drawing is open, begin Router-CIM by selecting the first Router-CIM icon on the Router-CIMT oolbar. The configuration wizard will Database and choose the ABD post from the list of post processors available. Then select OKPart Tutorial13 2010 Komo Machine, finish loading the ToolpathsTo make the tool paths we will follow some basic Router-CIM commands.