Transcription of 1 2 3 4 - skf.com
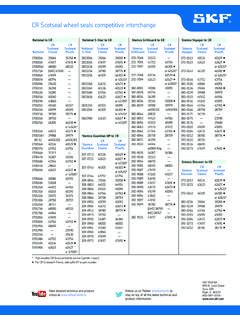
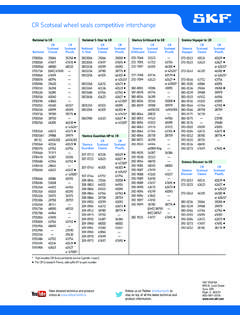
1 CR Scotseal Bearing Drive Centering Classic cone plate plug CR Scotseal Bearing Drive Centering Classic cone plate plugCR Scotseal tool chart 28758 ..JM205149-A ..463 ..722 JM207049-A ..463 ..723 34387 ..33281 ..427 ..716 33287 ..427 ..707 34975 ..39581 ..436 ..702 45284 ..436 ..700 35066 ..39581 ..436 ..702 45284 ..436 ..700 HM212047 ..436 ..704 HM212049X ..436 ..706 36365 ..555S ..427 ..702 560 ..427 ..706 3982 ..427 ..704 38750 ..495AX ..462 ..708 47686 ..462.
2 710 38780 ..495AX ..462 ..708 47678 ..462 ..708 47686/7 ..462 ..710 39988 ..HM212049 ..448 ..706 40086 ..6379 ..441 ..705 6386/89 ..441 ..706 40136 ..575 ..457 ..708 580 ..457 ..710 663 ..457 ..710 42623 ..593 ..452 ..712 HM518445 ..452 ..712 42672 ..663 ..445 ..710 HM516449 ..445 ..710 43752 ..663 ..465 ..710 665A ..465 ..711 43764 ..749 ..465 ..719 6461A ..465 ..708 43860 ..598A ..446 ..714 663 ..446 ..710 47686 ..446 ..710 HM516449 ..446 ..710 44922 ..641 ..484.
3 706 HM212049 ..484 ..706 H715345 ..484 ..716 44964 ..663 ..484 ..710 45010 ..6559 ..484 ..710 45099 ..580 ..484 ..710 45103 ..641 ..484 ..706 H715345 ..484 ..716 45160 ..580 ..461 ..710 594A ..461 ..715 598A ..461 ..714 46305 ..HM218248 ..451 ..713 47697 ..594A ..435 ..715 598A ..435 ..714 47686 ..435 ..710 48000 ..594 ..435 ..715 598A ..435 ..714 Installation procedure for CR Scotseal ClassicCaution: Do not install the CR Scotseal directly onto the the hub (wheel) assembly against a solid surface or bench at a 45 angle for seal installation.
4 This aids in centering the bearing and seal in the hub bore. Clean bore of any particles, rust or Pre-lube the inner bearing cone with the lubricant that is being retained and place it into the Place the CR Scotseal Classic into the hub bore and insert the tool assembly with centering plug into the seal. Note: Be sure to wear proper eye Hold the tool handle irmly and straight, and drive the seal with irm hammer strokes until the seal is squarely seated. Continue driving the seal into the hub until the sound of impact After the seal is bottomed in the bore, check for freedom of movement by manually moving the packing of the seal up and down.
5 Ensure that the inner bearing rotates : Install a new seal if the seal is cocked or damaged during or after tool handle (#450237)Standard plugbushingWasherNutCentering plugSeal drive plate(These components areinterchangeable. See chart below.)1234 View detailed technical and product videos at us on Twitter @skfpartsinfo to stay on top of all the latest technical and product VSM NA890 N. State StreetSuite 200 Elgin, IL SKF and Scotseal are registered trademarks of the SKF Group. SKF Group 2018 The contents of this publication are the copyright of the publisher and may not be reproduced (even extracts) unless permission is granted.
6 Every care has been taken to ensure the accuracy of the information contained in this publication but no liability can be accepted for any loss or damage whether direct, indirect or consequential arising out of the use of the information contained 457373 rev. 04/18 Printed in ) If dowel pin and washer (or washer tang and nut lat) are not aligned, remove the washer, turn it over, and reinstall. If required, loosen the inner (adjusting) nut just enough for ) Bendable type washer lock only: Secure nuts by bending one wheel nut washer tang over the inner and outer nut.
7 Bend the tangs over the closest lat perpendicular to the ) See "Wheel bearing lock nut system installation & adjustment procedures" in the 457975 SKF TFO Guide (12-2017)4) See "PreSet/PreSet Plus wheel bearing adjustment procedure" in the 457975 SKF TFO Guide (12-2017)* Printed with permission of the TMC, Reference RP618 BManual wheel bearing adjustment procedure*, 3), 4)Step 1: Lubricate the wheel bearing with clean axle lubricant of the same type used in the axle sump or hub assembly. Note: Never use an impact wrench when tightening or loosening lug nuts or bolts during the adjusting nut torqueInitial back offFinal adjusting nut torqueAcceptable end playAxle typeThreads per inchFinal back offNut sizeTorque speciicationsStep 2 Step 3 Step 4 Step 5 Step 6 Step 7 Step 8200 lb ft(271 N m)While rotating wheelsOne full turn50 lb ft (68 N m)While rotating wheelsSteer (front) non-drive121/6 Tu r n1)Install cotter pin to lock axle nut in in in ( mm mm)As measured per procedure with dial indicator181/4 Tu r n1)
8 121/3 Tu r n1)Less than 2 5/8 in ( mm)200 300 lb ft (271 407 N m)141/2 Turn 18 Drive121/4 Turn Dowel type washer300 400 lb ft (407 542 N m)16 Tang type washer2)200 275 lb ft (271 373 N m)Trailer121/4 Turn Less than2 5/8 in ( mm) 200 300 lb ft (271 407 N m)16 Pre-adjusted wheel bearing adjustment procedureThis refers to torque specifications and bearing adjustments. Please refer to original equipment manufacturer s recommended procedures for complete installation details. One piece spindle nuts - Torque a one piece spindle nut to 300 ft. lbs.
9 While rotating the hub. Do not back off the spindle nut. Engage any locking device that is a part of the spindle nut system. If the locking device can not be engaged, advance the spindle nut until the lock can be engaged. Double jam nut systems - Torque the inner spindle nut to 300 ft. lbs. while rotating the hub. Advance the inner nut as necessary to engage the locking ring. Do not back off the spindle nut. Install the outer spindle nut and torque it to 200 ft. lbs. Be sure to engage any locking device.