Transcription of 2x4 Workbench Plans - woodworking and …
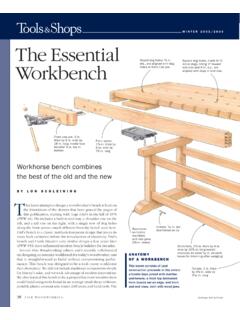
1 2x4 workbench plans Copyright 2013 Alex Harris Please feel free to share these Plans with your friends! P a g e | 1 Workbench Dimensions Length: 1300mm (~1400mm including tail vice) Width: 700mm Height: ~860mm Cutting List Part Dimensions Quantity 2x4 (~50x100mm) Lumber Total: ~12m Leg: Upper Rails 595mm 2 Leg: Bottom Rails 695mm 2 Leg: Stiles 695mm 4 Stretchers 1025mm 2 Edging: Long 1200mm 2 Edging: Short 700mm 2 Vice Jaw 500mm 1 18mm MDF/ Plywood Top 1200 x 600mm 2-3 Pine (optional thickness) Foot Pads 50 x 100mm 4 Hardware List Part Measurements Quantity Description Dowels 10 x 45mm 16 Pin mortice and tenon joints. Bolts M8 x 80-100mm 4 Fix together base of Workbench . Nuts M8 4 Fix together base of Workbench . Penny Washers M8 x 25mm 8 Fix together base of Workbench . Coach/ Carriage Bolts M10 x ~100mm 4 Join base to top of Workbench .
2 Penny Washers M10 4 Join base to top of Workbench . Wood Screws 30mm ~30 Laminate Workbench top together. 50mm ~20 Laminate Workbench top together. 30mm 8 Fix pads to bottom of legs. 80mm 16 Fix edging to top of Workbench Optional: Vice - 1-2 Bench Dogs 19mm (3/4 ) - If you have not watched the build video for this Workbench I urge you to do so, it will really help you to understand how it s built: Note: The size of commercial 2x4 (50x100mm) lumber can vary and will often be slightly undersize. In this case, you may need to adjust some of the dimensions quoted in the following Plans to suit what you can find. I was able to cut all 2x4 parts from just over 4x 3 metre (10ft) lengths. (Will fit in 6x 8ft lengths) P a g e | 2 Legs P a g e | 3 P a g e | 4 P a g e | 5 Stretchers P a g e | 6 Workbench Top P a g e | 7 Vice Tip: The easiest way to drill the bench dog holes all the way through the vice jaw, is to drill half way from one side, flip the piece and drill through the rest from the other side.
3 P a g e | 8 Possible Addition Although I did not include this on my own Workbench it might be worth considering attaching another stretcher (or two) at the top of the base of the Workbench . Something like this would provide further support to the top of the Workbench , as well as increasing the rigidity of the base. Above I have suggested a single top stretcher located in the centre of the frame. This would avoid cutting into the mortice and tenons joints of the legs, as well as avoid contacting the coach/ carriage bolts which fix the base to the top of the Workbench . Whether this central location would work, I am not sure. Depending on the location of the tail vice, the screw or guides may get in the way. P a g e | 9 Although every effort was made to include all the details necessary to build this Workbench if you feel information needs to be added/ amended I would love to hear from you: Or, you can explore the 3D Sketchup model and find the information you need yourself: Disclaimer (Yes, just in case!)
4 These are free Plans . No warranties are given or implied and your results may differ. and Alex Harris does not accept liability for any loss or personal injury which may incur from the replication of this design. For full terms and conditions visit this link: By using these Plans , the user agrees that the use of this information is entirely at his/her own risk.