Transcription of 33-00421EF-01 - T9 THERMOSTAT - Honeywell Store
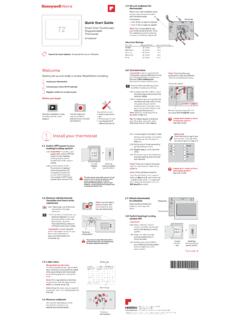
1 T9 THERMOSTAT . Installation guide Online Guides Read before installing. Included in your box: Installation guide Screws and anchors T9 Wi-Fi THERMOSTAT Wireless UWP. room sensor Wallplate C-Wire Wire labels Adapter (optional). Tools you will need: You may need: Phillips screwdriver Wire Stripper Small flat head screwdriver Needle-nose pliers Pencil Level Home Wi-Fi Password Drill and drill bit (7/32in). Flashlight 2. Compatibility Section REQUIRED: A C-Wire (common wire) is needed for 24 VAC power. If you do not have a C-Wire, then a C-Wire Adapter is provided. This guide will help you determine if you have a C-Wire or will need to use the included C-Wire Adapter (Step 10).
2 The C-Wire is a wire that originates from your heating and cooling system and needs to be connected to the C terminal on your THERMOSTAT . There is no universal color used to designate this type of wire. YGC. OR. Y G C UA. C-Wire C-Wire Adapter Compatible with most heating, cooling, and heat pump systems Does not work with electric baseboard heat (120-240V). Does not work with millivolt systems Does not support S terminals for indoor and outdoor sensors Android or iOS smartphone, tablet, or device CAUTION: ELECTRICAL HAZARD. Can cause electrical shock or equipment damage. Disconnect power before beginning installation.
3 CAUTION: EQUIPMENT DAMAGE HAZARD. Compressor protection is bypassed during testing. To prevent equipment damage, avoid cycling the compressor quickly. CAUTION: MERCURY NOTICE. If this product is replacing a control that contains mercury in a sealed tube, do not place the old control in the trash. Contact your local waste management authority for instructions regarding recycling and proper disposal. For help, see: ONLINE GUIDES AND SUPPORT VIDEOS AT: SOCIAL Twitter: @Honeywell_Home, Facebook: Honeywell Home Or contact: EMAIL Electrical Specifications PHONE 1-800-633-3991 INPUT: 24V~@60Hz, 3. Removing your old THERMOSTAT You will need: Screwdriver, needle-nose pliers 1 Turn off power ON.
4 To protect your equipment, turn off OFF. the power at the breaker box or switch that controls you heating and cooling OR. equipment. OFF. Note: The THERMOSTAT off switch Switch will not turn off the power to the equipment. Breaker box 2 Check that your system is off Change the temperature on your old THERMOSTAT so that your system starts 75. heating or cooling. If you don't hear or feel the system turn on within 5 minutes, the power is off. Note: If you have a digital THERMOSTAT that has a blank display, skip this step. 3 Remove your existing THERMOSTAT from the wall plate On most thermostats , you can take off the THERMOSTAT by grasping and gently pulling.
5 Some thermostats may have screws, buttons, or clasps. Do not remove any wires from your THERMOSTAT at this time! 4. Compatibility Check 4 Do you have a line voltage system? Line voltage systems have thick black wires with wire nuts or are labeled high voltage (120V or higher). YES. Your system is not compatible. Call 1-855-733-5465 to find a pro- Wire nut installer in your area. Thick black wire NO. Continue to the next step. 5 Take a picture of your existing wall plate's wiring In order to capture all of the letters next to the terminals, be sure to take multiple pictures from different angles. You may need to reference this image later.
6 6 Remove any jumpers Example Y R RC. A jumper is used to connect two of a jumper terminals. It may look like a small staple or a colored wire. Do not discard. Terminals Keep jumpers with your old wallplate. 7 Label the wires Use the stickers provided with your new THERMOSTAT to label each wire on your existing wall plate. Do not label jumpers. Your new THERMOSTAT does not need jumpers. 5. 8 Write down the colors of the wires Check the boxes and write down the color of the wires connected to terminals that are coming from the wall. Check all that apply (not all will apply). Terminal Wire Color Terminal Wire Color A or L/A R.
7 C Required* Rc E Rh G W. K W2 or Aux O/B Y. U (1 or 2) Y2. *A C-wire or C-Wire Power Adapter (included) is required. If there are wires in terminals that are not listed, you will need additional wiring support. Visit to find out more. 9 Disconnect the wires and remove the old wall plate You may need a screwdriver to release wires from terminals. Tip: Wrap the wires around a pencil to prevent them from falling in the wall. Compatibility Check 10 Do you have a C-Wire? Look at the THERMOSTAT wiring checklist from Step 8, or the photo you took. Is the C-Terminal checked? YES. This means you will not need YGC. to install the included C-Wire Adapter.
8 Skip to Installing Your New THERMOSTAT (page 9). NO. Y G C UA. This means you don't have a C-wire connected to your THERMOSTAT . Continue to next step. 6. Only complete this section if you answered No to Step 10. Connecting Your Unused C-Wire You will need: Screwdriver, flashlight, wire strippers Compatibility Check 11 Do you have a zoning panel? You have a zoning panel if you have multiple thermostats and one furnace or heating system. Furnace Zoning YES Panel THERMOSTAT C-Wire Adapter installation is more complicated on zoned systems. Call 1-855-733-5465. to find a pro-installer. NO. Proceed to the next step. 12 Do you have an unused wire?
9 Look at the bundle of wires coming from the Example of unused C-wire wall. Note: You may have to pull the bundle of wires out from the wall to find the unused wire. YES. Continue to Step 13. NO. Open the included C-Wire Adapter box and follow the instruction guide . 13 Label unused wire - Label your unused wire with the provided C sticker label. You may need to use a wire stripper to expose at least 1/4 inch of the wire. Note: If you have multiple unused wires, then label only one wire and make note of the color here: Go to your furnace or heating system This system is often located in your basement, attic or garage.
10 Bring a flashlight and screwdriver. 7. 14 Remove cover from furnace or heating system Open the heating and cooling system's cover to find the control board. You should see the same terminal labels that are on your THERMOSTAT . Note: You may need to unscrew the cover. G. The control board may be at the top or C. bottom. R. W. Y. 15 Find the other end of the unused wire Locate the bundle of wires that are the G. same as the ones at your THERMOSTAT . C. R. The unused wire should be the same W. color as the one near your existing Y. THERMOSTAT . See Step 13 for the color you wrote down. 16 Connect the unused wire to the C-terminal - G.