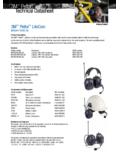
Transcription of 3M Peltor LiteCom
1 FP3724 Svenska ABBox 2341SE-331 02 V rnamoSwedenPhone: +46 (0) 370 65 65 65 Fax: +46 (0) 370 65 65 99 Email: recycle. Printed in Sweden. 3M 2013. All rights Peltor LiteComMT53H7*4400-EUThe Sound Solution4132(D)123(E)(G) (F) Radio Channel Frequencies(I)1231. (H) CTCSS (Continuous Tone Coded Squelch System)(K)1) Helmet Manufacturer2) Helmet Model3) Attachment4) Head size: S=small, N=medium, L=large3M1465P3 ENL3 MAirstream AH1, AH4, AH7, HT-701, HT-702, HT-705, HT-707P3 AENL3 MMistral M-106, M-107, M-306, M-307P3 AFNL3MG500 HeadgearP3 ESNL3M G2000P3 KSNL3M G22P3 ENL3M G3000P3 ESNLA uboueixBrennusP3 FSNLA uboueixFondelecP3 FSNLA uboueixIrisP3 ENLA uboueixIris 2P3 ENLS ofop TaliaplastOceanicP3 ENLS ofop TaliaplastOpusP3 ENLB erendsen Safety,Balance HDP3 NSNLC enturion1125/ARCO plusP3 HSNLC enturion1100/ARCO type 2P3 HNLC enturion1540/ARCOP3 ANLE vert LarssonRobustP3 ESNLE vert LarssonBalanceP3 ENLE vert LarssonBalance AC/3M 1465P3 ENLK emiraTop CapP3 ASNLLASLP2002P3 ESNLLASLP2006P3 ESNLMSAS uper V-Gard IIP3 ESNLMSAV-GardP3 ESNLP etzlVertexP3 ESNLP rotectorStyle 300P3 ESNLP rotectorStyle 600P3 GSNLP rotectorTuffmaster IIP3E.
2 P3 GNLR merBravo 2 NomazP3 BSNLR merMarcus Top 2 Atlas NomazP3 BSNLR merN2 Atlas NomazP3 BBSNLR merProfi ExpoP3 ESNLR merProfi NomazP3 ESNLR merTop Expo AtlasP3 BSNLS chuberthBENP3 BBSNLS chuberthBER80/WPC80P3 EASNLS chuberthBER SP3 ESNLS chuberthBOP RP3 BSNLS chuberthPIONIERP3 BSNLS chuberthSH 91/WPL 91P3 EBSNLS chuberthSW1P3 EBNLUVEXA irwingP3 ESNLVossInap 88P3 ESNLVossInap MasterP3 ENLVossInap StarP3 ENLVossInap PCGP3 GNL(A) Headband MT53H7A4400-EU(A:1)(A:4)(A:5)(A:6)(A:8)( A:10)(A:7)(A:9)(A:2)(A:3)(A:12)(A :11)(A:15)(A:14)(A:13)Technical dataFrequency range: 446 MHz (PMR)Operation mode: Half duplexChannels: max 8 (PMR)Channel raster: 6,25 Channel separation: 12,5 kHz Modulation: FM: 2,5 kHz Microphone type: Electret (MT53)Receiver sensibility: Typical-122 dBmSelective squelch: CTCSS (38 channels)Output power: 150 mWRange: Up to 3 km depending on conditionsPower supply: 2 AA alkaline (3,0V) or NiMH (2,4V)Power consumption: Stand-by: <80 mA Receiving: <85 mA Transmitting: <210 mAOperating time: 20 hrsOperating temperature: -20 C to +55 CStorage temperature: -40 C to +55 C(B) Helmet attachmentMT53H7P3E4400-EU(C) NeckbandMT53H7B4400-EU(B:1)(C:1)(C:2)(J: 1)(J:2)MT53H7A4400-EUSNR=32dB H=33 dB M=30 dB L=23 dB5) 418 gMT53H7P3E4400-EUSNR=33 dB H=34 dB M=30 dB L=23 dB5) 394 g(J:3) 5) 384 gMT53H7B4400-EUSNR=32 dB H=34 dB M=30 dB L=22 dBThe product is in conformity with the provisions set out in the following directives.
3 Thereby it fulfils the requirements for CE marking. PPE directive 89/686/EEC R&TTE-directive 1999/5/EC ROHS-directive 2011/65/EUThe product is tested and approved in accordance with following standards:EN 352-1:2002 / EN 352-3:2002, EN 62479:2010, EN 300 296-2 , EN 301 489-1 , EN 301 489-5 , EN 60950-1:2006 +A11:2009 +A1:2010 +A11:2009 +A12:2011 +AC:2011, EN 50581:2012 The product has been examined by: Combitech AB, nkhusgatan 9, Box 1017, SE-551 11 J nk ping, Sweden. Notified body #2279 BACL, Bay Area Compliance Labs Corp (Shenzhen), 6/F, the 3:rd Phase of WanLi Ind Build ShiHua Road, FuTian Free Trade Zone, Guangdong, Shenzhen, China, Notified body #0313(M:1)Z3GZ3KZ3E(L)Frequency (Hz) 1) 63 125 250 500 1000 2000 4000 8000 Mean attenuation (dB) 2) Std deviation (dB) 3) Assumed Protection Value (dB) 4) (Hz) 1) 63 125 250 500 1000 2000 4000 8000 Mean attenuation (dB) 2) Std deviation (dB) 3) Assumed Protection Value (dB) 4) (Hz) 1) 63 125 250 500 1000 2000 4000 8000 Mean attenuation (dB) 2) Std deviation (dB) 3) Assumed Protection Value (dB) 4) (M:2)(M.
4 3)3M Peltor LiteComGB, IE, ZA, AE 2-5FR, CH, BE 6-9DE, CH, AT 10-13IT, CH 14-17ES 18-21NL, BE 22-25SE 26-29DK 30-33NO 34-37IS 38-41FI 42-45PT 46-49GR 50-53PL 54-57HU 58-61CZ 62-65SK 66-69SI 70-73EE 74-77LV 78-81LT 82-85RO 86-89RU, BY, AZ 90-95HR 96-99BG 100-103TR 104-10723GB3M Peltor LiteComHearing protector with built in communication these instructions carefully before use and save them for future COMPONENTS1:1 Headband (figure A)(A:1) Headband (A:2) Headband padding (PVC foil)(A:3) Headband wire (stainless steel)(A:4) Two-point fastener (POM)(A:5) Ear cushion (PVC foil and PUR foam)(A:6) Attenuation cushion (PUR foam)(A:7) Cup(A:8) Speech microphone (electret microphone)(A:9) On/Off/Mode(A:10) +(A:11) (A:12) Antenna(A:13) Speech microphone input (J22)(A:14) PTT (Push To Talk button)(A:15) Battery cover 1:2 Helmet attachment (figure B)(B:1) Cup supporting arm (stainless steel)1:3 Neckband (figure C) (C:1) Neckband wire (stainless steel)(C:2) Neckband cover (POX)2.
5 FITTING AND ADJUSTMENTNote! Brush aside hair around your ears so the ear cushions (A:5) fit frames should be as thin as possible and fit close to the head to minimise acoustic :1 Headband (figure D)(D:1) Slide out the cups (A:7). Tilt the upper part of the headset outwards to ensure the wires are outside the headband wires (A:3).(D:2) Adjust the height of the cups by sliding them up or down while holding the headband in place.(D:3) The headband should be positioned across the top of your :2 Helmet attachment (figure E)(E:1) Insert the helmet attachment in the slot on the helmet and snap it into place. (E:2) Working mode. To switch the unit from ventilation mode to working mode, press the headband wires inwards until you hear a click on both sides. Make sure that the cups and the headband wires do not press on the edge of the helmet when in working mode as this can cause noise leakage.
6 (E:3) Ventilation mode. Avoid placing the cups against the helmet as this prevents ventilation (E:4).3. USAGE/FUNCTIONS3:1 Inserting batteriesUse a screwdriver or the like to open the cover by turning it the V AA batteries. Check that the battery polarity (+/ ) is correct before closing the cover (see diagram on battery cover).Warning! Do not try to charge the included alkaline batteries as this may damage the headset. The batteries may also explode. Always switch off the unit before you remove or insert new battery level is indicated by a voice message: low battery , repeated every five minutes. If the batteries are not replaced a battery empty warning will eventually be heard. The unit will then switch off ! Performance may deteriorate as the batteries get :2 Switching the headset on and offPress and hold the On/Off/Mode button (A:9) for two seconds to switch the headset on or off.
7 A voice message will confirm that the unit has been switched on or off. The last setting is always saved when the headset is switched ! Power is switched off automatically if the product has been inactive for two hours. Automatic power-off is indicated by a voice message: automatic power off followed by a series of short tones for 10 seconds, then the unit is switched :3 Scrolling through the menuPress the On/Off/Mode button (A:9) briefly to browse through the menu. A voice message confirms each Radio volume (sound level for communication radio)Press the + button (A:10) or button (A:11) to adjust the volume. Each change is confirmed by a voice message. You can choose between five levels. To turn the volume off, press the button (A:11) for two seconds. This is confirmed by the message radio volume off . Press the + button (A:10) to switch this function back !
8 No radio communication can be heard when the volume is switched ! When the volume is switched off the other menus will not be Channel (radio frequency)Press the + button (A:10) or button (A:11) to select channel. Each change is confirmed by a voice message. You can choose between eight channels. See table F Radio channel VOX (voice-operated transmission)VOX enables LiteCom to transmit automatically when sound above a certain level reaches the microphone. This allows radio transmission without pressing the PTT button (A:14).Press the + button (A:10) or button (A:11) to adjust the sensitivity of voice-operated transmission. Each change is confirmed by a voice message. You can choose between five levels or switch this function off. When the level is low it is easier to transmit. To switch this function off, press the button (A:11) for two seconds. This is confirmed by the message VOX off.
9 The PTT button (A:14) must now be used to transmit. Press the + button (A:10) to switch this function back on. Alternatively switch voice-operated transmission on or off by briefly press the PTT button twice. A voice message confirms the current VOX setting. The radio has a BCLO (Busy Channel Lock Out) function that prevents VOX operation if the channel is being used for other transmission. An audible tone indicates that the channel is already being ! To activate the VOX function the speech microphone (A:8) must be very close to your mouth, 1 3 mm (figure G). The user s voice will be heard in the headset when the radio is Squelch (hiss reduction) Squelch means that background hiss in the earphones is prevented when the incoming signal is below the set squelch level. Press the + button (A:10) or button (A:11) to adjust the squelch level. Each change is confirmed by a voice message.
10 You can choose between five levels or switch this function off. A low squelch level may permit longer range. To switch this function off, press the button (A:11) for two seconds. This is confirmed by the message squelch off . Press the + button (A:10) to switch this function back Sub channel (selective squelch )When sub channel is active, an inaudible tone will be transmitted with the speech, and this tone is used to open the receiver. This allows multiple groups of users to use the same channel without hearing other groups. This product supports CTCSS (Continuous Tone Coded Squelch System), which means there are 38 tones that have been assigned the numbers 1 38 (table H, CTCSS). All communication on the channel can be heard if this function is switched ! When the sub channel function is switched on, all other incoming radio communication will be the + button (A:10) or button (A:11) to select the sub channel.


