Transcription of 42- 2 STAGE SNOW THROWER - Sears
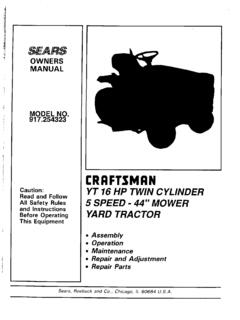
1 Operator's Manual . STOP. 42& quot ;- 2 STAGE SNOW THROWER . DO NOT RETURN TO STORE. TRACTOR ATTACHMENT For Missing Parts or Assembly Questions Call 1-866-576-8388. model No. FITS HUSQVARNA TRACTORS AND craftsman TRACTORS WITH model . NUMBERS THAT BEGIN WITH 917. CAUTION: Safety Before using this product, read this manual and follow all Safety Assembly Rules and Operating Instructions. Operation Maintenance Parts Sears , Roebuck and Co., Hoffman Estates, IL 60179 PRINTED IN FORM NO. 42316 (06/15/11). TABLE OF CONTENTS. SERVICE AND 28. SAFETY 29. FULL SIZE HARDWARE 29. CARTON REPAIR PARTS 30,32,34. REPAIR PARTS 31,33,34. SLOPE 35. PARTS COVER. WARRANTY. ONE YEAR FULL WARRANTY. When operated and maintained according to the instructions supplied with it, if this Snow THROWER fails due to a defect in material or workmanship within one year from the date of purchase, call 1-800-4-MY-HOME to arrange for free repair (or replacement if repair proves impossible).
2 If this product is used for commercial or rental purposes, this warranty applies for only 90 days from the date of purchase. This warranty gives you specific legal rights, and you may also have other rights which vary from state to state. Sears , Roebuck and Co., D817WA, Hoffman Estates, IL 60179. ACCESSORIES AND ATTACHMENTS. These and other accessories are recommended for use with your unit. Call 1-800-4-MY-HOME to find out if they are available. If available, they may be purchased at most craftsman outlets or by calling 1-800-4-MY-HOME . WHEEL WEIGHT TIRE CHAINS SNOW CAB. The model number and serial numbers will be found on a model NUMBER: decal attached to the snow THROWER . SERIAL NUMBER: _____. You should record both the serial number and the date of purchase and keep in a safe place for future reference. DATE OF PURCHASE: _____. 2. SAFETY. Read and understand the operating instructions before using.
3 Keep the area of operation clear of all persons, especially small children and pets. Thoroughly inspect the area to be cleared and remove all door mats, sleds, boards, wires and other foreign objects. Use extreme caution when operating on or crossing gravel surfaces. Never direct discharge at bystanders or allow anyone in front of the snow THROWER . 184045. 199682 199683. Do not place hands near rotating parts. Keep clear of the Do not place feet near rotating parts. discharge opening at all times. Never allow children to operate the equipment. Take all possible precautions when leaving the unit Never allow adults to operate the equipment without unattended. Disengage the attachment clutch lever or proper instruction. switch, lower the snow THROWER , shift into neutral, set Disengage all clutches and shift into neutral before the parking brake, stop the engine and remove the key. starting engine.
4 When cleaning, repairing or inspecting, make certain Do not operate equipment without wearing adequate all moving parts have stopped. Disconnect the spark winter outer garments. plug wire and keep it away from the plug to prevent Wear substantial footwear which will protect feet and accidental starting. improve footing on slippery surfaces. Do not run engine indoors except when transporting Check fuel before starting the engine. Do not remove the snow THROWER in or out of the building. Open the the fuel cap or fill the fuel tank while the engine outside doors. Exhaust fumes are dangerous. is running or hot. Do not fill the fuel tank indoors. Do not clear snow across the face of slopes. Exercise Gasoline is an extremely flammable fuel. extreme caution when changing direction on slopes. Make sure the snow THROWER height is adjusted to Do not attempt to clear steep slopes. Refer to the clear the type surface it will be used on.
5 Slope guide on page 35 of this manual. Do not use the snow THROWER without wheel weights Never operate the snow THROWER without guards, attached to the tractor. plates or other safety protection devices in place. Never make any adjustments while the engine is Never operate the snow THROWER near glass running. enclosures, automobiles, window wells, drop offs Always wear safety glasses or eye shield during etc. without proper adjustment of the snow THROWER operation or while performing adjustment or repair. discharge angle. Do not place hands or feet near rotating parts. Keep Never run the snow THROWER into snow at high speeds. clear of the discharge opening at all times. Do not overload the snow THROWER capacity by Do not carry passengers. attempting to clear snow at too fast a rate. After striking a foreign object, stop the engine, remove Never operate the snow THROWER at high transport the wire from the spark plug and then thoroughly speed on slippery surfaces.
6 Look behind and use care inspect the snow THROWER for damage. Repair any when backing up. damage before restarting and operating the snow Watch for traffic and stay alert when crossing or THROWER . operating near roadways. If the snow THROWER starts to vibrate abnormally, stop Disengage power to the snow THROWER when the engine immediately and check for the cause. transporting or when not in use. Vibration is generally a warning of trouble. Use only attachments and accessories approved by Stop the engine whenever you leave the operating the manufacturer of the snow THROWER (such as wheel position, before unclogging the snow THROWER or weights, counter weights, cabs etc.). making any adjustments or inspections. Never operate the snow THROWER without good visibility. 3. HARDWARE PACKAGE CONTENTS. SHOWN ACTUAL SIZE. A B C D E F G H. 43182. 43063 43661. 43840. 43351. 43020. 43084. I J K L M N O P.
7 43080. 49933. 48106 46938 43350 44326. 43682. 710-0890A. 44215. T U V W,X. Q R S. R19171616 43088. 49948 47630 43081 47605, 43070. 47631. Z AA BB CC. Y. 27231. 43086 43003. 44695. R19172410. DD EE FF GG HH. II JJ KK. 47810 47572 46584 47598. 712-3083 43019 HA21362 43082. 4. NOT SHOWN ACTUAL SIZE. LL NN PP. MM OO. 46959 731-0851A. 711-0198 47134 43343. QQ RR SS. TT. UU. 43055 714-04061 1643-60 23727. 43038. VV. WW XX. 726-0178. 47788. 46963. IMPORTANT: Not all items supplied in the hardware bag will be needed for your particular tractor. Unneeded items may be discarded after you have completed assembly and checked operation of unit. DO NOT DISCARD the two spare shear bolts (K) and 5/16& quot ; nylock nuts (HH). Refer to the Service and Adjustments section on page 28. REF. QTY. DESCRIPTION REF. QTY. DESCRIPTION. A 2 Hex Bolt, 1/2& quot ; x 1-1/2& quot ; AA 2 Bowed Washer B 2 Hex Bolt, 1/2& quot ; x 1-1/4& quot ; BB 7 Lock Washer, 3/8& quot ;.
8 C 1 Hex Bolt, 3/8& quot ; x 3-1/4& quot ; CC 2 Spacer, 1/2& quot ;. D 2 Hex Bolt, 5/16& quot ; x 1-3/4& quot ; DD 4 Nylock Nut, 1/2& quot ;. E 2 Hex Bolt, 5/16& quot ; x 1-1/4& quot ; EE 4 Jam Nut, 1/2& quot ;. F 4 Hex Bolt, 5/16& quot ; x 1& quot ; FF 6 Nylock Nut, 3/8& quot ;. G 8 Hex Bolt, 5/16& quot ; x 3/4& quot ; GG 2 Hex Lock Nut, 3/8& quot ;. H 6 Hex Bolt, 1/4& quot ; x 1& quot ; HH 21 Nylock Nut, 5/16& quot ; (2 spare parts). I 4 Shoulder Bolt, Hex Head II 10 Flanged Nut, 3/8& quot ;. J 2 Shoulder Bolt, Round Head JJ 1 Flanged Nut, 5/16& quot ;. K 2 Shear Bolt (spare parts) KK 6 Flanged Nut, 1/4& quot ;. L 6 Carriage Bolt, 3/8& quot ; x 1& quot ; LL 1 Spring M 2 Carriage Bolt, 5/16& quot ; x 1-3/4& quot ; MM 3 Chute Keeper N 2 Carriage Bolt , 5/16& quot ; x 1-1/4& quot ; NN 1 Trunnion O 4 Carriage Bolt, 5/16& quot ; x 1& quot ; OO 4 Hairpin Cotter, 5/64& quot ;. P 2 Carriage Bolt, 5/16& quot ; x 3/4& quot ; PP 4 Hairpin Cotter, 1/8& quot ;. Q 6 Hex Bolt, 3/8& quot ; x 1& quot ; (Thread Forming) QQ 1 Hairpin Cotter, 3/32& quot ;. R 2 Hex Bolt, 3/8& quot ; x 3/4& quot ; (Thread Forming) RR 2 Lock Pin S 2 Hex Bolt, 5/16& quot ; x 3/4& quot ; (Thread Forming) SS 2 Quick Release Pin T 4 Washer, 1/2& quot ; x 1& quot ; TT 1 Plastic Cap U 7 Washer, 1/4& quot ; UU 1 Spacer, 3/8& quot ;.
9 V 22 Washer, 5/16& quot ; (Extra washers included) VV 2 Chain, Tensioning W 1 Washer, 3/8& quot ; (Thin) WW 2 Tail Reflector X 3 Washer, 3/8& quot ; Standard XX 2 Nylon Tie Y 2 Lock Washer, 5/16& quot ;. Z 8 Washer, 1/2& quot ; x 1-1/2& quot ;. 5. CARTON CONTENTS. 1. Housing Assembly 12. Front Pulley Frame Bracket (2). 2. Lift Handle and Cable 13. V-Belt, Drive 56& quot ; (#48138). 3. Chute Crank Rod Assembly 14. V-Belt, Drive 55& quot ; (#46989). 4. Support Tube, Crank Rod 15. V-Belt, Auger (Attached to Housing Assembly). 5. Engagement Rod (Not used on some models) 16. Hanger Bracket (Outside Mounting). 6. Cable Bracket 17. Hanger Bracket (Outside Mounting). 7. Engine Pulley Keeper (Not used on some models) 18. Hanger Bracket (Inside Mounting). 8. Chute and Control Cable Assembly 19. Hanger Bracket (Inside Mounting). 9. Clutch Idler Assembly 20. Left Hand Side Plate 10. Rear Pulley Frame Bracket (2) 21. Right Hand Side Plate 11. Anti-rotation Bracket.
10 22. Pulley 23. Spacer, 3/8& quot ;. ONLY ITEMS NEEDED FOR craftsman model 917 TRACTORS. AND HUSQVARNA TRACTORS ARE SHOWN. 1 3 5. 4. 46948. 2 6 7. 10 11 24558 47043. 9 14. 24394. 13 46989. 8. 25728 12 15. 48138. 27016 47846. 16 17 18 19. 20 21. 65367 65450 64451 64452. 22 23. 48883 25780 25679 25678. 6. ASSEMBLY. IF YOU HAVE A HUSQVARNA TRACTOR CAUTION: Before starting to assemble the snow THROWER , remove the spark plug wire(s), Skip to & quot ;TOOLS REQUIRED FOR ASSEMBLY& quot ; set the parking brake and remove the key from the tractor ignition. IF YOU HAVE A craftsman TRACTOR. TRACTOR PREPARATION. LOCATE THE model LABEL. Look under the tractor seat to locate the model number Before performing these instructions, refer to the Service label. If the model number starts with 917 as shown and Adjustments section of your tractor owner's manual below, use this manual. If the model number starts with for specific safety instructions.