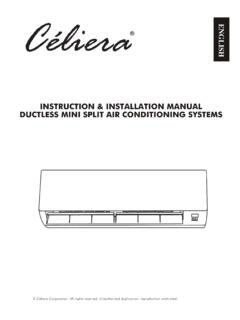
Transcription of 61MH0030A E30D Installation Manual 4th Edition
1 MORTEX PRODUCTS INC FORT WORTH, TX 76106 Page 1 Installation Manual DOWNFLOW SINGLE AND TWO STAGE electric furnace WITH: FACTORY INSTALLED electric HEAT, OR NO HEAT MODELS WITH FIELD INSTALLED electric HEAT KITS MODELS: E30 series LIST OF SECTIONS 1 General 1 7 Line Voltage and Control Box Wiring 9 2 Safety 3 8 Field Installed Heat Kit 12 3 Downflow Return Air and Clearance Requirements 4 9 Thermostat Wiring and Connections 13 4 Downflow Supply Air and Duct Connector Installation 5 10 Motor, Blower and furnace Startup 16 5 furnace Installation 7 11 Final System Checkout 17 6 Upflow Configuration 8 12 Wiring Diagrams 19 LIST OF FIGURES 1 furnace Dimensions 2 22 Same T stat, Separate furnace , Trans and Cool Unit 14 2 Closet Clearances 4 23 Single Stage Heat / Cool T stat.
2 Two Stage furnace 15 3 Typical Closet Installations 4 24 Two Stage Heating / Cooling T stat, furnace 16 4 Typical Alcove Installations 5 25 Typical Two Stage Heating / Heat Pump T stat, furnace 16 5 Clearance Access for Service 5 26 X-13 motor Terminals 17 6 Duct Connector Depths 5 27 Blower Assembly and Blower Deck 17 7 Duct Connector and Floor Base Installations 6 28 Wiring Diagram No Heat Model w/ X-13 Blower Motor 19 8 Duct Connector Measurements 6 29 Wiring Diagram 5 kW w/ X-13 Blower Motor 20 9 Duct Connector and Floor Base Measurements 6 30 Wiring Diagram 8 kW, 10 kW, 12kW w/ X-13 Blower Motor 21 10 Return Air Grille and Frame Assembly 7 31 Wiring Diagram 12 kW w/ X-13 Blower Motor 22 11 Grille and Frame Assembly Filter Locations 7 32 Wiring Diagram 15 kW w/ X-13 Blower Motor 23 12 Coil Cabinet Door Bracket Location 8 33 Wiring Diagram 20 kW w/ X-13 Blower Motor 24 13 Typical Upflow Installation 8 34 Wiring Diagram No Heat Model w/ PSC Blower Motor 25 14 Control Box Component Locations 11 35 Wiring Diagram 5 kW w/ PSC Blower Motor 26 15 Control Box Cover and Circuit Breaker Location 11 36 Wiring Diagram 8 kW, 10 kW w/ PSC Blower Motor 27 16 Line Voltage Electrical Shield 11 37 Wiring Diagram 12 kW w/ PSC Blower Motor 28 17 Line Voltage Electrical Shield Location 12 38 Wiring Diagram 15 kW w/ PSC Blower Motor 29 18 Control Box Power.
3 Blower & Fuse Connections 13 39 Wiring Diagram 20 kW w/ PSC Blower Motor 30 19 Separate Thermostats, Same furnace Wiring Diagram 14 20 Separate Thermostats, Same furnace Wiring Diagram 14 21 Same T stat, Separate furnace , Trans and Heat Pump 14 LIST OF TABLES 1 electric furnace Model Specifications 2 9 Field Installed electric Heat Kit Model Number Chart 12 2 Model Nomenclature 2 10 Field Installed electric Heat Kit Model Nomenclature 12 3 Optional Cooling Cabinets and Return Air Grille 2 11 Low Voltage Wire Gauge and Max Lengths 13 4 Clearances to Combustibles 4 12 Recommended Heat/Cool T stat Wire Color Code 15 5 Duct Connectors 5 13 Recommended Heat/Cool/HP T stat Color Code 15 6 Wiring Requirements Single Branch Circuit 9 14 X-13 Motor Terminal Connections 16 7 Wiring Requirements Dual Branch Circuit 10 15 X-13 Motor Factory Speed Tap Settings 18 8 Electrical Data 10
4 SECTION I: GENERAL The following list includes important facts and information regarding the electric furnace and its inclusions. 1. furnace is rated at 240 volts AC at 60 Hertz 2. furnace is the same size for all models 3. Four-wire thermostat operation for heating and cooling 4. A/C ready furnaces equipped with blower for A/C or Heat Pump operation 5. Holding Strap furnished with furnace 6. This furnace is designed for downflow application 7. This furnace must not be operated without furnace door installed NOTE: This furnace and its components listed on the A/C and Heat Pump equipment sticker were listed in combination as a system by ETL for the United States. SAVE THIS Manual FOR FUTURE REFERENCE MORTEX PRODUCTS INC FORT WORTH, TX 76106 Page 2 Figure 1: furnace Dimensions ModelsALLALLALLI nput, kW5810 With A-Coil CabinetNONONOAir Temperature Rise, Range - F20-80 20-80 30-90 Designed Max Outlet Air Temp-F170170180 Blower-Heat or Heat/CoolMax.
5 External SP (Duct), In. CircuitElectric furnace Cabinet Height10 X 9 VAC, 60 Hz, 40VA33 inches ModelsALLALLALLI nput, kW121520 With A-Coil CabinetNONONOAir Temperature Rise, Range - F30-90 35-100 40-100 Designed Max Outlet Air Temp-F180185185 Blower-Heat or Heat/CoolMax. External SP (Duct), In. CircuitElectric furnace Cabinet Height24 VAC, 60 Hz, 40VA33 inches10 X 9 Table 1: electric furnace Model Specifications Available Blower Motors 1. Standard Blower Motor - 5 SPD X-13 MOTOR 2. Optional Blower Motor 3 SPD PSC MOTOR of FuelCabinetBlower MotorSpeed TapsConfiguationE = electric Furnace30 = 33"Input (kW) Cabinet Height Coil Cabinetand H PType ofFurnaceHeatingFurnaceFurnaceRevisionTy peA = PSCB = X-13 Blower Motor1 = 3 SPD 1/2 HP PSC2 = 3 SPD 1/3 HP PSC3 = 5 SPD 1/3 HP X-134 = 5 SPD 1/2 HP X-135 = 5 SPD 3/4 HP X-13D = DownflowA = New releaseA = Coil Cabinet OptionalB = Two Stage Heat005 = 5 kW Heater008 = 8 kW Heater010 = 10 kW Heater012 = 12 kW Heater015 = 15 kW Heater017 = 17 kW Heater020 = 20 kW HeaterLet ter6 = 3 SPD 3/4 HP PSCA = Single Stage HeatHeight Table 2.
6 furnace Model Nomenclature Coil Cabinet ModelFront Door of CabinetOpen Top 17 3/4" x 21 3/4"Maximum Air Flow CFM1" Pleated Air Filter, In The Door2" Pleated Air Filter, Top of CabinetHeight Depth Width97 FLSB 21 LouveredN/A120020x2023 1/4" 25" 19 3/4"97 FSOB 21 Solid160020x24 23 1/4" 25" 19 3/4"97 FLOB 21 Louvered180020x2020x24 23 1/4" 25" 19 3/4"97 FLSB 27 LouveredN/A160020x3030 1/2" 25" 19 3/4"97 FSOB 27 Solid160020x24 30 1/2" 25" 19 3/4"97 FLOB 27 Louvered180020x2020x24 30 1/2" 25" 19 3/4"97 FLSB 39 LouveredN/A1800 2ea 20x2040 1/4" 25" 19 3/4"97 FSOB 39 Solid200020x24 40 1/4" 25" 19 3/4"97 FG 18 LouveredN/A1200N/AN/A18"N/A 19 3/4"97 FG 24 LouveredN/A1600N/AN/A24"N/A 19 3/4"Frame & Grills Non CabinetCoil SizesAll Mortex 96 series coils will fit in cabinet 96 97 series coils and 98 series coils sizes up to 98 8W7 All Mortex series coils will fit in cabinet Table 3.
7 Optional Cooling Cabinets and Return Air Grille Frame Assemblies MORTEX PRODUCTS INC FORT WORTH, TX 76106 Page 3 SECTION II: SAFETY This is a safety alert symbol. When you see this symbol on labels or in manuals; be alert to the potential for personal injury. Understand and pay particular attention to the signal words DANGER, WARNING, or CAUTION. DANGER: indicates an imminently hazardous situation, which if not avoided, will result in death or serious injury. WARNING: indicates a potentially hazardous situation, which if not avoided, could result in death or serious injury. CAUTION: indicated a potentially hazardous situation, which if not avoided, may result in minor or moderate injury. It is also used to alert against unsafe practices and hazards involving property damage. furnace Weights E30A1 DxxxAAA Models 82 lbs E30A2 DxxxAAA Models 82 lbs E30B3 DxxxAAA Models 79 lbs E30B4 DxxxAAA Models 81 lbs E30B5 DxxxAAA Models 85 lbs E30A6 DxxxAAA Models 85 lbs Safety Requirements 1.
8 This electric furnace should be installed in accordance with all national and local; building, safety, plumbing, and wastewater codes and requirements; along with all other applicable codes. 2. Refer to the furnace rating plate for the furnace model number. 3. Refer to the dimensions page of this instruction for the duct connector dimensions shown in Figures 6 thru 9. The duct connector must be installed according to the instructions in this Manual . 4. Provide clearances from combustible materials as listed under Clearances to Combustibles. 5. Provide clearances for servicing ensuring service access is allowed for the control box, electric elements and the blower. 6. Failure to carefully read and follow all instructions in this Manual can result in malfunction of the furnace , death, personal injury, and/or property damage. 7. Check the rating plate and the power supply to be sure the electrical characteristics match.
9 8. electric furnace shall be installed so the electrical components are protected from water. 9. Installing and servicing heating/cooling equipment can be hazardous due to electrical components. 10. Only trained and qualified personnel should install repair or service heating/cooling equipment. Untrained service personnel can perform basic maintenance functions such as cleaning of exterior surfaces and replacing the air filters. Observe all precautions in the manuals and on the attached labels when working on this appliance. 11. These instructions cover minimum requirements and conform to existing national standards and safety codes. In some instances these instructions exceed certain local codes and ordinances, especially those who have not kept up with changing mobile home, modular home and HUD construction practices. These instructions are to be followed and are the minimum requirement for a safe Installation .
10 Inspection As soon as the furnace is received, it should be inspected for possible damage during transit. If damage is evident, the extent of the damage should be noted on the carrier s freight bill. A separate request for inspection by the carrier s agent should be made in writing. Before installing the furnace you should check the cabinet for screws or bolts which may have loosened in transit. There are no shipping or spacer brackets which need to be removed before startup. Also check to be sure all accessories such as heater kits, and coils are available. Installation of these accessories should be accomplished before the furnace is set in place or the connecting of the wiring, electric heat, ducts or piping. Improper Installation may create a condition where the operation of the product could cause personal injury or property damage. Improper Installation , adjustment, alteration, service or maintenance can cause injury or property damage.