Transcription of A TYPE E Main Valve - Control Products Inc
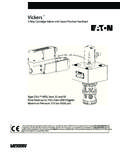
1 DIMENSIONS (inches) AND WEIGHTS (pounds)TYPE E main ValveSizes 3/8 through 12 TYPE E main VALVEThe Spence Type E main Valve is of normally closed, singleseat design featuring packless construction, balanced metaldiaphragms and protected main controlled by one or more of the various types of SpencePilots, this Valve will accomplish most functions required of IRON RATINGS (Maximum Inlet Conditions) Valve EndsPressure(Temperature) ANSI NPT (450 F) ANSI 125 Flanged ..125 (450 F) ANSI 250 Flanged ..250 (450 F)CAST STEEL RATINGS (Maximum Inlet Conditions) Valve EndsPressure(Temperature) ANSI NPT PSIG ..(600 F) ANSI 150 Flanged.
2 150 (600 F) ANSI 300 Flanged ..300 PSIG ..(600 F) ANSI 600 Flanged ..600 PSIG ..(600 F) 750 F construction available on TO FACE DIMENSIONSOTHER DIMENSIONSABCDEAPPROX. ,150250300600600 NPT1251502503006003/843/8 57/823/4 51/473/814 1/243/8 657/823/423/451/473/814 203/443/8 63/861/227/837/851/277/818 28153/851/2661/261/2735/841/461/487/8232 42627313211/461/263/471/477/877/877/841/ 845/861/291/833363740414511/271/467/873/ 88883/443/851/871/893/4434547515558271/2 81/29101/4101/497/851/453/475/8111/46267 7372788321/2 93/810111/4111/4107/853/477/883/8121/8 82951001001303 10103/4121/4121/4113/465/891/891/4145/8 1101251301401754 117/8121/2121/2141/2143/475/8105/8117/81 81/4 2002102352303105 135/8141/2141/2161/2167/881/2121/2121/22 01/8 2802953153104906 151/81616173/8193/410133/4141/8223/8 3854204554706558
3 192020215/8221/2111/2153/8171/4273/4 657700735710107010 235/82525 28133/4 233/8361/4 1260124014301300 12 261/22828 33157/8 251/4411/2 2070206021452140 SEATREGULATOR SIZEFACTOR3/81/23/4111/411/2221 75 % 50 % 75 % 18335987114187283474 Normal 50 % 1222395876125189316 RATED FLOW COEFFICIENTS (Cv)PRINTED IN 3001F/0707 CABDESD 3001 FRECOMMENDED INSTALLATIONOPERATING PRINCIPLEThe regulator is operated by initial steam or fluid pressure. It isnormally closed, being held so by initial pressure on the discand by an internal main spring. When the pilot is opened (seepilot instructions), initial pressure flows through the pilot to the8B tee.
4 Bleedport 4A restricts the flow and pressure buildsunder the diaphragm and opens the main Valve . The 5A steadiesthe operation of the pressure feeds back through the Control pipe to thepilot diaphragm. As this pressure approaches a balance with thethrust of the adjusting spring, the pilot throttles the loadingpressure. In turn, the main Valve takes a position established bythe loading pressure where just enough steam flows to maintainthe set delivery 1A - Typical InstallationFIGURE 1B - Installation of Integrally Mounted PilotSTART-UP AND SETTINGFIGURE 2On pressure reducing valves like the ED, use by-pass to fill thedelivery system and raise pressure to slightly below normalrequired.
5 Close pilot by releasing compression on adjustingspring. See Figure 2. Open 1/4" Control pipe Valve . Crack outletstop Valve . Crack inlet stop Valve . Blow down :Never open a reducing Valve without positive indication thatthe high side is clear of inlet stop Valve and gradually compress adjusting springuntil the Valve opens and takes Control at desired choke down on the by-pass and open outlet stopvalve until the regulator is on the line. See individual instructionsfor other TEST PROCEDUREI nstall pilot according to instructions. Fully compress pilot springand open inlet and outlet stop valves before filling fill system from inlet or high pressure side of off trapped air.
6 SLOWLY develop test pressure up to300 PSIG MAXIMUM. If a higher presure is requiredCONTACT FACTORY pressures may cause normally accedptable leakage at thediaphragm joint. Consult factory for hydrostatic test for othertypes of the Valve in a straight run of horizontal pipe. Allowheadroom above the Valve for access through the blindflange. Provide clearance for stem withdrawal water hammer and erratic operation by installing trapsto provide proper drainage before and after the Valve andbefore secondary PRV or Control Valve . Avoid damagingeffects of scale and dirt in pipe lines by using a strainer asshown in Figure 1.
7 Provide a 3- Valve by-pass to facilitateinspection without interrupting eliminate excessive noise and erratic regulation with steamand other compressible fluids, enlarge the delivery pipe size toeffect a reasonable flow velocity at the reduced pressure. Atapered transition is recommended. If possible, avoid a sharpturn close to the regulator outlet and a bull-headed teeconnection to the low pressure initial and delivery pressure gages to indicateperformance. If the pressure rating of the delivery system orconnected equipment is less than the initial steam pressure,provide a safety VALVEF lush the piping system thoroughly to clear it of weldingbeads, scale, sand, etc.
8 Mount the main Valve with diaphragmchamber down and arrow on body pointing in the direction offlow. Screwed end valves should be mounted in SIDE MOUNT CONSTRUCTION: Mount the pilot oneither side of the main Valve by means of 1/4" nipple andunion provided. Make this connection on the 1/4" pipe tap atthe inlet of the main Valve as shown in Figure INTEGRAL MOUNT CONSTRUCTION: Remove blindflange on pilot and mount on blind flange of main Valve usingprovided No. 4A bleedport fitting into the 1/8" pipe tap at theoutlet of the main Valve body. Note bleed orifice in this fitting vital to operation of No. 8B tee into 1/8" pipe tap in pilot.
9 Select tap No. 5A elbow containing restriction orifice into 1/8"pipe tap on underside of main Valve diaphragm chamber. Ifthe initial pressure or pressure drop is less than 15 psi, a open elbow is tubing bends as illustrated in Fig. 2. valves withcondensation chamber are fitted up according to Figure PIPEUse 1/4" pipe for this line which connects the pilot diaphragmchamber to the desired point of pressure Control . Take thecontrol at a point of minimum turbulence. Avoid controlimmediately at the Valve outlet or after a turn. When thedelivery pipe expands in size, select a spot at least 4 pipediameters beyond the point of enlargement.
10 Pitch away frompilot to avoid erratic operation and excessive water pockets. Locate delivery pressure gage incontrol pipe to show pressure actually reaching TO OPEN OR SAGGING DELIVERYPRESSURE1. Adjusting spring on pilot may have been tampered Initial pressure may be down due to partially closed supplyvalve, clogged strainer or other Orifice in No. 5A restriction elbow may be plugged. No. 4 Ableedport fitting may have been omitted and an open Control pipe may be plugged. Most likely points of obstructionare at shutoff Valve and entrance to delivery main diaphragm may be broken. Test with air or water TO CLOSE OR OVER-RIDINGDELIVERY PRESSURE1.