Transcription of Accent 1400 Quick Reference - cloud.prentrom.com
1 Accent 1400 Quick Reference Unity 5/28/2015 Accent 1400 Quick Reference Applies to Software Version PRC Tech Support: (800) 262-1990 YouTube video tutorial playlists Terms you need to know: Activity Row A set of buttons located at the top of the screen. This row offers most of the device user s frequently used noun items (fringe vocabulary items). Core vocabulary The bottom remaining rows offer words frequently used to communicate in our language: verbs, pronouns, adjectives, negatives, question words, etc. These keys may also act as category keys that will link to the nouns in the activity row. Pages Pages serve as a warehouse of additional vocabulary items that are less frequently used.
2 You will find the Pages link at the top right corner of the activity row. Tools (to modify device) These keys provide access to the user keys, such as the Toolbox and Setup key. POWER/SLEEP BUTTONS The power/sleep button is on the top of the device. 1. To power on the device, press and hold the power/sleep button. 2. To wake the device from sleep mode, press the power/sleep button. 3. The device should be restarted weekly.* To restart, select Tools, Toolbox, Maintenance Menu, Power Management, Restart, and then Yes. * Recommended: Restart once per week; put to sleep daily. 4. If you don t plan to use the device or want to store it for more than a couple of days, it is recommended to power off the device completely.
3 To do this, select Tools, Shutdown, and then Yes. CHANGING USER AREAS 1. Select Tools, and then Toolbox. 2. Select User Area Menu. Select Switch User Area. 3. Select the User Area (1-6) to switch to and wait until the device returns you to the User Area Menu screen. Select OK. 4. From the toolbox, press Go to Home (blue key). 5. Please note that Replace User Area provides more user area choices and will overwrite an existing user area. CHANGING THE VOICE 1. Select Tools, and then Toolbox. 2. Select Speech Menu. 3. Select Change Voice. 4. Select the desired voice. Wait for it to load. To listen to the voice, select Test Speech. 5. Use the additional keys to adjust the pitch, rate, etc.
4 Of the voice. Select OK and Go to Home. PRONUNCIATION DICTIONARY Teach the device to pronounce a word correctly. 1. Select Tools, and then Toolbox. 2. Select Pronunciation Dictionary. 3. Choose either Main Voice or Prompt Voice. 4. Select Add Pronunciation. 5. Enter the correct spelling of the word. Select OK. 6. Enter the phonetic spelling of the word. To test the pronunciation, select the message window. 7. Select OK, and then OK. 8. From the toolbox, press Go to Home (blue key). DISABLING THE TOOLBOX To disable the toolbox: 1. Select Tools, and then Toolbox. 2. Select Maintenance Menu. 3. Select Disable Toolbox and select Disable under Toolbox.
5 You must enter a password and select OK to disable the toolbox. 4. Remember your password. (see Create Toolbox Disable Override below) 5. Select OK, OK, and then Go to Home (blue key). To enable the toolbox: 1. Select Tools. 2. Enter your password and select OK. 3. Select Toolbox. 4. Select Maintenance Menu. 5. Select Disable Toolbox and select Enable under Toolbox. 6. Select OK, OK, and then Go to Home (blue key). Additional options 1. Select Tools, Toolbox, Maintenance Menu, and Disable Toolbox. 2. Create Toolbox Disable Override: Select this option and then insert a USB flash drive. Override will be placed on the flash drive.
6 Select OK. The device will unlock anytime this USB stick is inserted into the device, without the need to enter a password. 3. Enable or Disable On-Screen Tools Key, Help Button, and/or Pulldown Menu Button. MODIFY USER KEYS The user keys appear after you select Tools. 1. Select Tools, and then Toolbox. 2. Select User Area Menu. 3. Select Modify User Keys. 4. Select the key you want to modify. 5. Select Enter Assignment, Clear Display, and then Insert Tool. 6. Select the tool you want to insert. Select OK. 7. To change the icon and label, select Change Icon and Change Label. 8. Select OK and then OK. 9. From the toolbox, press Go to Home (blue key).
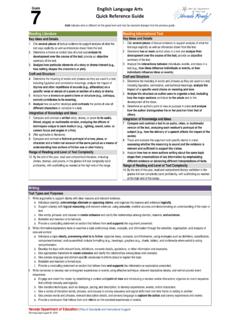
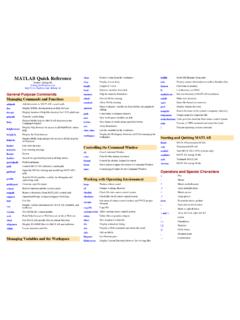
7 Note: Select Clear Key Contents if you want no tool assigned to the User Key. Tools key (on the display) Power/Sleep button Tools key (on front of device) Accent 1400 Quick Reference Unity 2 HIDING/SHOWING KEYS Please note: Use hide/show to limit vocabulary in Unity 1-hit or pages and use vocabulary Builder to limit vocabulary in Unity sequenced. 1. Select Tools, and then select Setup Key. 2. Select Hide/Show Keys at the top right corner of the screen. 3. Select the keys to hide or select Hide All. 4. If you selected Hide All, select individual keys to show by touching them. They brighten. 5. Select the text display area to exit.
8 6. To show all keys, select Show All after step 2. EDITING CORE KEYS 1. Be sure you are looking at the key you want to edit. Select Tools, and then select Setup Key. 2. Touch the core key you want to edit. 3. If you are modifying a speaking key, touch Spell Message or Define Key Function to type text that will appear and be spoken in the display. Be sure to put a space after the last character. Select OK. 4. Select Change Icon (Modify Last Picture) and Change Label. 5. When you are finished, select OK. SETTING UP A KEY 1. Be sure you are looking at the key you want to edit. Select Tools, and then Setup Key. 2. Touch the key you want to edit.
9 3. Select Change Icon. Then do one of the following: A. Spell Icon to Find. Spell what you are looking for. Select OK. Touch the icon you want. B. Plug a USB flash drive with a photo into the device. Select Import Icon. If the content of the flash drive is showing, touch the photo you want to import. If not, select Up Folder to navigate to the flash drive, and then touch the photo you want. Select OK and OK. Select Cancel. The photo will be placed on the key and in the imports folder of the icon dictionary. C.
10 Search for an icon by category. 4. Look to see if the text to speak is correct. If not, select Spell Message or Define Key Function to type text that will appear in the display and be spoken. Be sure to put a space after the last character. Select OK. 5. Check to see if the label is correct. If it isn t, select Change Label, type new label and OK. 6. Select OK or Choose Next Key to Define. CREATING A NEW ACTIVITY 1. Select Tools, and then Toolbox. 2. Select Create Activity. 3. Spell the name of the new activity. Select OK. 4. Select an icon for the activity. 5. Touch a blank key in the activity.