Transcription of Adjustment of the HD8 Carburetor
1 Adjustment of the HD8 carburetors for the BJ8 1. Warm up the car. Make sure all components of the ignition system (timing, plugs, points, and wires) are properly adjusted and working well, and that the valves are adjusted to specification before trying to adjust the carburetors . 2. Remove the four screws attaching the Carburetor suction chambers (piston covers) to each carb; then remove the chambers, piston springs, and pistons. Be careful to keep the parts for each Carburetor separated and do not intermix them, and be very careful not to damage the piston needles. Examine the needles for straightness and damage.
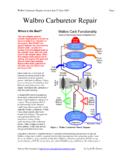
2 Clean parts as necessary to remove oil and grease, dirt, and carbon buildup. 3. Back off the Fast Idle Adjusting Screw (#3 in the photo) for each carb to ensure that neither screw is touching its throttle shaft stop lever. 4. There is an interconnecting shaft between the carburetors that makes both throttle plates open and close together. Loosen the screws/nuts (5/16 ) on the interconnecting shaft clamps so that each throttle plate can be rotated independently of the other. 5. Rotate each throttle plate fully closed by turning its shaft as far as possible (counterclockwise, as viewing the end of the shaft from the front of the car).
3 Each shaft can be rotated and held in the throttle-closed position using the shaft lever (to which is attached the carb return spring). With each throttle plate held fully closed, re-tighten its shaft clamp screw/nut. Note: The head of each clamp screw can be accessed for final tightening by rotating the throttle shaft open to the stops after the clamp screw nut is tightened enough so the clamp doesn t slip on the shaft. Note: There is an extended arm on each interconnecting shaft clamp with a pin that fits into a slot on the carb throttle shaft lever. The pin is smaller in diameter than the slot, so it s possible to adjust the clearance between the pin and slot (by rotating the clamp) to occur at the upper edge of the slot, at the bottom edge, or both.
4 I adjust mine on both carbs so that most of the clearance occurs at the top. Clearance anywhere except at the top will allow some throttle shaft rotation before the throttle plate begins to open. The SU Carburetor manual specifies clearance between the bottom of the pin and the edge of the slot, but this is pretty much impossible to measure due to poor access. 6. Check to see that both throttle plates open together by operating the linkage and noting the movement of the full-throttle stops on the forward side of each Carburetor . Both stops should reach full travel at the same time.
5 7. Using a small straightedge to determine flushness (I use the end of a 6 steel scale), turn the Jet (Mixture) Adjusting Screw (#2) for each Carburetor until the jet is flush with the bridge of the Carburetor (the bridge is the part in the Carburetor throat that the piston sits on when it is down). Turn the Jet (Mixture) Adjusting Screw (#2) counterclockwise to raise the jet (leaning), clockwise to lower it (richening). Once the jet is flush, turn the Jet (Mixture) Adjusting Screw (#2) two and one-half turns clockwise (rich) as an initial setting. Note: to help keep track of the number of turns of the adjusting screws, I find it helpful to paint a small spot on both the screw and the adjacent non-turning surface after the screws are at their initial positions for Adjustment .
6 8. Re-install the Carburetor pistons. With chokes fully off (carb jet levers as far down as they will go), check to make sure that each piston, when raised, falls smoothly and completely to the bridge (you should hear a metallic click). If not, the jet will have to be re-centered.** If piston movement is satisfactory, re-install piston springs and suction chambers. Be sure the parts are reinstalled in the same Carburetor they were removed from. **see procedures following Step 16 for how to re-center the jet in the HD8 Carburetor . 9. As an initial setting, turn the Slow Run Valve (Slow Idle) Adjusting Screw (#1) for each Carburetor clockwise as far as it will go until it bottoms lightly on its seat.
7 Then, turn it back counterclockwise three full turns. 10. Start the engine. Unless you are sure of the accuracy of your tachometer in the dash, you should have an external tachometer connected for making the following adjustments. I bought a tachometer at Sears, but after checking found that my in-dash tachometer tracked the Sears tachometer all the way to 4000 rpm. 11. Ensuring that the engine is fully warmed up, adjust the idle speed to 500 rpm by turning each Slow Run Valve (Slow Idle) Adjusting Screw (#1) clockwise an equal amount. The carburetors should be monitored for balanced (equal) air flow while adjusting the Slow Run Valve (Slow Idle) Adjusting Screw (#1).
8 This can be done by either: listening through a tube to the hiss of air entering the Carburetor throat (hiss should sound the same in pitch and loudness for each Carburetor ); by using the wire guides that come with an Carburetor tuning kit**; or by using a Uni-syn airflow measuring device (available from Moss Motors, etc.). The Uni-syn requires removal of the air filters. ** the wire guides fit into tubular adapters, which go into the piston tubes (where the damper pistons normally go) and are used to give a visual indication of the relative vertical positions of the Carburetor pistons as adjustments are made.
9 The vertical position of a piston depends on the air flow through the Carburetor . When flow is balanced, the wires should line up with each other at the same height 12. With the carburetors synchronized (equal air flow) at 500 rpm, turn the Jet (Mixture) Adjusting Screws (#2) an equal amount (CLOCKWISE for richer, COUNTERCLOCKWISE for leaner) until the fastest idle speed is obtained, consistent with even firing. ** Note: the last time I did this, the initial setting was the best idle speed. Turning the screws (#2) in either direction from the initial setting did not increase the idle speed, but turning them far enough either way would kill the engine.
10 So, it s possible that the initial Adjustment is as good as it gets. ** A Gunson Colortune device can be used for setting the mixture strength instead of this method (and is recommended). This consists of a special sparkplug with a window that allows the mixture to be adjusted according to the color of the flame in the combustion chamber. 13. When the best Adjustment has been found in Step 12, it may be necessary to readjust the Slow Run Valve (Slow Idle) Adjusting Screws (#1) again to achieve the slow idle speed of 500 rpm. 14. Check for proper mixture with the engine at idle by raising the lifting pin on the bottom of each Carburetor about 1/32 inch, one at a time (this is the procedure recommended by the workshop manual).


