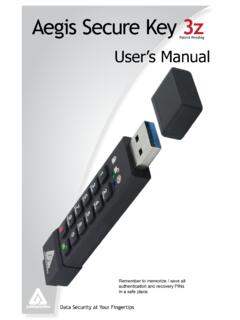
Transcription of Aegis Secure Key 3 - Apricorn
1 Aegis Secure Key to save your PIN in a safe place. If PIN is lost or forgotten, there will be no way to access data on the key. User s ManualData Security at Your FingertipsCopyright Apricorn , Inc 2017. All rights is a registered trademark of Microsoft other trademarks and copyrights referred to are the property of their respective owners. Distribution of modified versions of this document is prohibited without the explicit permission of the copyright holder. Distribution of the work or derivative work in any standard (paper) book form for commercial purposes is prohibited unless prior permission is obtained from the copyright IS PROVIDED AS IS AND ALL EXPRESS OR IMPLIED CONDITIONS, REPRESENTATIONS AND WARRANTIES, INCLUDING ANY IMPLIED WARRANTY OF MERCHANTABILITY, FITNESS FOR A PARTICULAR PURPOSE OR NON-INFRINGEMENT, ARE DISCLAIMED, EXCEPT TO THE EXTENT THAT SUCH DISCLAIMERS ARE HELD TO BE LEGALLY INVALID(Rev 0)
2 05/25/2017 Table of ContentsAbout the Aegis Secure Key 4 PIN Requirements 4 Battery Note 4 Waking the Key 5 First-Time Use 5 Admin Mode 5 LED States and Their Meaning 6 Locking the Key 6 Unlocking the Key 6 Establishing a New User PIN 7 Deleting the User PIN 8 Changing the User PIN 8 Changing the Admin PIN 8 Setting One-Time Use Recovery PINs 9 Using One-Time Use Recovery PINs 9 Setting Read-Only or Read / Write Modes from Admin Mode 10 Setting Read-Only or Read / Write Modes from the User Mode 11 Setting LED Flicker / Button Press Indicator Mode 12 Setting Minimum PIN Length Requirement 12 Setting the Unattended Auto-Lock Feature 12 Setting a Self-Destruct PIN 13 Aegis Secure Key Brute-Force Protection 14 Performing a Complete Reset 15 Initializing after Performing a Complete Reset 16 Hibernating or Logging Off from the Operating System 17 Aegis Secure Key Setup for Mac OS 17 Diagnostic Mode 18 Lock-Override Mode 19 Troubleshooting / FAQs 20-21 Technical Support 22 Warranty and RMA information 2245231 About the Aegis Secure Key must be a minimum of seven digits and a maximum of 16 contain all
3 Sequential numbers ( , 01234567, 9876543)and cannot contain all of the same number ( , 1111111, 2222222.)Note: Sequentially, 0 occurs before 1, not after RequirementsImportant:With its flash key size, the Aegis Secure Key also has relatively small buttons. For greater ease and better control of key commands, enter all PINs and command codes onto the Secure Key s keypad PRIOR to plugging the device into the USB port for use. Failure to do so may damage the USB port and cause the key to not function NoteThe Aegis Secure Key has an internal rechargeable battery with a smart-charging circuit.
4 For safety, each key ships with a partial charge. Before initial use, we recommend plugging the key into a powered USB port for 80 minutes to fully charge the battery. The battery will automatically charge whenever it is plugged into a powered USB port, regardless of its operational mode. In standby mode, the RED LED fades in and out slowly to indicate that it s charging and glows solid RED to indicate that it s fully charged. If the battery is completely discharged, the key will go through a self-test (indicated by a RED, GREEN, and BLUE LED sequence) when plugged into a USB : It s normal for this device to be warm to the touch during UseEach Aegis Secure Key is shipped without a preset Personal Identification Number (PIN) installed on the key.
5 A 7 to 16-digit Admin PIN must be established before the key can be used. This Admin PIN can be used to set any and all of the Admin Mode Features of the key, as well as to access the key s : if you are using the Aegis configurator to set up your Aegis Secure Key or any other Apricorn Secure drive , first ensure that the device to be configured has the configurable logo on the belly label and second, DO NOT perform any of the the following Manual Admin and USER PIN SETUP steps below; The Aegis configurator will execute these setup steps and will only recognize devices in their factory out of box state or devices that have been completely Set Up the Admin PIN:1.
6 Wake up the key by pressing the UNLOCK button. Both the BLUE and GREEN LEDs will glow Press UNLOCK + 9 at the same time. The BLUE LED will glow solidly and the GREEN LED will be Enter the series of numbers that you will use for the Admin PIN (See PIN requirements on p. 4) and press the UNLOCK button.* 4. Re-enter that same PIN and press the UNLOCK button again. The GREEN LED will illuminate for one second followed by the BLUE LED glowing solidly by The key is now in Admin mode and other Admin features can be set ( , adding a User.)6. To exit the Admin mode, press the LOCK button.
7 The key will return to the locked standby state. If no action is taken within 30 seconds, the key will return to its locked sleep state. * GREEN LED will blink if the PIN is accepted; If the PIN is NOT accepted, the RED LED will blink-- return to step 4 to resume the Admin PIN setup the KeyWhen the key is not in use, it will enter a sleep state. While in this state, the key is locked and cannot be accessed. To wake the key so it can accept keypad inputs, press the UNLOCK button once. The RED LED will glow solidly (standby state.) Note: If the key has never been used, the BLUE and GREEN LEDs will glow solidly indicating that the Admin PIN must first be established before the key can be ModeTo set up any of the key s Admin functions, the Admin mode must first be entered.
8 Once in the Admin mode, each of the key s functions can be addressed with the appropriate button com-mands. While in the Admin mode, the data on the key will not be accessible. Prior to your first use of the Aegis Secure Key, you must first set an Admin PIN. Immediately after setting up your Admin PIN, you may then continue setting up other functions. If you do nothing for a period of 30 seconds, the key will revert to its standby state. To re-enter the Admin mode, perform the following steps Press and hold UNLOCK + 0 for five seconds until the RED LED blinks. (This indicates that you can enter the Admin PIN.)
9 2. Enter the Admin PIN and press the UNLOCK Admin Mode is indicated by a solid BLUE To exit the Admin Mode, either allow 30 seconds of inactivity or press the LOCK the KeyPress the LOCK button. When successfully locked, The RED LED will glow solidly, indicating that it s in its standby state. The Aegis Secure Key will not be recognized by the operating system while in its standby : If data is still being written to the key, the Secure Key will wait until that operation is completed and then it will lock automatically. Unlocking the Key1. Press the UNLOCK button to wake the key from sleep (as described above.)
10 The RED LED will glow Enter either a User PIN or Admin PIN and press the UNLOCK button. If the PIN is accepted, the GREEN LED will rapidly blink three times, then will slow down to one blink per second until it s plugged into a USB port, at which time will glow solidly. (If the PIN is incorrect, the RED LED will blink.)3. A blinking GREEN LED indicates that the key is unlocked and ready for use. The key is now ready to plug into a USB port and will function as an external drive . If it s not plugged into a USB port within 30 seconds, the key will lock itself and return to its sleep Fading REDB attery charging (when plugged into USB port)No LEDsKey locked and asleepBlinking REDE rror / incorrect key entry; Mode Not Available; User PIN ChangeSolid REDL ocked / Standby state.