Transcription of AFN7500HD Decoder Troubleshooting Guide IMPORTANT …
1 AFN7500HD Decoder Troubleshooting Guide AFN7500HD Decoder Troubleshooting Guide , 20210201 IMPORTANT Decoder UPDATE This Guide contains a solution for a software glitch that prevents a small number of AFN7500HD decoders from properly locking onto the AFN Ku-band satellite signals. This Guide steps you through the correct procedures for installing the AFN7500HD Decoder , including some simple Troubleshooting steps for correcting issues encountered due to multiple satellite dish and dish Low Noise Blocker (LNB) combinations used by AFN customers worldwide. To begin these steps please ensure the following cables are connected: power, HDMI from the Decoder to the TV, the cable from the satellite dish LNB to the Decoder . Additionally, ensure the Decoder is powered on before proceeding. You will need a formatted USB thumb drive with a minimum capacity of 8GB that does not contain any files.
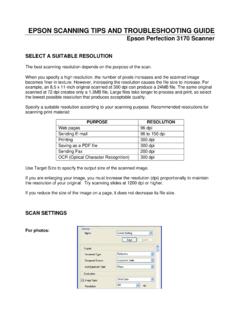
2 If you have a USB thumb drive with files, please copy those files to your computer and ensure no files exist on the thumb drive before proceeding. Operating System Update and Installation Steps 1. Insert the thumb drive into your computer. 2. Click on the link below or copy and paste the entire link into your web browser. 3. Two files will appear at the link, and 4. Download these two files to your USB thumb drive and then eject the thumb drive from your computer. 5. Insert the USB thumb drive into the USB port on the back of the AFN7500HD . 6. Disconnect the power cable from the back of the AFN7500HD . 7. While pressing the UP arrow key on the circular navigation wheel on the front of the Decoder , re-insert the power cable to the back of the Decoder and continue to hold the UP arrow until you see USB displayed on the Decoder and a file loading percentage bar on the TV screen.
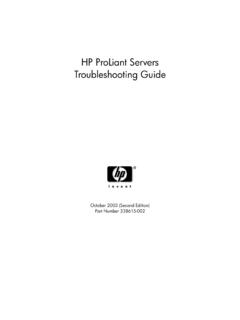
3 The appearance of the percentage bar indicates the Decoder software is being updated. 8. After the software upload is complete the AFN7500HD Decoder will automatically reboot. 9. Remove the USB thumb drive from the back of your Decoder . 10. Once the Decoder completes the reboot it automatically takes you to the Select Time Zone page where you enter the time zone for your area. 11. Once your time zone is entered, you ll be taken directly to the Select Satellite page in the setup menu. (Continued on the next page) AFN7500HD Decoder Troubleshooting Guide AFN7500HD Decoder Troubleshooting Guide , 20210201 Automatic Decoder Setup Steps The Select Satellite screen (below) allows you to automatically load pre-set satellite configurations for your area. The gray bar, displayed below, highlights the current selection.
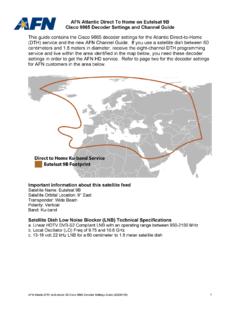
4 The left and right arrows on the gray bar allow you to scroll through the various satellites used by AFN to deliver programming worldwide. Using the circular navigation wheel on your Decoder remote control, select the satellite you use from the list below. Once the correct satellite is selected, press the continue button and the proper settings should automatically load and your Decoder should work. Note: You do not need to adjust the DiSEqC Mode settings. Satellite Name Location Service Specifics AFN ATL E9B (Ku-band) Europe, Central and Southwest Asia Eight-channel Direct to Home AFN PAC KSAT5A (Ku-band) Japan, Korea, Philippines and Eastern China Eight-channel Direct to Home AFN ATL G16 (C-band) Canada, Greenland, Central America, Caribbean Eight-channel AFN Satellite Network (SATNET) AFN ATL SES5 (C-band) Europe, Western Asia, Africa, Eastern South America Eight-channel AFN Satellite Network (SATNET) AFN PAC IS18 (C-band) Eastern and Southeast Asia Eight-channel AFN Satellite Network (SATNET) DTS PAC NSS9 (C-band) Pacific Ocean Region Four-channel Direct to Sailor DTS ALT IS35E (C-band) Atlantic Ocean Region Four-channel Direct to Sailor DTS IOR NSS12 (C-band)
5 Indian Ocean Region Four-channel Direct to Sailor The new AFN Channel Lineup for all viewing areas is on the last page of this Guide . You may have to reboot your Decoder multiple times for the settings to take. To reboot the Decoder , remove the power cable for one minute before reconnecting power to the Decoder . Select your satellite from the list below and then select Continue on the set up menu AFN7500HD Decoder Troubleshooting Guide AFN7500HD Decoder Troubleshooting Guide , 20210201 The Progress screen will display, indicating the Decoder is completing the Decoder configuration. When configuration is complete, the next screen will show that the Decoder is acquiring the AFN services. (Continued on the next page) AFN7500HD Decoder Troubleshooting Guide AFN7500HD Decoder Troubleshooting Guide , 20210201 When you see Services found: ## (shown below), press Continue.
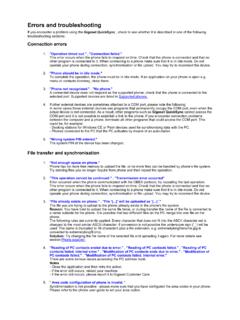
6 Note: The number of Services found will vary depending upon your location and the specific satellite you are receiving the signal from. Press OK to continue, and the Decoder will return to the Satellite Setup menu, with the channel image displayed behind the menu. You can either press Menu twice, or press Exit, and your TV will go to programming .. and you re done! Problems? Contact our AFN Broadcast Center Technologists at DSN: (312) 348-1339; commercial: +1 (951) 413-2339; or email: AFN7500HD Decoder Troubleshooting Guide AFN7500HD Decoder Troubleshooting Guide , 20210201 Direct to Home (DTH) and AFN Satellite Network (SATNET) The eight-channel DTH service TV programming package includes the following channels AFN Pacific TV Services AFN Europe TV Services Decoder Channel Service Decoder Channel Service 02 AFN|prime Atlantic 102 AFN|prime Atlantic 03 AFN|news 103 AFN|news 04 AFN|sports 104 AFN|sports 05 AFN|prime Pacific 105 AFN|prime Pacific 06 AFN|spectrum 106 AFN|spectrum 07 AFN|sports 2 107 AFN|sports 2 08 AFN|family 108 AFN|family 09 AFN|movie 109 AFN|movie 401 Decoder Expired 401 Decoder Expired 402 Test Pattern 402 Test Pattern Direct to Sailor (DTS)
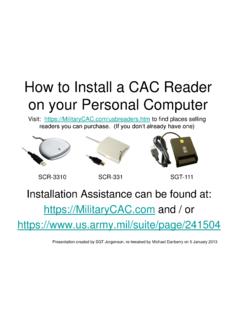
7 The three-channel DTS service TV programming package includes the following channels DTS Pacific Ocean Region DTS Atlantic & Indian Ocean Region Decoder Channel Service Decoder Channel Service 202 AFN|prime 302 AFN|prime 203 AFN|news 303 AFN|news 204 AFN|sports 304 AFN|sports 205 AFN|sports 2 305 AFN|sports 2 For customers in the Eutelsat 9B and Koreasat 5A satellite footprints, you may have to change the polarization from Vertical to Horizontal if the signal is not acquired. Do this only after you ve rebooted the Decoder several times. To change the polarization of your satellite dish LNB, go to the Configure Transponder page and select Polarization. Use the left and right arrows on the highlighted gray bar to change the setting. Highlight Polarization to change the setting between horizontal and vertical