Transcription of Agilent 7890B Gas Chromatograph
1 Agilent 7890B Gas Chromatograph Installation and First Startup Agilent Technologies Notices Agilent Technologies, Inc. 2015 Warranty Safety Notices No part of this manual may be reproduced The material contained in this document is in any form or by any means (including electronic storage and retrieval or provided as is, and is subject to being WA RNING. changed, without notice, in future editions. translation into a foreign language) Further, to the maximum extent permitted A WARNING notice denotes a hazard. without prior agreement and written by applicable law, Agilent disclaims all It calls attention to an operating consent from Agilent Technologies, Inc. as warranties, either express or implied, with governed by United States and procedure, practice, or the like that, if regard to this manual and any information international copyright laws.
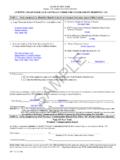
2 Not correctly performed or adhered contained herein, including but not limited to, could result in personal injury or to the implied warranties of Manual Part Number merchantability and fitness for a particular death. Do not proceed beyond a purpose. Agilent shall not be liable for WARNING notice until the indicated G3430-90056 errors or for incidental or consequential conditions are fully understood and damages in connection with the met. Edition furnishing, use, or performance of this document or of any information contained Third edition, October 2015 . herein. Should Agilent and the user have a CAUTION. Second edition, December 2013 . separate written agreement with warranty First edition, January 2013.
3 Terms covering the material in this A CAUTION notice denotes a hazard. Printed in USA document that conflict with these terms, It calls attention to an operating the warranty terms in the separate procedure, practice, or the like that, if Agilent Technologies, Inc. agreement shall control. not correctly performed or adhered to, 2850 Centerville Road could result in damage to the product Wilmington, DE 19808-1610 USA. or loss of important data. Do not proceed beyond a CAUTION notice until the indicated conditions are fully 412 understood and met. 800 820 3278. Contents 1 Installing the GC. Overview of Installation 8. Purpose of this procedure 8. Customer responsibilities 8. About Agilent 's installation service 8.
4 Tools and additional parts required 9. Performing checkout 9. System installation 9. The 7890B GC 11. Unpacking 12. Step 1. Place the GC on the bench 13. Step 2. Verify line voltage, voltage settings, and power cord. 14. Power consumption 14. Power cords available 15. Grounding 19. Line voltage 19. Line power cord terminations 19. Step 3. Connect the power cord and turn on the GC 20. Step 4. Connect gases and traps 22. Install the gas regulators 22. Connect the tubing to the gas source 24. Install traps 25. Supplied fittings 26. Plumb to EPC flow modules 26. Install Aux EPC module frits for your application 30. Install hydrogen sensor calibration gas 31. Step 5. Leak test all connections and set source pressures 33.
5 Set source gas pressures 35. Step 6. Vent ECD or uncombusted hydrogen to a fume hood 36. Step 7. Connect cryogenic cooling (if present) 37. Connecting liquid carbon dioxide 38. Connecting liquid nitrogen 40. Connecting air to the multimode inlet 41. Step 8. Connect valve actuator air (if present) 42. Step 9. Install inlet checkout parts 43. Step 10. Install ALS, if ordered 44. Agilent 7890B Installation 3. Step 11. Connect the external cables 45. Back panel connectors 45. Connecting cables 48. Labeling BCD and EVENT cables 50. Configuring the GC IP address 50. GC / MS / Agilent data system / ALS 52. Additional cabling configurations 52. Step 12. Finish configuring communications 53.
6 Configuring GC-MS communications (5977A, 7000C, 7010) 53. Configuring GC-MS communications (5877B) 56. Configuring GC-HS communications 56. Step 13. Calibrate the Hydrogen Sensor 58. Step 14. Configure the date/time, pressure units, and the checkout column 59. Date and time 59. Pressure units 59. Checkout column 59. Step 15. Install the checkout column to the inlet and condition 61. Step 16. Bakeout the detector 63. Step 17. Cool the detector and complete column installation 64. Step 18. If appropriate, update firmware 65. GC firmware 65. PIDs 66. Step 19. Transfer the checkout sample to a screw-top sample vial 67. Step 20. When the system stabilizes, run one injection 68. Step 21. Evaluate Results 69.
7 Prepare for the Next Analysis 70. A Making Swagelok Connections Making Swagelok Connections 72. Using a Swagelok Tee 75. 4 Agilent 7890B Installation B Cabling Diagrams and Remote Start/Stop Using the Remote Start/Stop Cable 78. Connecting Agilent products 78. Connecting non- Agilent products 78. Multi-instrument Cabling Examples 81. GC / ALS / Non- Agilent Data System 81. GC / 3395A/3396B Integrator / ALS 82. GC / 3396C Integrator / ALS 83. Example: Using a Y-Cable in a setup (GC/MSD/Data System/Headspace Sampler) 84. GC / External Events (unspecified, non- Agilent instrument) 85. Cable Diagrams 86. Analog signal cable, general use, G1530-60560 86. Agilent analog signal cable, G1530-60570 87.
8 Remote start/stop cable, general use, 35900-60670 87. Agilent APG remote start/stop cable, 03396-61010 88. Agilent APG remote start/stop cable, G1530-60930 89. Agilent remote start/stop Y-cable, G1530-61200 89. BCD cable, G1530-60590 90. BCD cable, G1530-61100 91. External event cable, G1530-60590 92. External valve cable, G1580-60710 93. Pulser module power supply cable, G1580-60730 94. Agilent 7890B Installation 5. 6 Agilent 7890B Installation Agilent 7890B Gas Chromatograph Installation and First Startup 1. Installing the GC. Overview of Installation 8. The 7890B GC 11. Unpacking 12. Step 1. Place the GC on the bench 13. Step 2. Verify line voltage, voltage settings, and power cord.
9 14. Step 3. Connect the power cord and turn on the GC 20. Step 4. Connect gases and traps 22. Step 5. Leak test all connections and set source pressures 33. Step 6. Vent ECD or uncombusted hydrogen to a fume hood 36. Step 7. Connect cryogenic cooling (if present) 37. Step 8. Connect valve actuator air (if present) 42. Step 9. Install inlet checkout parts 43. Step 10. Install ALS, if ordered 44. Step 11. Connect the external cables 45. Step 12. Finish configuring communications 53. Step 13. Calibrate the Hydrogen Sensor 58. Step 14. Configure the date/time, pressure units, and the checkout column 59. Step 15. Install the checkout column to the inlet and condition 61. Step 16. Bakeout the detector 63.
10 Step 17. Cool the detector and complete column installation 64. Step 18. If appropriate, update firmware 65. Step 19. Transfer the checkout sample to a screw-top sample vial 67. Step 20. When the system stabilizes, run one injection 68. Step 21. Evaluate Results 69. Prepare for the Next Analysis 70. This section contains installation procedures for the Agilent 7890B GC. Depending on the ordered options, some steps are optional, such as plumbing cryogenic cooling or valve actuator air. Instructions for connecting cables from the GC to other instruments in a typical 7890 Series system are included here and in Appendix B, Cabling Diagrams and Remote Start/Stop.". Agilent Technologies 7.