Transcription of Alternator Removal and Installation Instructions
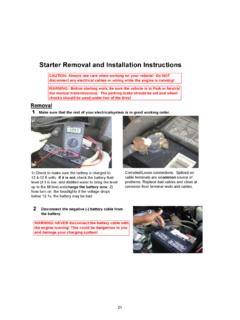
1 Alternator Removal and Installation Instructions CAUTION: Always use care when working on your vehicle! Do NOT. disconnect any electrical cables or wiring while the engine is running! Removal 1 Make sure that the rest of your charging system is in good working order. Fusible Link 1) Check to make sure the battery is Check fuses and fuseable links Corroded/Loose connections. Spliced on charged to volts. If it is not, (under hood, under dash and in- cable terminals are a common source of check the battery fluid level ( if possible) and line).
2 With fusible links look for a problems. Replace bad cables and clean charge the battery soft spot in the cable. Replace any all corrosion from terminal ends and now. 2) Now turn on the headlights if the fuses or fusible links as necessary. cables. voltage drops below , the battery may be bad. CAUTION: A defective or discharged battery can damage your new Alternator ! IMPORTANT: Check to see if your Alternator is externally regulated (look for a label on the outside of your new Alternator ). Check the operation of the external regulator, per the manufacturer's Instructions (replace as necessary).
3 2 Disconnect the negative (-) battery cable from the battery. WARNING: NEVER disconnect the battery cable with the engine running! This could be dangerous to you and damage your charging system! 3 Loosen or remove belt. With adjustment ear on Alternator -- 2 1) Loosen bolt in adjustment ear, 2). rotate Alternator to create enough slack to remove the belt from the 1 Alternator pulley. NOTE: If the belt will not go slack, loosen the pivot bolt at the bottom of the Alternator . Then pull on the 16. 3 cont. With automatic tesioner--Using a long handled wrench, 1) pry back the tensioner arm to create slack in the belt.
4 2) Remove the belt. 1 NOTE: In the photo the wrench is installed to the center nut of the 2 tensioner pulley. Many tensioners have a square hole in the tensioner arm and require a breaker bar to pry the arm back. With manual belt tensioner-- 1) Loosen the lock nut in the center of the 2. pulley. 2) Then loosen the adjusting bolt until enough slack has been created to remove the 1 Loosen belt from the Alternator lock nut pulley. 4 Remove all wire/cable connections on the Alternator . 1) Remove the BAT (+) cable by removing the retaining nut as shown.
5 2. 2)Where plugs are used most have locking tabs. Apply pressure to the lock 1. tab while pulling gently. 5 Remove mounting bolts or hardware and remove Alternator from vehicle. 17. 6 Make sure you have the correct part number for your vehicle. Hold the two alternators up side by side and inspect for differences in the "Key Check Points". Key Check Points Is this hole the same size and Does your Alternator thread type as the one for the require any additional Alternator coming off your car? mounting points? (check all mounting holes). Does the plug Does the pulley have the look the same?
6 Same number of grooves? Is the distance between the feet Is the pulley height or the width of the foot (1 foot the same? designs) the same? CAUTION: Some alternators may look different, but may be correct. If you are not sure you have the right unit, call the MPA Technical Support Line at (800)228-9672. Installation WARNING: Before starting work, be sure the vehicle is in Park or Neutral (for manual transmissions). The parking brake should be set and wheel chocks should be used under two of the tires! 7 Mount Alternator . Position unit on Alternator bracket and install mounting hardware.
7 For units with automatic belt tensioner, torque bolts securely. For alternators with adjustment ear or manual tensioner, install mounting bolt(s) finger tight only (at this time). 8 Install Belt. CAUTION: Check belt condition by turning the belt inside out. Belts need to be changed a minimum of every 60,000 miles or 5 years which ever comes first. If the belt is frayed, has cracks, glazing (shiny), or irregular wear, CHANGE IT NOW. a) For those vehicles with adjustment ear on Alternator -- 1) Using a pry bar between the front housing of the Alternator and engine block, apply just enough force to achieve the correct belt tension per the manufacturer's requirements.
8 2) Tighten the bolt on the adjustment ear. Remove the pry bar and 2. tighten the remaining mounting bolt(s). 1. 18. 8 cont. b) With automatic tensioner-- 1) Loosely route the belt per the Under hood decal, leaving the belt off the most easily accessible pulley. 2) Position a wrench or breaker bar on the tensioner. 3) Pull the tensioner arm back to create enough slack to slip belt over the last pulley. 2. 3. 1 (example only). c) With manual tensioner--. 1). Place the belt over the correct pulleys and tighten the tensioner adjusting bolt until belt tension 1 meets the manufacturer's requirements.
9 2) Then tighten 2. the lock nut and Alternator mounting bolt(s). HINT(for manual tensioners and those with adjustment ear): When the manufacture's belt tension specifications are unavailable, check the deflection. This is done by applying about 20 lbs. of finger pressure to the belt between the two pulley's that are furthest apart. A correctly adjusted belt will usually deflect about a 1/2". This tension must be re-checked /adjusted after the engine has run for 15 minutes. 9 Re-connect all the cables and harnesses to the back of the Alternator .
10 Inspect all wire, cable and connectors for cracks or damage. Replace as necessary. When a harness is provided with your new Alternator , ALWAYS replace. CAUTION: Do not over tighten battery post nut. (Torque to 50-70 inch/lbs.). 10 Re-connect the battery (-) cable and start the engine. Allow the engine to idle for 15 minutes. Operate the engine at 2000 rpm (in Park, or Neutral (for manual transmissions) check the output with a voltmeter. The voltage reading should be volts. If it is outside this range see Basic Troubleshooting below. REMINDER: Re-check belt tension after you turn off the engine, now that the vehicle has been operating for 15 minutes.)