Transcription of APA Format (7th Edition) in Microsoft Word
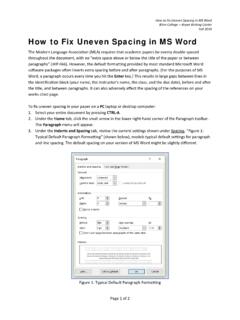
1 APA Format (7th Edition) in Microsoft Word Opening Microsoft Word On the computer desktop, double click Microsoft Word. (Or on the Taskbar at the bottom of the screen, click the Microsoft Word icon.). Setting Up the Paper in APA Format Click the Line Spacing button in the Paragraph group. Choose (If you do not see the Line Spacing button, click the Home tab.). If Remove Space After Paragraph is at the bottom of the Line Spacing drop-down menu, click on it. If necessary, click the arrow next to the Font box, and choose Times New Roman. Click the arrow next to the Font Size box and choose 12. Line Spacing Font Button settings Setting Defaults To set the above font and paragraph settings as defaults (automating settings), go to Font and select Set as Default and, under Paragraph Settings, select Set as Default.
2 Once you set your font and paragraph settings as default, they will be the automatic font and paragraph setting for each new document you open. Sierra College Writing Center. This handout may be freely reproduced for educational purposes only. Click the Insert tab. Click Page Number, choose Top of Page, and then choose Plain Number 3. If the page number is not in Times New Roman, highlight it, click on the Home tab, and change the font and size. Double click below the dotted line or click Close Header and Footer. All the pages will be automatically numbered correctly. 2. Title Page Click the Center button in the Paragraph group, as well as the Bold button in the Font group.
3 Type the title of your essay. (Capitalize the first letter of each main word.) Press the Enter key twice. Unselect the Bold button and type your full name. Press the Enter key once. Type the Department name, followed by a comma and Sierra College. Press the Enter key once. Write the full name of the course. Press the Enter key once and write your professor's name. Press the Enter key once. Type the date. The information should be roughly centered on the page. 3. Abstract Some instructors require an abstract. The abstract should be the second page, after the title page. Click the Bold button the Font group and the Center button in the Paragraph group.
4 Type Abstract. (Capitalize the first letter.) Press the Enter key once. Click the Align Text Left button (to the left of the Center button), deselect the Bold button, and you are ready to type the text of your abstract. Your Essay Begin your essay on the page following the abstract. (If your instructor does not require an abstract, your paper will begin after the title page). Click the Bold button in the Font group and the Center button in the Paragraph group. Type the title of your essay. (Capitalize the first letter of each main word.) Press the Enter key once. Click the Align Text Left button (to the left of the Center button) and deselect the Bold button.
5 Press the Tab key once, and you are ready to type the first paragraph of your paper. 4. NOTE: One-inch margins are the default (automatic) setting. However, if you need to set the margins, click the Page Layout tab, click Margins, and choose Normal. Never use the ruler to set the margins. Saving the Paper Click the File tab, and choose Save As. At the top of the window, choose where you want to save your paper, for instance, on your USB memory stick (flash drive). Use the buttons on the left to navigate. In the File name box near the bottom of the window, you can type a short name for your file. You can choose to save in a different Format in the Save as type box.
6 Rich Text Format (RTF) is a good choice if you use another computer that does not have Microsoft Word. Click Save. 5. Updated March 2021. The instructions on this handout apply to Microsoft Word 2019 and Office 365. Your desktop may look different depending on your computer's settings, as well as the version of Word. 6.