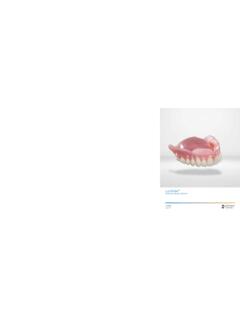
Transcription of Atlantis® Conus concept - Dentsply Sirona
1 Clinical and laboratory manualAtlantis Conus conceptAtlantis Conus concept Atlantis Conus concept is a conometric solution for patient-specific, non-resilient, yet removable prostheses that provide patients with the stability, comfort, and palate-free option of a fixed restoration with the ease of maintenance of a removable innovative friction-retained solution is compatible with all major implants systems*, providing edentulous patients with optimal comfort, ease of use and function.*Refer to Atlantis abutments implant compatibility chartTo improve readability for our customers, Dentsply Sirona does not use or in body copy. However, Dentsply Sirona does not waive any right to the trademark and nothing herein shall be interpreted to the illustrations are not to for fully edentulous patients 4 Atlantis Conus concept 4 Treatment objectives and requirements 5 Clinical and laboratory proceduresAtlantis Conus Abutment 6 Impression and model 6 Ordering 6 Design and production 7 All- acrylic prosthesis 8 Abutment installation using Atlantis Insertion Guide 8 SynCone cap pick up 10 Metal-framework prosthesis 12 Framework fabrication 12 Intraoral bonding 14 Finishing and delivery 16 AddendumCleaning and sterilization 18 Order SynCone products 18 Other design options 18 CONTENTSA tlantis 3 Introduction Edentulism is a handicap that affects millions of people all over the world.
2 In addition to functional disorders, it is well documented that many individuals with complete dentures also experience nutritional deficiencies, altered self-esteem and quality of life, psychosocial disorders, and systemic-related on the clinical situation, patient economics, and expectations for function and esthetics, there are several treatment options for the fully edentulous patient. A non-resilient, implant-supported, removable dental prosthesis can be an economical solution that delivers comfort and confidence with easy hygiene and restoration with conometric retentionA conometric dental prosthesis is an implant-supported solution that uses a tapered abutment design to retain a cap on the abutment by surface abutment design and manufacturing standards provide a non-resilient prosthesis with the functional stability of screw- and cement-retained patient can remove the prosthesis for easy oral hygiene which is necessary even when horizontal and vertical extensions are required for optimal Conus concept Atlantis Conus concept is a conometric solution that uses Atlantis Conus abutments and prefabricated SynCone caps for providing removable, friction-retained, cost-effective.
3 Non-resilient dental Conus AbutmentPatient-specific Atlantis Conus abutments are individually designed using the proprietary Virtual Atlantis Design (VAD) software in relation to the space needed for the final prosthesis while ensuring that all abutments are parallel, and that each of their restorative margins are as close to the soft tissue as capsAtlantis Conus Abutment is designed to fit the SynCone 5 caps. The SynCone caps are available in two exterior designs: With retention for seating into an acrylic temporary prosthesis Without retention for precise seating into a frameworkNote: When planning the prosthesis, please note that variations in height can occur when a SynCone cap is seated on an Atlantis Conus Abutment, due to machining tolerances. The intraocclusal space is the key and must be adequate for the abutment, coping, acrylic and denture caps are prefabricated and available in two exterior Conus abutments are designed to ensure abutment parallelism and to fit SynCone caps, and are delivered with an mandatory Atlantis Insertion Guide.
4 The notch acts as rotational key to the guide and the dimple as a confirmation that the abutment is placed correct into the Editor image. Red lines show the variations in in designConometric solutions provide the unique combination of removable ease and fixed for fully edentulous patientsDimpleNotch4 Treatment objectives and requirementsTreatment objectives and requirementsThe following guidelines must be followed to ensure a conometric dental prosthesis provides optimal esthetics function, and stability:Number of implantsFavorable load distribution should be managed through the number and distribution of implants. Minimum of four implantsDistribution of implantsIn all cases, implant placement should provide a load distribution similar to fixed bridge solutions. When possible, place implants in the canine and first molar areas Minimize cantilevers.
5 Use traditional criteria of cantilever as with fixed bridge solutions, taking into account the anterior-posterior (AP) spreadAbutment planning Relate the abutments to the occlusal plane of the prosthesis Limit angulation of implants to less than 30 degrees Plan for a vertical path of insertionVertical height requirements A minimum of mm (providing mm for components and 5 mm for materials) For prostheses with a metal framework, include an additional mm for a total minimum of 12 mmMaterial optionsA conometric, implant-supported prosthesis can be made of all acrylic or acrylic with a metal framework to allow maximum reduction of horizontal and vertical acrylic extension Implant placementStart with a denture that provides the proper vertical dimension of occlusion (VDO), maxillary-mandibular relations (MM), and esthetics.
6 Plan implant and abutment placement based on the desired position of the prosthetic teeth and the patient s existing can be accomplished in the following manner: Duplicate the patient s existing or new complete denture in radio-opaque resin for use as a radiographic template Take a CBCT and format ( , SIMPLANT) Base implant location on the anatomy, functional load support, occlusal plane, and vertical height requirements of the cap and restorative material (minimum 12 mm)For more information, refer to the Atlantis Conus concept brochure and Atlantis patient-specific abutments - Design guide .Always check occlusal space carefully, especially for shallow-placed implants. More information regarding recommended space, on page 8 and of distribution of implantsNote: Atlantis Conus abutments are designed to compensate for implants placed at an angle.
7 The height of the abutment sides may therefore vary and the surface of the abutment may be exposed even when the cap is fully level impression The implant level impression should be made with an individual, rigid the implant pick-up/implant transfer with manual tightening. Apply the impression material on the implant pick-up/implant transfer separately. Place the tray, filled with impression material. Send the impression with the pick-ups/ transfer and replicas in place, to the dental laboratory for casting the model with implant the healing of a master model Prepare the impression with a removable soft tissue mask by applying silicone around the implant replica the model using dental stone Class IV. Ensure sufficient height to cover the lower part of the implant analog with plaster. Then, undo the transfer screws and remove the : A diagnostic wax-up must be provided for all Atlantis Conus concept Enter your order in Atlantis WebOrder ( ), and personalize the design to the patient s specific needs by modifying the abutment design preferences.
8 Print and send the order ticket with the models in an Atlantis CaseSafe to the Atlantis manufacturing facility or use Atlantis lab-based scanning to transfer the digital information for : Please refer to Atlantis WebOrder user guide for detailed procedure Laboratory procedureOrdering Atlantis Conus Abutment: orderingCourtesy of Dentist Claudia Mrosek, SwedenDental technician Jans St ckel, Sweden6 Design and productionThe Atlantis Editor is a software tool that makes it possible to both view and make limited edits to the proposed abutment design, which can be visulized in virtual design of the abutments can be viewed in different layers and from various angles. The wax setup can also be displayed for review of the abutments in relation to the desired prosthetic more information, refer to Atlantis Editor manual.
9 Atlantis Conus Abutment: design and productionDesign and production Case models are scanned and generated into 3D imaging that is then used for the individual design of the abutments using proprietary Virtual Atlantis Design (VAD) scanned cases are submitted directly for approval of the abutment design (if requested), the Atlantis abutment is manufactured, inspected and and approval Display the SynCone caps in Atlantis Editor and control the height. Check the box Show caps in the menu to the mesial-distal (MD) angle and facial-lingual (FL) angle are used to adjust the common path of insertion for all abutments at review the SynCone caps and the wax-up in different views to ensure there is sufficient space for the the clearance between the SynCone cap and the occlusal plane; recommended space is 5 procedure7 All- acrylic prosthesisAll- acrylic prosthesis: abutment installationClinical procedureAbutment installation Remove the healing abutment, and prepare for the Atlantis Conus abutments are delivered with an mandatory Atlantis Insertion Guide.
10 The abutments include a notch that acts as a rotational key to the guide and a dimple as a visual Insertion Guide Place abutments into the guide and turn it until it sinks or locks into the correct position. Once the abutment is keyed into the guide, verify that the dimple on the abutment is aligned with the window in the guide. If the dimple is visible in the window, the abutment is properly some cases, it may be difficult or impossible to use the guide to place all abutments simultaneously due to non-parallel implant installation. In this case, it may be easier to use the guide to place one or two abutments at a time, starting with the abutments that have the largest implant angle installation Install the Atlantis Conus abutments according to the to the value as recommended by the implant all abutments have been properly placed, the guide should easily fit onto all abutments : Atlantis Conus abutments are designed to compensate for implants placed at an angle.