Transcription of BALL VALVE TROUBLESHOOTING GUIDE - Spears …
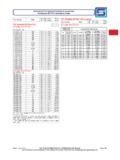
1 134 ball VALVE TROUBLESHOOTING GUIDES pears True Union, Single Entry and Compact ball valves are designed and produced for trouble-free operation and use. However, certain aspects of installation and application can result in VALVE GUIDE identifies some of the more common problems encountered and their necessary corrective actions. Such problems have been categorized as External Leaks, Internal Leaks, Frozen Movements and Structural LeaksLocationPossible CauseCorrective ActionAt Thread/Socket ConnectionsAt Union NutsAt StemImproper solvent or improperly applied thread sealant; incompatible sealant (paste).Over-tightened thread joint splitting VALVE support splitting connector or damaged O-ring; particles in O-ring contraction pulling end connectors; improper end connector Union or pinched seal carrier stem end connector(s) according to installation threads for proper size; replace or thread connection according to proper procedures; check paste cracked end connector(s).
2 Replace cracked end connector(s). Add support on each side of system alignment - end connector(s) must be parallel. Check for adequate VALVE VALVE and inspect O-ring for physical or chemical damage. Check O-ring compatibility, replace accordingly. Clean and re-seat thermal variations; anchor pipe each side of VALVE ; install expansion loop. Correct and disassemble seal carrier; re-seat or replace and disassemble VALVE stem; inspect for physical or chemical damage. Check O-ring compatibility, clean and replace Movements unable, or very difficult, to open/close; sometimes accompanied by stem break (shear) Possible CauseCorrective ActionInternal Obstructions; Sediment or Particle Buildup; Solvent Cement on BallOver-tight Seal CarrierRemove VALVE and check for solids, debris or solvent cement deposits blocking the ball or VALVE interior.
3 Check for sediment particles lodged around ball -to-seat contact areas. Remove stem and check for the same. Clean and valves - remove VALVE ; slightly loosen seal carrier (located on inlet end of body).Single Entry valves - slightly loosen single Union : Generally only a slight adjustment is required (either VALVE ). A properly adjusted VALVE should have significant resistance to operation without Attack (generally appears as distortion, peeling, etching or bleaching of ball sealing surfaces or other internal components)Check VALVE material (PVC, CPVC) chemical compatibility with system fluids. Be sure to consider operating temperatures with this Leaks In-line Leakage Past VALVE Possible CauseCorrective ActionBall obstructionBroken StemCheck that the VALVE is in its full-closed position.
4 If not, remove VALVE and check for solids blocking the ball port. Clean and reinstall end connector and check for ball rotation while operating VALVE . Replace as Carrier LooseTrue Union valves - remove VALVE ; CAREFULLY tighten seal carrier (located on inlet end of body).Single Entry valves - CAREFULLY tighten single Union : Generally only a slight adjustment is required (either VALVE ). A properly adjusted VALVE should have significant resistance to operation without binding - AVOID OVER-TIGHTENING!PTFE Seat Damage or Debris LadenRemove and disassemble VALVE seats. Check for excessive debris and physical damage (nicks, cuts, scoring, etc.). Clean and replace as O-ring Displaced, Damaged or Debris LadenRemove and disassemble VALVE seat O-rings; check for physical or chemical damage.
5 Check O-ring chemical compatibility; clean and replace accordingly. Check for excessive system flow DamagedRemove and disassemble VALVE ball . Check for physical damage (excessive nicks, scoring, etc.) at seat sealing surface (perpendicular to ball port). Clean surface; replace ball if nec-essary. Check for chemical damage and VALVE material (PVC, CPVC) (glue) Contamination from Installation SpillageRemove VALVE and check for glue deposits on ball or seat areas. Clean, if possible; excessive damage may require component Damage(component distortion)Check system operating temperatures, external heat sources (including direct sun), and heat generated from system design or VALVE VALVE TROUBLESHOOTING GUIDE136 ball VALVE TROUBLESHOOTING GUIDENOTES: Certain corrective actions of this GUIDE may not be feasible with the Compact BallValve (sealed unit).
6 Improper system operating temperatures and chemical incompatibility can cause a variety of functional and structural failures. Be sure to use proper VALVE material-types for both temperature and chemical resistance. Most VALVE problems are traceable to improper system design or installation. Be sure to have all design performed by a qualified Engineer and installation made by properly trained personnel. Spears VALVE Installation Instructions and Maintenance/Service Procedures should be followed in conjunction with all corrective Breakage LocationPossible CauseCorrective ActionHandle brokenBody BreakFrozen internal VALVE Frozen Movements section.
7 And correct and correct system pressures and surge pressures; check for entrapped system alignment - end connector(s) must be system support on each side of chemical compatibility of system StrippedOverextending open/close exposure to direct-sunlight has soft-ened handle or screen VALVE from direct-sun Sheared / BrokenFrozen movements; external Frozen Movements Union NutNut has been over tightened to draw-up or align end-connectors; external VALVE internal pressure / Hydraulic ShockAdjust spacing between end-connectors for proper VALVE lay-lengths. Check system alignment - end connector(s) must be system support on each side of system pressures and surge pressures; check for entrapped Connector BreakSystem misalignment; external thread-joint VALVE system alignment - end connector(s) must be new end connector according to installation system support on each side of VALVE .