Transcription of BASIC ELECTRONIC EXPERIMENTS
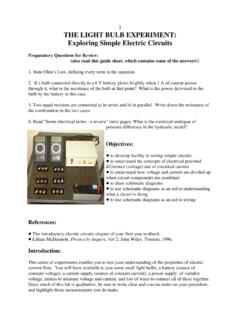
1 BASIC . ELECTRONIC . EXPERIMENTS . MODEL PK-101. TRANSFORMS ANY STANDARD. BREADBOARD INTO AN ELECTRONIC . LEARNING CENTER! Perform 50. EXPERIMENTS ! Build an ELECTRONIC Key- board, ELECTRONIC Kazoo, Battery Tester, Finger Touch Lamp, Burglar and Water Alarms, a Siren, a Magnetic Bridge, and a whole lot more! No soldering or tools required, all parts are included! (Requires a breadboard and a 9V battery or power supply.). ELENCO . Copyright 2011, 1999 by ELENCO All rights reserved. Revised 2011 REV-F 753064. No part of this book shall be reproduced by any means; ELECTRONIC , photocopying, or otherwise without written permission from the publisher. In this booklet you will learn: The BASIC principles of electronics.
2 How to build circuits using a breadboard. How all of the BASIC ELECTRONIC components work and how to read their values. How to read ELECTRONIC schematics. How to design and troubleshoot BASIC ELECTRONIC circuits. How to change the performance of ELECTRONIC circuits by changing component values within the circuit. TABLE OF CONTENTS. Parts List Page 3 Introduction to Inductors and Transformers 40. Answers to Quizzes 3 Test Your Knowledge #2 41. Introduction to BASIC Components 4 Experiment #27: The Magnetic Bridge 42. Experiment #1: The Light Bulb 8 Experiment #28: The Lighthouse 43. More About Resistors 10 Experiment #29: ELECTRONIC Sound 44. Experiment #2: Brightness Control 12 Experiment #30: The Alarm 46.
3 Experiment #3: Resistors in Series 13 Experiment #31: Morse Code 47. Experiment #4: Parallel Pipes 14 Experiment #32: Siren 48. Experiment #5: Comparison of Parallel Currents 15 Experiment #33: ELECTRONIC Rain 49. Experiment #6: Combined Circuit 16 Experiment #34: The Space Gun 50. Experiment #7: Water Detector 17 Experiment #35: ELECTRONIC Noisemaker 51. Introduction to Capacitors 18 Experiment #36: Drawing Resistors 52. Experiment #8: Slow Light Bulb 20 Experiment #37: ELECTRONIC Kazoo 54. Experiment #9: Small Dominates Large 21 Experiment #38: ELECTRONIC Keyboard 55. Experiment #10: Large Dominates Small 22 Experiment #39: Fun with Water 56. Experiment #11: Make Your Own Battery 23 Experiment #40: Blinking Lights 57.
4 Test Your Knowledge #1 24 Experiment #41: Noisy Blinker 58. Introduction to Diodes 24 Experiment #42: One Shot 59. Experiment #12: One - Way Current 25 Experiment #43: Alarm With Shut - Off Timer 60. Experiment #13: One - Way Light Bulbs 26 Experiment #44: The Flip - Flop 61. Introduction to Transistors 27 Experiment #45: Finger Touch Lamp With Memory 62. Experiment #14: The ELECTRONIC Switch 28 Experiment #46: This OR That 63. Experiment #15: The Current Amplifier 28 Experiment #47: Neither This NOR That 64. Experiment #16: The Substitute 29 Experiment #48: This AND That 65. Experiment #17: Standard Transistor Biasing Circuit 30 Experiment #49: Audio NAND, AND 66. Experiment #18: Very Slow Light Bulb 31 Experiment #50: Logic Combination 67.
5 Experiment #19: The Darlington 32 Test Your Knowledge #3 68. Experiment #20: The Two Finger Touch Lamp 32 Troubleshooting Guide 68. Experiment #21: The One Finger Touch Lamp 33 Definition of Terms 69. Experiment #22: The Voltmeter 34. Experiment #23: Volt Battery Tester 36. Experiment #24: 9 Volt Battery Tester 37. Experiment #25: The Battery Immunizer 38. Experiment #26: The Anti-Capacitor 39. THE EXPERIMENTS IN THIS BOOKLET REQUIRE A BREADBOARD OR. CAN BE DONE ON THE ELENCO XK-150, XK-550, OR XK-700 TRAINERS. 2. PARTS LIST. Quantity Part Number Description r1 134700 470 Resistor, r1 141000 1k Resistor, r1 143300 Resistor, r1 151000 10k Resistor, r1 153300 33k Resistor, r1 161000 100k Resistor, r1 171000 1M Resistor, r1 191549 50k Variable Resistor, lay-down, with dial r1 235018 F Disc Capacitor r1 244780 F Disc Capacitor r1 271045 10 F Electrolytic Capacitor r1 281044 100 F Electrolytic Capacitor r1 314148 Diode, 1N4148.
6 R3 323904 Transistor, NPN, 2N3904. r2 350002 Light Emitting Diodes (LEDs). r1 442100 Transformer r1 540100 Switch, push-button r1 590098 9V Battery Clip r1 590102 Speaker, 8 , Watt, with wires added r1 - Wires Bag QUIZ ANSWERS. First Quiz: 1. electrons; 2. short; 3. battery; 4. increase; 5. insulators, conductors; 6. decreases, increases; 7. decreases;. 8. voltage; 9. alternating, direct; 10. increases, decreases. Second Quiz: 1. reverse; 2. LEDs; 3. amplifier; 4. integrated; 5. saturated; 6. alternating, direct; 7. decreases, increases;. 8. magnetic; 9. increases; 10. twice Third Quiz: 1. feedback; 2. air, pressure; 3. decreases; 4. OR; 5. NAND. 3. INTRODUCTION TO BASIC COMPONENTS. Welcome to the exciting world of Electronics!
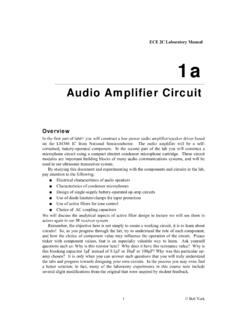
7 Before starting the first experiment, let's learn about some of the BASIC ELECTRONIC components. Electricity is a flow of sub-atomic (very, very, very, small) particles, called electrons. The electrons move from atom to atom when an electrical charge is applied across the material. Electronics will be easier to understand if you think of the flow of electricity through circuits as water flowing through pipes (this will be referred to as the water pipe analogy). Wires: Wires can be thought of as large, smooth pipes that allow water to pass through easily. Wires are made of metals, usually copper, that offer very low resistance to the flow of electricity. When wires from different parts of a circuit connect accidentally we have a short circuit or simply a short.
8 You probably know from the movies that this usually means trouble. You must always make sure that the metal from different wires never touches except at springs where the wires are connecting to each other. The electric current, expressed in amperes (A, named after Andre Ampere who studied the relationship between electricity and magnetism) or milliamps (mA, 1/1000 of an ampere), is a measure of how fast electrons are flowing in a wire just as a water current describes how fast water is flowing in a pipe. PIPE WIRE. Batteries and Generators: To make water flow through a pipe we need a pump. To make electricity flow through wires, we use a battery or a generator to create an electrical charge across the wires.
9 A battery does this by using a chemical reaction and has the advantage of being simple , small, and portable. If you move a magnet near a wire then electricity will flow in the wire. This is done in a generator. The electric power companies have enormous generators driven by steam or water pressure to produce electricity for your home. The voltage, expressed in volts (V, and named after Alessandro Volta who invented the battery in 1800), is a measure of how strong the electric charge from your battery or generator is, similar to the water pressure. Your PK-101 may be used with either a 9V battery or the adjustable power supply that is part of the XK-150, XK-550, and XK-700 Trainers. A power supply converts the electricity from your electric company into a simple form that can be used in your PK-101.
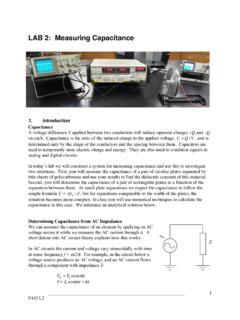
10 If using the power supply, then adjust it for 9V. (This manual will usually refer to the battery, this is also meant to refer to the 9V power supply if you are using that instead). Notice the + and signs on the battery. These indicate which direction the battery will pump the electricity, similarly to how a water pump can only pump water in one direction. The 0V or side of the battery is often referred to as ground . Notice that just to the right of the battery pictured below is a symbol, the same symbol you see next to the battery holder. Engineers are not very good at drawing pictures of their parts, so when engineers draw pictures of their circuits they use symbols like this to represent them.