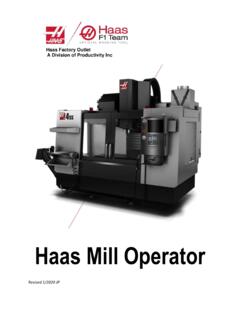
Transcription of BASIC HAAS VF SERIES - Productivity Inc
1 Haas Factory Outlet A Division of Productivity Inc. HFO MN Haas Mill SERIES Training Manual Haas G&M Code Programming Rev 8/2018 2 This Manual is the Property of Productivity Inc. It may not be reproduced or disseminated without the express written permission of Productivity Inc. The content must not be altered, nor have the Productivity name removed from the materials. This training manual is a guide for the operation of the Machine Tool. The Operator is responsible for following Safety Procedures as outlined by their Instructor or the Manufacturers Specification. Downloading and/or other use of this manual does not certify the completion of the Training Course. This manual is for reference only. For more information on Additional Training Opportunities or our Classroom Schedule, Contact Productivity Inc.
2 (800)328-3272 Toll Free Visit us on the Web: To obtain permissions contact: Note: Some of the content, images and screen shots included in this manual are taken from Haas manuals, controllers and web information with permission from Haas Automation Inc. 2800 Sturgis Road Oxnard CA 93030-8933 3 G&M Code Mill Programming Training Manual Table of Contents INTRODUCTION .. 5 MACHINE HOME WITH WORK OFFSETS .. 7 WORK COORDINATE SELECTION .. 8 TOOL LENGTH COMPENSATION G43 .. 9 ABSOLUTE AND INCREMENTAL POSITIONING .. 10 THE CARTESIAN COORDINATE SYSTEM .. 11 WORD ADDRESS PROGRAMMING .. 12 PROGRAMMING .. 14 ALPHABET WORD ADDRESS ASSIGNMENTS .. 15 PREPARATORY FUNCTIONS (G CODES) .. 19 MACHINE FUNCTIONS (M CODES) .. 23 PROGRAM STRUCTURE AND FORMAT .. 27 PROGRAM FORMAT .. 28 MACHINE DEFAULTS .. 29 PROGRAMMING WITH CODES .. 30 PROGRAM STRUCTURE.
3 31 LINEAR AND CIRCULAR TOOL PATHS .. 33 LINEAR/CIRCULAR MOVEMENT CREATING TOOL PATH .. 34 INTERPOLATION COMMANDS .. 35 CIRCULAR INTERPOLATION (G02 AND G03) COMMANDS .. 36 CUTTER COMPENSATION (G41, G42) .. 43 FORMULAS TAPPING, SPEEDS AND FEEDS .. 52 DRILLING, TAPPING, BORING CANNED CYCLES .. 53 CANNED CYCLES .. 54 LOOPING COMMAND CYCLES .. 72 BOLT HOLE PATTERNS .. 74 4 ADDITIONAL G CODES .. 80 MILLING CIRCLES WITH CUTTER COMP .. 81 THREAD MILLING .. 82 CIRCULAR POCKET MILLING USING G12 AND G13 .. 83 CIRCULAR PLANE SELECTION .. 88 INCH / METRIC SELECTION (G20, G21).. 89 SETTING WORK, TOOL OFFSETS THROUGH THE PROGRAM (G10).. 90 GENERAL PURPOSE POCKET MILLING (G150) .. 91 ENGRAVING (G47).. 98 SUBROUTINES (SUBPROGRAMS) .. 103 SUBROUTINES .. 104 EXERCISES .. 106 FINAL EXERCISES .. 110 5 Introduction Welcome to Productivity , Inc.
4 , your local Haas Factory Outlet ( ) for the Mill Programming Class. This class is intended to give a BASIC understanding of the programming of a Haas Machining Center. After 1945 design of wings for the US Air Force were becoming extremely complex and hard to manufacture using conventional machine tools. MIT developed a machine that was able to control a cutting tool path with a SERIES of straight lines defined by axial coordinates at prescribed feed rates. The first NC machine tool was introduced to the defense and aerospace industry by MIT in 1952. The contour of a constantly changing curvature could be described by a SERIES of short lines determined by a SERIES of coordinate in three axes. The first machine tools were run with instructions or programs punched out on paper tape. The files of the early machine tools were often in the format which later became known as G-code.
5 The reason for the name being that many of the lines of text began with the letter G. In an NC machine, the tool is controlled by a code system that enables it to be operated with minimal supervision and with a great deal of repeatability. "CNC" (Computerized Numerical Control) is the same type of operating system, with the exception that a computer monitors the machine tool. The same principles used in operating a manual machine are used in programming a NC or CNC Machine. The main difference is that instead of cranking handles to a position on a slide to a certain point, the dimension is stored in the memory of the machine control once. The control will then move the machine to these positions each time the program is run. The operation of the VF- SERIES Vertical Machining Center requires that a part program be designed, written, and entered into the memory of the control.
6 There are several options for getting these programs to the control. RS-232 (serial port with a computer), Floppy Disk, Ethernet / Networking/ and USB are all viable ways to transmit and receive programs. In order to operate and program a CNC controlled machine, a BASIC understanding of machining practices and a working knowledge of math are necessary. It is also important to become familiar with the control console and the placement of the keys, switches, displays, etc., that are pertinent to the operation of the machine. This manual is intended to give a BASIC understanding of CNC programming and its applications. It is not intended as an in-depth study of all ranges of machine use, but as an overview of common and potential situations facing CNC programmers. Also use of the new Haas Control feature Intuitive Programming System or (IPS) will be demonstrated.
7 It will produce G-Code programs for simple machine operations. 6 NOTES _____ 7 Machine Home with Work Offsets The principle of machine home may be seen when doing a reference return of all machine axes at machine start-up. A zero return (POWER UP/RESTART) is required when you power on machine, all three axes are moved to extreme positive locations until limit switches are reached. The reason the machine does this is to double check its position with the Home switches of the machine. This is crucial to the operation and function of a CNC machine as all of our programs, fixturing, and tooling are based off of machine home. Above: The relationship of machine home to work home , otherwise know as work offset 8 Work Coordinate Selection What is a Work Coordinate ? A work coordinate (otherwise known as a part offset) is how we tell the machine where our part (or parts) are located at in the travels of the machine.
8 Under the Work Offsets page in the control, we hand wheel the machine to the X & Y Zero location for our part, and use the Part Offset Measure key under the Reset key to set the corresponding work offset from our program (G54, G55, G56, ) G54 59 Work Offsets #1 6 These are the first G-Codes that were assigned to work Coordinates. This is how we tell the machine that we are working on Part #1, Part #2, thru Part #6. Originally no one thought we would need more than 6 part offsets, but thru time and the invention of new types of machines, more were G110 G129 Work Offsets #7 26 (Older Machines) G154 P1-P99 Work Offsets #7-106 (Newer Machines) These codes are the same as G54 to G59; they add more places as X & Y zero. We now can set up to 99 additional zeros within the travels of our machine. MORE WORK COORDINATE SYSTEM SELECTION Note: The G52 command works differently depending on the value of Setting 33.
9 This setting selects the FANUC, HAAS, or YASNAC style of coordinates, which are listed below. G52 Global Work Coordinate Shift G52 will shift all work offsets that are set in the machine. In the Work Offsets page of the control, if we input a value of X + , ALL of the offsets will move one to the right by a value of This is most commonly used in casting and forging work where we have core movement. G53 Positioning In Regards to Machine Home (Non Modal) G53 is used inside a program when we want to move the machine a certain distance and location from Machine Home. This is quite often used if we want to establish a safe tool change position because we have large parts or tools and need to clear the tool changer. G92 Set Work Coordinate System G92 Can be used to set our work offsets while on the fly in our program. G92 was used back when machines only had one offset to choose from.
10 We had to cut our first part, move the spindle over to the second part X&Y zero, and then call G92 X0Y0 in our program. Our work offset is now set around the second part. Using G54 G129 is much faster, more tunable, and easier to use. 9 Tool Length Compensation G43 G43 Tool Length Compensation G43 is the code we use to establish a tool length to the control. Upon setup, the operator will determine the tool length and input that dimension into the Tool Offset Memory for that tool. Each tool in the machine will have a defined tool length, and this will be presented to the control in the form of an H value. (H1 is equal to tool length offset #1, H2 = length offset #2, ) The programmed code would be: Canceling Tool Compensation (G49 or H00) To cancel tool length compensation, we can either use the code of G49, G28 (Go to machine home position) or use an H value of H00.