Transcription of Build a UserForm for Excel
1 Microsoft Excel VBA Fact Sheet: Build a UserForm for Excel Martin Green 1 Build a UserForm for Excel Introduction A UserForm is a custom-built dialog box that you Build using the Visual Basic Editor. Whilst this example works in Excel you can use the same techniques to create a UserForm in any of the Microsoft Office programs that support VBA. With a UserForm you can create a user-friendly interface for your workbook or document, making data entry more controllable for you and easier for the user. About the Project This document shows you how to Build a simple UserForm for entering personal expenses data on to a worksheet in Excel .
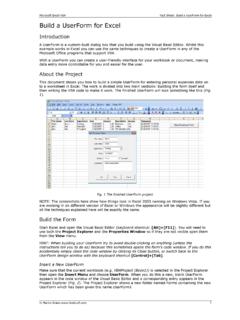
2 The work is divided into two main sections: building the form itself and then writing the VBA code to make it work. The finished UserForm will look something like this (Fig. 1). Fig. 1 The finished UserForm project. NOTE: The screenshots here show how things look in Excel 2003 running on Windows Vista. If you are working in an different version of Excel or Windows the appearance will be slightly different but all the techniques explained here will be exactly the same. Build the Form Start Excel and open the Visual Basic Editor (keyboard shortcut: [Alt]+[F11]).
3 You will need to use both the Project Explorer and the Properties Window so if they are not visible open them from the View menu. HINT: When building your UserForm try to avoid double-clicking on anything (unless the instructions tell you to do so) because this sometimes opens the form's code window. If you do this accidentally simply close the code window by clicking its Close button, or switch back to the UserForm design window with the keyboard shortcut [Control]+[Tab]. Insert a New UserForm Make sure that the current workbook ( VBAP roject (Book1)) is selected in the Project Explorer then open the Insert Menu and choose UserForm .
4 When you do this a new, blank UserForm appears in the code window of the Visual Basic Editor and a corresponding entry appears in the Project Explorer (Fig. 2). The Project Explorer shows a new folder named Forms containing the new UserForm which has been given the name UserForm1. Microsoft Excel VBA Fact Sheet: Build a UserForm for Excel Martin Green 2 You should also see the Toolbox (Fig. 3). If it is not visible click anywhere on the new UserForm (the Visual Basic Editor hides the toolbox when it thinks you are working elsewhere) and if it still does not appear open it from the View menu.
5 Fig. 2 The Project Explorer shows the UserForm . Fig. 3 The Toolbox The UserForm has a dotted border around it. On the border, in the lower-right corner and halfway along the bottom and right sides of the form, are small white squares. These are the resizing handles. You can use the mouse to drag these handles to make the UserForm the required size. The grid of dots on the form is to help you easily align items you place there. Rename the UserForm and Add a Caption A single project can include many UserForms so it is a good idea to give each one a meaningful name.
6 With the UserForm selected find the Name property in the Properties Window (it is normally the first item in the list) and change it frmExpenses. Then change the Caption property to Staff Expenses Claim. The Project Explorer now displays the UserForm 's new name and the Title Bar of the form immediately changes to show the new caption (Fig. 4). Fig. 4 The form's Title Bar shows the new caption. When naming forms and their controls remember that you must not include spaces in the name, or use any of the VBA "reserved words" ( those keywords that are part of the VBA language such as "Date").
7 Add a TextBox Control and a Label The controls are the items, such as textboxes, comboboxes and command buttons, that will be placed on the form. The standard selection of controls is represented by buttons on the Toolbox. Point at a Toolbox button to see a tooltip showing the name of the control. Add a TextBox control to the form by clicking on the TextBox button in the Toolbox then clicking somewhere near the centre of the form. As with the UserForm itself any control that you place on the form shows a dotted border and resizing handles when the item is selected (click on any item to select it).
8 You can change the size and shape of a control either by dragging the resizing handles (the mouse pointer will change to a double-headed arrow (Fig. 5)) or by changing the values of its Height and Width properties in the Properties Window. To move a control drag the dotted border at a point between resizing handles (the mouse pointer will show a four-headed arrow (Fig. 6)) or change the values of its Top and Left properties. Fig. 5 Resizing a control. Fig. 6 Moving a control. Drag the textbox to a point near the top of the UserForm and about halfway across the form.
9 Microsoft Excel VBA Fact Sheet: Build a UserForm for Excel Martin Green 3 Each control should have a meaningful name so that when you write the code you can easily identify it. This one currently has the name TextBox1. Use the Properties Window to change its name to txtFirstName. HINT: It is helpful when naming controls to add a prefix describing the type of control ("txt" for textbox, "cbo" for combobox etc.). This reminds you what type of control it is when you are working in the code. It forces the names to appear together when displayed in a list.
10 It also lets you use words that are otherwise reserved ( txtDate instead of Date). Now use the toolbox to place a Label control on the form. To change the caption of the label you can either type directly on to the label or you can change its Caption property in the Properties Window. Change the label's caption to First Name:. Change the TextAlign property of the label to 3-fmTextAlignRight then double-click the lower-right corner resizing handle to snap the label to fit the text (Fig. 7). Drag the label to a position just to the left of the FirstName textbox.