Transcription of CALIBRATION - A2LA
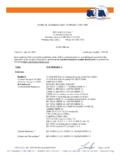
1 (A2LA Cert. No. ) Revised 08/02/2018 Page 1 of 58 SCOPE OF ACCREDITATION TO ISO/IEC 17025:2005 JAPAN QUALITY ASSURANCE ORGANIZATION Measurement and CALIBRATION Center 4-4-4, Minamiosawa, Hachioji-shi, Tokyo, 192-0364, Japan Yoshio Kobayashi Phone: 81 42 679 0144 CALIBRATION Valid To: March 31, 2020 Certificate Number: In recognition of the successful completion of the A2LA evaluation process, accreditation is granted to the laboratory location listed above and as well as the one satellite location listed below1: I. Acoustical Quantities Parameter/Range Frequency CMC2 ( ) Comments Sound Level Meter Free-Field Response Level Acoustic Electrical CALIBRATION Acoustical Signal Tests of a Frequency Weighting Electrical Signal Tests of Frequency Weightings Frequency and Time Weightings at 1 kHz Long-Term Stability (10 to 20) Hz (20 to 50) Hz (50 to 3150) Hz (3150 to 8000) Hz (8000 to 12 500) Hz (20 to 50) Hz (50 to 3150) Hz (3150 to 12 500) Hz (12 500 to 20 000) Hz Hz to 8 kHz 125 Hz 1000 Hz 8000 Hz (63 to 16000)
2 Hz 1000 Hz 1000 Hz dB dB dB dB dB dB dB dB dB dB dB dB dB dB dB dB Type I reference microphone Type II reference microphone Level linearity IEC 61672-3 Periodic tests IEC 61672-3 Periodic tests IEC 61672-3 Periodic tests IEC 61672-3 Periodic tests (A2LA Cert. No. ) Revised 08/02/2018 Page 2 of 58 Parameter/Range Frequency CMC2 ( ) Comments Sound Level Meter (cont) Level Linearity on the Reference Level Range Level Linearity Including the Level Range Control Toneburst Response C-Weighted Peak Sound Level Overload Indication High-Level Stability 8000 Hz 1000 Hz 4000 Hz 500 Hz, 8000 Hz 4000 Hz 1000 Hz dB dB dB dB dB dB IEC 61672-3 Periodic tests IEC 61672-3 Periodic tests IEC 61672-3 Periodic tests IEC 61672-3 Periodic tests IEC 61672-3 Periodic tests IEC 61672-3 Periodic tests Calibrator Sound Pressure Level/Acoustic Calibrator Sound Pressure Level/Multifunction Acoustic Calibrator Frequency Distortion 250 Hz, 1000 Hz 250 Hz.
3 1000 Hz Hz 63 Hz 125 Hz 250 Hz 500 Hz 1000 Hz 2000 Hz 4000 Hz 8000 Hz 12 500 Hz 16 000 Hz ( to 1) kHz Up to 5 % THD, ( to 1) kHz dB dB dB dB dB dB dB dB dB dB dB dB dB Hz 3 % Type I reference microphone Type II reference microphone Type II reference microphone Frequency counter Audio analyzer (A2LA Cert. No. ) Revised 08/02/2018 Page 3 of 58 Parameter/Range Frequency CMC2 ( ) Comments Microphone Type I Microphone Pressure Sensitivity Type II Microphone Pressure Sensitivity Type I Microphone Pressure Sensitivity Type II Microphone Pressure Sensitivity Type I Microphone Pressure Sensitivity Type II Microphone Pressure Sensitivity Type I Microphone Free-field Sensitivity Type II Microphone Free-field Sensitivity (20 to 8000) Hz (8000 to 10 000) Hz (10 000 to 12 500) Hz (20 to 50) Hz (50 to 16 000) Hz (16 000 to 20 000) Hz (20 to 4000) Hz (4000 to 10 000) Hz (10 000 to 12 500) Hz (20 to 50) Hz (50 to 16 000) Hz (16 000 to 20 000) Hz (20 to 100) Hz (100 to 1000)
4 Hz (20 to 100) Hz (100 to 4000) Hz (4000 to 8000) Hz (8000 to 16 000) Hz (16 000 to 20 000) Hz (20 to 4000) Hz (4000 to 10 000) Hz (10 000 to 12 500) Hz (20 to 4000) Hz (4000 to 9000) Hz (9000 to 16 000) Hz (16 000 to 20 000) Hz dB dB dB dB dB dB dB dB dB dB dB dB dB dB dB dB dB dB dB dB dB dB dB dB dB dB Pressure CALIBRATION by reciprocity method Pressure CALIBRATION by reciprocity method Pressure CALIBRATION by comparison method Pressure CALIBRATION by comparison method Pressure CALIBRATION by simplified comparison method Pressure CALIBRATION by simplified comparison method Free field CALIBRATION by comparison method Free field CALIBRATION by comparison method (A2LA Cert.)
5 No. ) Revised 08/02/2018 Page 4 of 58 II. Chemical Quantities Parameter/Equipment Range CMC2 ( ) Comments pH Indicator Instrumental Error Linearity Repeatability (0 to 14) pH units (0 to 14) pH units (0 to 14) pH units pH units pH units pH units DC voltage pH Detector Instrumental Error Linearity Repeatability 4 pH units, 9 pH units 4 pH units, 7 pH units, 9 pH units 4 pH units, 7 pH units 9 pH units mV/pH mV mV mV Standard solutions pH Meters Three-Point CALIBRATION Instrumental Error Two-Point CALIBRATION Instrumental Error 4 pH units 7 pH units 9 pH units 4 pH units, 9 pH units 7 pH units pH units pH units pH units pH units pH units Standard solutions One-Point CALIBRATION Instrumental Error 4 pH units.
6 7 pH units 9 pH units pH units pH units Light Scattering Airborne Particle Counter Counting Efficiency ( to ) m ( to ) m ( to ) m % of counting efficiency % of counting efficiency % of counting efficiency JIS B 9921 Particle counters with standard particles (A2LA Cert. No. ) Revised 08/02/2018 Page 5 of 58 Parameter/Equipment Range CMC2 ( ) Comments CO2 Monitor Diffusion Types Probe Types, Suction Types 0 % CO2 ( ) % CO2 ( ) % CO2 ( ) % CO2 ( ) % CO2 ( ) % CO2 ( ) % CO2 ( ) % CO2 (1 ) % CO2 0 % CO2 ( ) % CO2 ( ) % CO2 ( ) % CO2 ( ) % CO2 ( ) % CO2 ( ) % CO2 ( ) % CO2 (1 ) % CO2 % CO2 % CO2 % CO2 % CO2 % CO2 % CO2 % CO2 % CO2 % CO2 % CO2 % CO2 % CO2 % CO2 % CO2 % CO2 % CO2 % CO2 % CO2 Standard gas: CO2 in N2 Standard gas.
7 CO2 in N2 Electrical Conductivity Meters Fixed Points mS/m 141 mS/m 1280 mS/m mS/m 141 mS/m 1280 mS/m % % % % % % Standard conductivity solutions Calibrated electrical conductivity meter (A2LA Cert. No. ) Revised 08/02/2018 Page 6 of 58 III. Dimensional Parameter/Equipment Range CMC2, 4 ( ) Comments Gage Blocks ( to 100) mm (100 to 250) mm (250 to 400) mm (400 to 800) mm (800 to 1000) mm ( to 100) mm (100 to 500) mm (500 to 1000) mm m ( + L/3500) m ( + L/3400) m ( + L/3200) m ( + L/3100) m m ( + L/1800) m ( + L/1800) m By interferometry, type GBI and NRLM-Tsugami By interferometry, type LGB By comparison Step Height Gauges ( to 1000) m (Mode of Silicon) m By interferometry, type NRLM-Tsugami Step Gages Up to 1050 mm ( +L/650)
8 M Comparison to gage blocks 633 nm Stabilized He-Ne Laser Wavelength8 633 nm parts in 1011 Comparison to laser standard Line Standard Scales Up to 200 mm (200 to 300) mm Up to 300 mm (300 to 1000) mm ( + L/2000) m ( + L/1300) m m ( + L/1500) m Laser By interferometry, type LST 1000 Plain Ring Gages ( to 100) mm (100 to 200) mm (200 to 250) mm m m m Type IDM Laser/ULM ULM Cylinder Gages3 Up to mm m Dial gage tester (A2LA Cert. No. ) Revised 08/02/2018 Page 7 of 58 Parameter/Equipment Range CMC2, 4 ( ) Comments Plug and Pin Gages ( to 100) mm (100 to 200) mm m m ULM Feeler Gages ( to ) mm m ULM Electrical Comparators Analog Digital Up to 3 mm Up to 3 mm 2 % full scale m Gage blocks Calipers3 Up to 200 mm (200 to 600) mm (600 to 2000) mm mm mm mm Gage blocks, step gage Centerline Caliper3 Up to 1000 mm mm Centerline caliper checker Micrometers3 Up to 500 mm (2 + L/100) m Gage blocks Dial Gages3 Up to 25 mm (25 to 50) mm (50 to 100) mm m m m Dial gages tester Pin Gages ( to 10) mm (10 to 30)
9 Mm m m Laser microscan Snap Gage3 Up to 200 mm m Gage blocks Three Wires for Screw Thread Measuring Up to 6 mm m Measure over roll Standard Bar ( to 600) mm (600 to 1000) mm ( +L/500) m ( +L/5000) m Comparison to gage blocks (A2LA Cert. No. ) Revised 08/02/2018 Page 8 of 58 Parameter/Equipment Range CMC2, 4 ( ) Comments Dial Gage Tester Up to 50 mm (50 to 100) mm m m Laser Height Gages3 Analog Digital and Dial Up to 600 mm Up to 600 mm mm mm Gage blocks, step gages Micro-Height Gages3 Up to 300 mm (300 to 600) mm m m Gage blocks Depth Gage3 Vernier and Digital Up to 300 mm Up to 300 mm 29 m 9 m Gage blocks, step gages Microindicators Up to 100 m m Gage blocks Depth Micrometers3 Up to 50 mm (50 to 150)
10 Mm m m Gage blocks, step gages Inside Micrometers3 Caliper Type Up to 300 mm m Gage blocks Dial Depth Indicator3 Up to 100 mm 3 m Gage blocks Optical Flats Flatness Up to 150 mm m Comparison to optical flat masters Optical Parallels Parallelism Flatness Up to 30 mm Up to 30 mm m m Electrical high resolution length comparators Comparison to optical flat master (A2LA Cert. No. ) Revised 08/02/2018 Page 9 of 58 Parameter/Equipment Range CMC2 ( ) Comments Hole Tester3 3-Point ID Micrometer Analog Digital (2 to 20) mm (20 to 100) mm (100 to 200) mm (100 to 200) mm m m m m Master rings Measuring Microscope3 Parallelism Straightness in X-Y Plane X-Y Squareness Linear Accuracy Angle Up to 300 mm Up to 300 mm Up to 300 mm Up to 200 mm (200 to 300) mm Up to 360 m m m m m ' Glass line standard scales and electrical comparators Angle gauge blocks Digital Indicator and Linear Gages3 Up to 100 mm m Gage blocks (A2LA Cert.)
