Transcription of CB237 - DUROCK® Brand Cement Board Installation Guide
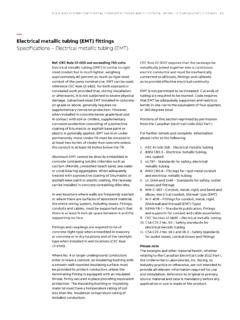
1 DUROCK BrandCement Boardinstallation guideSubstrate and ceramic tile Installation for walls,floors, countertops and wall ceramic tile Installation is only as good as the surface beneath the tile. Strong, lightweightand resistant to water damage, DUROCKB randCement Board is an ideal base for ceramic tileinstallations throughout the tile takes planning, time and care. But with the help of this step-by-step installationguide, the careful do-it-yourselfer can get thesame results as a Brand Cement beneath the surface 2 Textured sideCoated glass-fiber meshAggregated portland Cement coreSmooth wrapped edgeSmooth sideCut edgeToolsStart with Quality Products3In general, common tools are usedfor Cement Board Installation whileinstalling tile requires special stores frequently rent thespecial tools needed for tile work ona per-day basis, including tile cutter,nippers and notched trowels.
2 Othertools you may need for cementboard and tile installations include:straightedge, level, tape measure,caulk and caulking gun, hammer,drill, drill bits (including hole-sawbits), wood rasp, scoring tool or utility knife, sponge and Cement Board Standard Board is 1/2 or 5/8 thickand 32 ,3 or 4 wide. Standardlengths are 4 ,5 ,6 or 8 .Customlengths are available upon requestand minimum order requirementsdo apply. DUROCK Brand Underlay-ment is 4 x4 x5/16 ,3 x5 x5/16 or 4 x8 x5/16 ideal for floor andcountertop is smooth on one side foradhesive applications, textured on the other for thin-set Brand Interior Tape Alkali-resistant glass fiber tape reinforces interior Cement boardjoints to provide a strong, continu-ous Cement Board is readily appliedover framing with 1-1/2 hot-dipped galvanized roofing nails or 1-1/4 DUROCK Brand WoodScrews.
3 With steel framing use 1-1/4 DUROCK Brand Steel , Mortars, Grouts Check your local tile distributor forthe products available and whichones are appropriate for your Board Walls and Ceilings A typical tub surround uses two3 x5 Cement boards horizontally for tub backwall, one 3 x6 boardvertically at each endwall, andone 3 x5 Board for the CuttingTo cut DUROCKB rand CementBoard, mark desired size on theboard with a rule and both sides and edgeswith a utility knife through theglass-fiber mesh, and snap theboard to size. Smooth cutedges with wood rasp. Cuttingwith a circular saw with a car-bide-tipped blade is an CutoutsTo make cutouts for fixtures,outline area with utility knife, cutthrough the mesh on both sides,and punch out with a hammerfrom the back side.
4 Smoothedges with wood , mark location anddrill hole using the appropriatesize hole-saw bit and drill. Useslow speed if AttachmentPlace a 1/4 spacer strip orshim around lip of tub or showerpan to hold bottom edge ofcement Board off Board to wood studsspaced at 16 * with 1-1/2 hot-dipped galvanized roofingnails spaced 8 for walls, 6 for ceilings, or using 1-1/4 DUROCKB rand Wood Screwswith the same spacing.(For steel stud applications, use 1-1/4 DUROCKB rand SteelScrews.) Leave a 1/8 gapbetween all panel edges.*On center is the spacing between thecenterlines of two structural members Board Floors51. LaminationLaminate 5/16 DUROCKB randUnderlayment to minimum 5/8 thick exterior grade plywood ororiented strand Board (OSB)using adhesive or mortar suitable for bonding cementbacker Board to the adhesive with 5/8 V-notched trowel, mortar with1/4 square-notched FastenersPlace underlayment with jointsstaggered from subfloor ends and edges closely butnot forced together, leaving a1/8 gap.
5 Fasten underlaymentto subfloor with 1-1/2 hot-dipped galvanized roofing nailsor 1-1/4 DUROCKB rand WoodScrews spaced 8 in 1/2 or 5/8 DUROCKB rand Cement Board is used in underlayment applications,follow the same procedure asfor 5/16 AttachmentInstall minimum 3/4 exterior-grade plywood or OSB base across the wood cabinet sup-ports. Position ends and edgesover supports. Staple-attach15-lb. felt or 4-mil polyethylenefilm using 1/4 galvanized sta-ples over the plywood to the plywood with 1-1/4 DUROCKB rand WoodScrews or 1-1/2 hot-dippedgalvanized roofing nails, spaced8 in both directions andaround edges. Leave a 1/8 gap between using 1/2 or 5/8 DUROCKB rand Cement Board in under-layment applications, follow thesame procedure as for 5/16 DUROCKB rand Board CountertopsInstalling Tile Measuring and PlanningPrefill joints, as well as inside and outside corners, with latex-forti-fied mortar or Type 1 organicadhesive and then immediatelyembed tape and level : Use latex-fortified portland cementmortar for wall shield and floor Treatment Walls,Floors and Countertops61.
6 WallsEstablish tile height for walls byfinding the low point of the floornext to the wall. Measure fromthis point to wainscot heightincluding base and cap. On newwork where floor must beinstalled, allow for tile low point, stack one row oftile to required height with dabsof mastic on the back of eachtile. Use cap to establish heightbut draw line on top of the lasttile as caps can be vertical starting line bybeginning from the center of thewall. Lay out a row of tile to thecorner. If cut comes to less thanhalf the tile, adjust vertical start-ing line so its center hits middleof tile instead of tile FloorsFind starting point for floors byplacing tile on floor in front ofthe tub and along the adjoiningwall. Some tile may have to becut to fill in open spaces.
7 Fit tilesto pipes, then draw starting linefor Setting tileTo set tile, apply the adhesive or mortar you ve selected towall, floor or counter top usingnotched trowel, holding at 50 or 60 angle for a small area at a time,set tile with a slight slidingmotion and press into avoids adhesive pile-up ontile edge and in grout tiles aligned so joints arestraight and tile spacers, if adhesive is squeezed fromunder tile, you re using toomuch. Clean out excess adhesive before it 1/4 shims beneaththe bottom row of tiles andcement Board to make a caulkjoint along tub beginning at the top,place tile to horizontal line, thenbutter each cap and place inposition. This eliminates possi-bility of troweling adhesiveabove required Cutting TileTo trim tile use a professionaltile cutting tool.
8 Score tile onlyonce for each cut. This preventsuneven breaking of tile anddulling of cutting make contoured and irregularcuts, use nippers to take smallbites to prevent cracking orbreaking of tile. With rod sawuse long, even strokes to avoidbinding. Smooth cut edges withan abrasive Application of Grout on WallsWait at least 24 hours after tilehas been installed before grout-ing. Apply with a rubber float orsqueegee at a slight angle tothe walls. Go over each jointthree times, spreading groutacross tile joints completely. Removeexcess grout with a float orsqueegee as you go grout set for 20 minutes,then wipe tile diagonally with adamp square-edge until grout lines areeven and joints are sponge often but keep itas dry as possible.
9 Let joints dryabout 15 to 20 minutes, or untila haze forms on the tile. Thenpolish with clean paper towel ora clean white Application of Grout onFloors and CountertopsWait at least 48 hours afterthe tile has been installedbefore grouting. Apply groutand force into joints with rub-ber float. Remove excessgrout by drawing float acrosstile at 45 angle. Then wipetile diagonally with dampsponge until joints are smoothand even. Rinse sponge often,and wring it as dry as possi-ble. Polish with clean papertowels or a clean, white : After you ve completed grout-ing, it s important to put moisture backinto the grout for a few days forstronger grout joints. Dampen groutnow and then with a fine water sprayduring the first 24 hours while grout iscuring.
10 After the final cure in about 2or 3 weeks protect grout surface onwalls from dirt by coating with siliconetile and grout sealer. Do not use sealeron 1/4 space between tub lipand bottom edge of tile around tubwith flexible sealant. Also caulkaround tub soap dish and otherwall fixtures. Fill vertical groutlines adjacent to door jambs withflexible caulk rather than stiffcement space where floor edgesmeet walls with sealant. Protectunglazed mosaic or quarry tilewith a the same steps used forgrouting floors. Caulk abutmentsof countertop and walls and, ifneeded, underneath sink ProtectorsApply 1/8 to 1/4 thick latex-fortified portland Cement to solidsurface never on top ofcarpeting or DUROCKB rand CementBoard with 1-1/4 hot-dipped galvanized roofing nails or 1-1/4 DUROCKB rand Screws, spaced 8 in both directions, penetratingfloor a minimum of 3/4.