Transcription of Coating Thickness Tester
1 USER MANUAL Coating Thickness Tester With Bluetooth Model CG304 Additional User Manual Translations available at 5/17 2 Introduction Thank you for selecting the Extech CG304 Coating Thickness Tester . The CG304 is a portable meter designed for non-invasive Coating Thickness measurements with automatic recognition of the material under test. The meter uses two measurement methods: magnetic induction (for ferrous metal substrates) and eddy current (for non-ferrous metal substrates). The Bluetooth feature wirelessly transmits measurement data to a Bluetooth receiving device for further analysis and for generating report documentation. Proper use and care of this meter will provide many years of reliable service. Features Measured Coatings: Non-magnetic coatings ( paint, zinc) on steel; Insulated Coatings ( paint, anodized coatings) on non-ferrous metals Intuitive menu-based programming Memory storage of up to 2500 readings in 50 groups (50 readings per group) Delete single readings or reading groups easily Bluetooth data transfer to PC, phone, tablet or other device Auto Power OFF with disable feature User Zero Calibration ability Applications Corrosion protection Paint Shops and Electroplaters Chemical, Automobile, Shipbuilding, and Aircraft industries Laboratory, Workshop, and Field use Probe Description The CG304 probe is spring mounted in the sensor sleeve.
2 This ensures safe and stable positioning of the probe and ensures constant contact pressure. A V-groove in the sleeve of the probe facilitates reliable readings on small cylindrical parts. The hemispherical tip of the probe is made of hard and durable material. Hold the probe by the spring mounted sleeve when applying pressure on the measured object. Measuring metallic coatings This meter can measure non-magnetic metal coatings (Zinc) on a magnetic (ferrous) substance base, and non-metal coatings on a metal base (ferrous or non-ferrous). 5/17 3 Description Meter Description 1. LCD display 2. Power button 3. Sensing Probe 4. Navigation buttons Note: Battery compartment on rear of meter Display Description 1. Data record memory group number 2. Record Number in current memory group 3. Bluetooth icon 4. Automatic (Auto) metal detect mode 5. Battery status icon 6. Measurement units: m = Micrometers; mils = millimeters * 7. Metal type (FE=ferrous, NFE=non-ferrous) 8.
3 Measurement reading 9. DEL (Delete): Press the RIGHT arrow button to delete the displayed reading 5/17 4 Operation Meter Power Install two AAA V batteries into the rear battery compartment. Press the power button to switch the meter ON. The display will switch ON. If the display does not switch ON, install or replace the batteries. When powering up, please keep the meter at least 10cm (4 ) from metal objects. Replace the batteries when the battery status icon appears low, the meter will give inaccurate readings if the battery voltage falls very low. Measurements Before each measurement session please perform a Zero Calibration as described later in this User Guide. Practice with the fil m and zero (round) reference metal substrates to learn how the meter operates before moving to a professional application. The heavier metal substrate is the ferrous (magnetic) zero substrate and the lighter metal substrate is the non-ferrous (non-magnetic) zero substrate.
4 The meter automatically senses ferrous and non-ferrous substrates. 1. Place a reference film (250 m, for example) on the round, ferrous substrate. 2. Power the meter by pressing the power button if necessary. 3. Place the spring-loaded meter sensor against the reference film. 4. The meter will emit an audible tone indicating that the measurement has been taken. 5. The LCD will show the reading (250 m) at the center of the display area. 6. A typical display will also show the following: Group(x): Upper left; Reading Memory Group number (0~50). Use the up/down arrow buttons to scroll groups (x): Upper right; Number of readings (0~50) stored in current group Battery status icon at upper right DEL: Press the RIGHT arrow button to delete the displayed reading Fe or NFE: Ferrous or Non Ferrous substrate on the lower left of the LCD Bluetooth icon: When Bluetooth operation is active Automatic Metal detect mode (dual arrows) Experiment with the remaining reference films and the substrates before using the meter professionally.
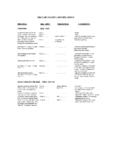
5 Automatic Power OFF In order to conserve battery life, the meter will automatically turn off after approximately 3 minutes. To defeat this feature use the programming menu detailed in the next section (menu parameter AUTO POWER OFF under SET). 5/17 5 Programming Menu The meter can be configured and calibrated through simple button presses in the programming menu. Press the LEFT button to access the menu; refer to the menu tree below. Use the UP/DOWN buttons to scroll the menu Use the LEFT button to select the highlighted mode Use the RIGHT button to back out of a mode Other button presses are mode specific, follow on-screen prompts explained below. In the table below the factory default settings are in bold with an asterisk. Each parameter is explained in detail in the subsequent sections. Top level Sub level 1 Sub level 2 Description WORKING MODE Group Shows Memory Groups and the number of readings in each group MEASURE MODE NFE, FE, Auto* Non-Ferrous, Ferrous, or Auto (Automatic) Metal selection SET Unit settings m* Micrometers Mil Mils = mm * / 100 Backlight Increase/decrease backlight using a up/down arrows Auto Power OFF Enable* Allows Auto Power OFF Disable Defeats Auto Power OFF feature Bluetooth Enable Bluetooth communication enabled Disable* Bluetooth communication disabled Contrast Increase/decrease contrast using up/down arrows Info Shows firmware version number and meter Serial Number MEASURE VIEW View or delete stored data in all groups or selected groups CALIBRATION CAL Zero of FE Perform Fe Zero Calibration (refer to Calibration section) CAL Zero of NFE Perform nFe Zero Calibration (refer to Calibration section) Delete Zero Delete Fe Zero Calibration data Delete Zero Delete nFe Zero Calibration data NOTE.
6 Disable the Auto Power OFF feature before lengthy programming to avoid inconvenient automatic power down while programming. WORKING MODE MENU 1. Press the LEFT button to access the menu. 2. Scroll to WORKING MODE (if necessary) using up/down buttons. 3. Press the LEFT button (SELECT) to open WORKING MODE. 4. Use the UP and DOWN buttons to scroll through the groups and to see the number of saved readings in each group. 5. Press the LEFT button (SELECT) to return to the main menu or press the RIGHT button (BACK) twice to return to the normal operating mode. 5/17 6 MEASURE MODE MENU 1. Press the LEFT button to access the programming menu 2. Use the UP/DOWN buttons to scroll to the Measure Mode 3. Press the LEFT button (SELECT) to select the Measure Mode 4. Use the UP/DOWN buttons to scroll to Auto, FE, or NFE. Press the LEFT button (SELECT) to make a selection. In the AUTO mode, the meter automatically recognizes the metal that is being measured. In the Ferrous (FE) Mode the Magnetic induction measurement mode is used.
7 In the Non-Ferrous (NFE) Mode the eddy current measurement mode is used. 5. Press the RIGHT button (BACK) to return to the normal operating mode. SET MENU 1. Press the LEFT arrow to enter the menu. 2. Use the UP/DOWN arrows to scroll to SET. 3. Press the LEFT button (SELECT) to open the SET menu. a. Units of measure selections From the SET menu, scroll to the UNITS selection if necessary. Press the LEFT button (SELECT) to open UNITS. Select m or mil using the arrow buttons ( m = micrometers; mils = mm* ). Press the LEFT button (SELECT) button to confirm and to return to the SET menu (otherwise press the right button [BACK] to abort the edit and return to the SET menu). b. Backlight From the SET menu, scroll to the BACKLIGHT selection. Press the LEFT button (SELECT) to open BACKLIGHT. Use the UP and DOWN arrows to adjust the brightness of the backlight. Press the RIGHT button (Back) to confirm and return to the SET menu. c. Auto Power OFF From the SET menu, scroll to the Auto Power OFF selection.
8 Press the LEFT button (SELECT) to open Auto Power OFF. Select ENABLE or DISABLE using the arrow buttons. When enabled, the meter automatically switches OFF after 3 minutes of inactivity. When disabled, the meter will only switch OFF with a power button press or when the battery power is weak. Press the LEFT button (SELECT) button to confirm and to return to the SET menu (otherwise press the right button [BACK] to abort the edit and return to the SET menu). d. Bluetooth From the SET menu, scroll to the BLUETOOTH selection. Press the LEFT button (SELECT) to open BLUETOOTH. Select DISABLE or ENABLE using the arrow buttons. If Disable is selected the Bluetooth will be switched OFF. When Bluetooth is enabled, data will be automatically sent to PC, phone, or other Bluetooth receiving device. When the first connection is being made the device may prompt for a PIN number. In this case enter code 0000. 5/17 7 Note: Turn on Bluetooth only when necessary as the battery will drain more quickly with Bluetooth powered ON.
9 Press the LEFT button (SELECT) button to confirm and to return to the SET menu (otherwise press the right button [BACK] to abort the edit and return to the SET menu). e. Contrast From the SET menu, scroll to the CONTRAST selection. Press the LEFT button (SELECT) to open CONTRAST. Use the UP and DOWN arrow buttons to adjust the contrast. Press OK to return to the main menu or select BACK to return to the SET menu. f. Info From the SET menu, scroll to the INFO selection. Press the LEFT button (SELECT) to open INFO. View the firmware version and serial number of the meter. Use the RIGHT button (BACK) to move back through the menu items all the way to the normal measurement mode if desired. MEASURE VIEW MENU The Measure View menu allows for scrolling through the readings in all of the groups. Readings can be viewed or deleted in this mode. 1. Press the LEFT button to access the main menu. 2. Use the DOWN ARROW button to scroll down to MEASURE VIEW. 3. Press LEFT (SELECT) to open the MEASURE VIEW parameter.
10 4. Use the UP/DOWN ARROW buttons to scroll through the groups of stored readings. 5. When a group is highlighted that contains stored readings, use the LEFT arrow button to open the readings list. Now use the UP/DOWN arrows to view the readings. Press the LEFT button (Delete Group) to delete all readings in this Group or press the RIGHT button (BACK) to return to the main Group list. 6. Highlight Delete All and press the LEFT button (SELECT) to delete all of the readings in all groups. Otherwise press the RIGHT button (BACK) to return to the previous menu. 5/17 8 CALIBRATION MENU The Calibration menu allows the user to perform a ferrous (Zero F) or non-ferrous (Zero N) ZERO Calibration. The Calibration menu also allows the user to delete ZERO calibration data for both ferrous (Zero F) and non-ferrous (Zero N) modes. 1. Press the LEFT button to access the main menu. 2. Use the DOWN button to scroll to CALIBRATION. 3. Press LEFT (SELECT) to open the CALIBRATION parameter.