Transcription of Combat Tent Manual
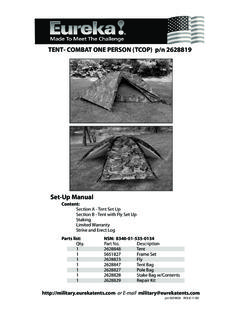
1 Combat tent Manual PARTS LIST: Qty. Description of Item National Stock Number or Product Code 1 Combat tent , complete with contents: 8340-01-452-591. 1 tent body 8340-01-464-0809. 1 rain fly (reversible) 8340-01-464-0773. 3 tent poles 8340-01-462-6873. 1 Combat tent transport bag 8340-01-464- 0405. 1 tent pole bag 8340-01-464-0395. 1 rain fly bag 8340-01-464- 0370. 1 Combat tent Manual 5690460. 1 repair kit /stake bag, w/contents: 8340-01-462- 6490. 8 stakes 8340-01-462-6547. 6 10' pull out cords 8340-01-464-0829. 2 5' pull out cords 8340-01-462-6881. 2 side rain fly pitching webs 8340-01-464-0822.
2 1 middle rain fly pitching web 8340-01-462-6866. 1 pole repair sleeve 8340-01-462-6818. 3 shok locks 8340-01-462-6861. 1 16' length of shock cord 5651805. 1 12" x 12" piece floor fabric 8340-01-462-6877. 1 12" x 12" piece rain fly fabric 8340-01-464-0270. 1 12" x 12" piece roof cloth fabric 8340-01-464-0186. 1 12" x 12" piece net 8340-01-462-6569. 1 sewing needle 5285020. 1 thimble 5285025. 1 spool of thread (100 yards) 5285030. 1 1 oz. bottle Seam Grip 8340-01-458-2768. 1 12" of 3/4" black, heavy duty web 8340-01-464-0099. 1 12" of 1" black, light weight web 8340-01-464-0092.
3 2 side squeeze buckles 5678210 / 5678215. 2 toggles 8340-01-464-0836. Replacement part: 1 Combat leg section 2628946. For information, parts, or repairs, contact the Eureka! Customer Satisfaction Department at our address in the Limited Warranty. or E-mail REV. C 6/08. Pitching Instructions: 1. Lay the tent body out on the ground. Assemble the poles. Make sure each rod is fully inserted into the next rod. Do not let the rods snap together. 2. Open the doors of the tent . Do not stake the tent down yet. In windy conditions, stake down the corner that faces into the wind.
4 3. Start at a corner and slide a pole through a sleeve. Follow the seam to the next sleeve and slide the pole through. Continue until you reach the other side of the tent . Be careful wherever seams cross. 4. Repeat with second and third poles. One pole should run from A. to B, a second from C to D and the third from E to F. Follow seams where poles cross B Pole sleeve F C. E. D. A. 5. Place the pole posts into the grommets at the corners of the tent in the following order: A to B, C to D and E to F. B. F. C. D E. A. 6. Move the tent into position and stake down the tent body at the corners and at the side stake loops E and F.
5 7. Choose the color and drape the reversible rain fly over the tent . Arrange the fly so that the arc of the door aligns with the arc of the third pole. 8. There are seven Velcro wraps on the underside of the rain fly. Wrap these around the tent poles to secure the fly. 9. Fasten the buckles at the corners of the fly to their mates at the corners of the tent . 10. Stake down the vestibules. Attach the 5' pull out cords to the loops at the sides of the fly and stake them down. 11. Adjust the tension on the rain fly at the corner buckles until the fly is taut and secure. Adjust 5' pull out cord if needed.
6 10' pull out cords 10' pull out cord tie to rain fly here ties to rain fly here Tie 5' pull out cord Stake vestibule here to rain fly here NOTE: Always stake your tent down - placing objects inside the tent is not adequate. Use the 10' pull out cords for added stability in high winds. Tie the cords to the loops on the rain fly and stake them down 3-4 feet from the tent . The cords should be taut, but they should not warp the poles or distort the shape of the tent . Striking Instructions Pull up all stakes. Release four buckles on rain fly. Unfasten Velcro on rain fly from tent poles.
7 Remove rain fly. Open doors and shake debris out through the doors. Pull pole posts out of all grommets. Slide poles out of sleeves. Fold tent to the length of the poles. Fold differently each time to prevent creases that may damage the tent . Roll tent toward a door to push air out. Ventilation One adult produces about a pint of water overnight. If this water vapor cannot escape, it reappears as condensation. If the inside of the tent is wet in the morning but there is no obvious leak, you probably have condensation. Usually, condensation is heaviest on the tent floor, where objects touch the cool earth.
8 You can help prevent condensation by leaving your windows open at night. To vent this tent in wet weather, open the top of the front door under the hood in the rain fly. Pitching the Rain fly Only: 1. Assemble all three poles. Unfold the rain fly with the desired color down. 2. There are three black Rain fly Pitching Webs [ RPW ], two with buckle ends and one with snap ends. Attach a buckle RPW to its mate at D of the rain fly . Repeat with a second buckle RPW at B. Snap the remaining RPW to ring at F. 3. Following the seam, thread a pole from A to B, passing through two web loops.
9 Place the pole's post into the grommet where the RPW is attached to the rain fly. Repeat, threading a second pole from C to D. 4. Wrap the Velcro at the peak of the rain fly to capture both poles. 5. Thread the last pole from E to F, passing through the Buckle RPW. web loop above the vestibule Post in grommet zipper, and through the web D. loops where it crosses the other two poles. A. F Velcro Snap RPW. B. Ring E. Buckle RPW. C. Web loop above vestibule zipper 6. Attach the other buckle of the RPW connected at B to the buckle at corner C. Push the pole from A toward B (post already inserted).
10 Place the free post into the grommet at A. 7. Attach the second RPW, connected at D to the buckle at A. Push the pole from corner C toward D and place the pole's post into the grommet at C. Insert post into grommet A. E. C. D. F. B. 8. Snap the loose end of the middle RPW to the ring on the rain fly at E. Push the third pole toward F and place the pole's post into the grommet at E. 9. Turn the rain fly over and stake down the corners and the vestibules. Use the center snaps in the RPWs to adjust the rain fly's height. Restake the corners and/or the vestibule stake loops if needed.