Transcription of Configuring RSLinx as an OPC Server for …
1 Configuring RSLinx as an OPC Server for PanelMate ePro RSLinx includes OPC Server functionality in all versions except RSLinx Lite. This means that if a user purchases a license for RSLinx OEM, Standard, or Gateway versions it can act as an OPC Server and be used with PanelMate PC Pro or PanelMate ePro. On PanelMate ePro there are several issues to be aware of when attempting to use RSLinx as an OPC Server . First, you must understand that RSLinx does much more than just provide OPC Server functionality, and as a result has a much larger installation storage requirement than OPC servers from companies such as Kepware.
2 The minimum installation requirements of RSLinx ( ) are approximately 30 Megabytes of DOM storage on an ePro (this does not include any help files) and it requires as least 5 additional Megabytes of space to uninstall or upgrade to a newer version. For this reason RSLinx is not approved for use on an ePro with less than a 256 Megabyte DOM (ePro XE or ePro X1 models). The second issue to note is that the PanelMate technical support group is not responsible for assisting in troubleshooting problems you may encounter with use of RSLinx . This document only covers the very basics of configuration of RSLinx OPC Server topics and setup of that Server within the PanelMate configuration editor.
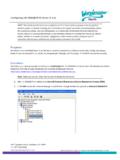
3 Outside of providing information contained herein for guidelines on configuration of RSLinx with PanelMate software you must rely on your Rockwell Automation technical support resources for product support on RSLinx . Setting up the OPC Topic in RSLinx In order to configure RSLinx s OPC Server you must create an OPC Topic. To do so, open RSLinx and select Topic Configuration from the DDE/OPC menu selection as shown below: Next, browse the Data Source tab to select and highlight the processor that you wish to communicate to using OPC. Below is an example using a ControlLogix processor over Ethernet, but this process will work with any RSLinx driver supported by the ePro (serial DF1, AB Ethernet, ControlLogix Ethernet, DH+ using SST-5136-SD-ISA card) and any AB Processor on those networks (Eg.)
4 PLC-5, SLC 500, FlexLogix, CompactLogix, and MicroLogix models). Once the desired logic processor is highlighted, click on the New button as shown below: Select/Highlight Click Here A topic labeled NEW_TOPIC will be added to the topic list as shown below. Edit the topic name as desired. The topic name you select here will later be used in the PanelMate configuration editor as the OPC Access Path . In this example the selected logic processor is named PLC1 (as shown below). After entering the topic name click on the Apply button to save the topic configuration.
5 Repeat the process for any other logic processors to which you wish to communicate, assigning a unique name for each topic. Once you have configured all topics click on the Done button as shown below. Click here after the topic name is entered Click here when finished If you forget to click the Apply button prior to the Done button, the editor will prompt you to save the last topic configured (as shown below). Click on Yes to complete the OPC topic configuration. Configuration of an OPC Server in PanelMate s Configuration Editor Configuration of OPC Servers is done in the PLC Name & Port Table of the desired PanelMate configuration.
6 First, select the port to use, 1, 2, or I/O. The port used has no bearing on what physical connection is actually used to connect the ePro to the PLC or PLC network. Since an OPC Client/ Server exchange is a logical connection between two different software components it is independent of any hardware/physical connection. The actual physical connection (serial, Ethernet or optional I/O card) is only known by the OPC Server , so the PanelMate OPC client doesn t actually use the port assignment in the PLC Name & Port table. The port assignment is only used to differentiate between devices (shown in the PLC Name Parameters section of the Name & Port Table) that use native drivers (which are actually assigned to a physical serial or I/O connection) and devices that use OPC drivers when using both native and OPC communications.
7 To assign an OPC Server to a port, select the port with a mouse click and use the Driver Use pull-down menu to choose OPC Server . Port 1 is used in the example shown below. Next, fill out a PLC Name in the PLC Name Parameters section, select the port as the one assigned to OPC Server and enter a unique Remote ID (Model selection has no meaning in an OPC connection). The Remote ID must be unique when using multiple PLC Names assigned to an OPC Server connection. The Remote ID has no bearing on any network address other than to distinguish one OPC device from another within PanelMate s internal logical connection mechanism.
8 All physical network addressing (DH+ node, TCP/IP address) is defined within the OPC Server , and in the case of RSLinx , that address is defined in the topic configuration process when a logic processor is selected from the browser. In the example shown below a device named Clogix1, remote ID 0, Port 1(OPC Server port) has been selected. Once these 3 fields are defined click on the Add button as shown: Click here to add a device Once the device is added to the table, select that device entry with a mouse click. Once selected a button labeled OPC Setup will appear in the bottom left area of the dialog box (next to the Tag button) as shown below.
9 Click on that button to configure the OPC properties of that device. Click here to enter OPC settings The OPC Server Setup dialog box will pop-up as shown below. In the dialog box the OPC Server Name and Access Path need to be specified in order to create the logical connection between the PanelMate device name (Clogix1 in this example) and the RSLinx topic (PLC1 in this example). Each OPC Server name is unique, and in the case of RSLinx the Server name is RSLinx OPC Server (upper or lower case doesn t matter, RSLinx opc Server is okay too, but the spelling, along with spaces before and after OPC is critical for successful operation).
10 The access path depends on configuration of the OPC Server . In the case of RSLinx the Access Path Name is equal to the topic name created in RSLinx . In our example it was PLC1 . Type in the information in the dialog box as shown below and click on OK . If you have additional OPC servers or additional topics/logic processors to connect, create additional devices in the PLC Name Parameters section in the same manner. Since each device has a unique OPC Setup ( Server Name and Access Path Name) multiple OPC servers, or multiple devices attached to a single OPC Server can be accommodated from a single OPC Server entry in the top half of the PLC Name & Port Table.