Transcription of Connect your home phone jacks (OPTIONAL) - AT&T
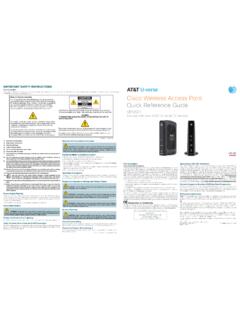
1 Gather materials needed for setup:Get startedApproximate installation time: 35 minutesUVE458_VoIP_3801_Install_Guide_Ba ck_ReleaseUVE458_VoIP_3801_Install_Guide _Front_Release911 Acknowledgment form Terms of Service AT&T U- verse Voice User Guide 911 stickers phone cordNeed more help?Go online: Visit us: Dial and say U- verse technical support. 2012 AT&T Intellectual Property. All rights reserved. AT&T, the AT&T logo and all other AT&T marks contained herein are trademarks of AT&T Intellectual Property and/or AT&T affiliated companies. Battery backup unit (BBU) will provide you with backup power in the event of a power outage. (BBU color may vary.)Before you begin:1. Check your service activation not attempt to install your service until your service activation date.
2 You can find this date on your packing slip. The packing slip can be found in a plastic sleeve located on the outside of the shipping your Wireless Gateway:1. Go outside and find your phone box.*2. Open the phone box by removing the screw with a flathead Unplug the phone cord in the outside box (as indicated in diagram 3).4. Close the box and screw it.*One side of the phone box may not be accessible because it is for phone company use A: Disconnect your previous/old outside phone lineFigure B: phone cord connecting Gateway to phone jackBeforeAfterPHONESLINES 1 & 2 phone LINEAUX. LINE LOCAL ETHERNETRESETPOWER2341 PHONESLINES 1 & 2 phone LINEAUX. LINE LOCAL ETHERNETRESETPOWER2341 Computer or TVTo coax jack on wallComputer or TVTo coax jack on wallPHONESLINES 1 & 2 phone LINEAUX.
3 LINE LOCAL ETHERNETRESETPOWER2341 PHONESLINES 1 & 2 phone LINEAUX. LINE LOCAL ETHERNETRESETPOWER2341 Computer or TVComputer or TVPHONESLINES 1 & 2 phone LINEAUX. LINE LOCAL ETHERNETRESETPOWER2341 PHONESLINES 1 & 2 phone LINEAUX. LINE LOCAL ETHERNETRESETPOWER2341 Computer or TVTo coax jack on wallComputer or TVTo coax jack on wallPHONESLINES 1 & 2 phone LINEAUX. LINE LOCAL ETHERNETRESETPOWER2341 PHONESLINES 1 & 2 phone LINEAUX. LINE LOCAL ETHERNETRESETPOWER2341 Computer or TVComputer or TV124 PHONESLINES 1 & 2 phone LINEAUX. LINE LOCAL ETHERNETRESETPOWER2341 PHONESLINES 1 & 2 phone LINEAUX. LINE LOCAL ETHERNETRESETPOWER2341 Computer or TVTo coax jack on wallComputer or TVTo coax jack on wallPHONESLINES 1 & 2 phone LINEAUX.
4 LINE LOCAL ETHERNETRESETPOWER2341 PHONESLINES 1 & 2 phone LINEAUX. LINE LOCAL ETHERNETRESETPOWER2341 Computer or TVComputer or TV3B. At the Wireless Gateway, Connect the gray phone cord from the Lines 1 & 2 port on the Wireless Gateway to a wall jack. You will need a flathead screwdriver (not included) Connect your home phone jacks (OPTIONAL)Approximate time: 15 minutesThese steps will enable you to use your existing home phone jacks with your AT&T U- verse Voice service. Note: You must follow steps 1, 2, and 3 inside ( Connect your primary phone , power up, and complete your mandatory activation call) before attempting to Connect your home phone To Connect your home phone jacks , you must be able to answer yes to these questions: 1.
5 Do you have AT&T U- verse TV service? 2. Do you have access to the phone box outside your home? (See figure A.) 3. Do you have an unused phone jack near your Wireless Gateway? 4. Does your Wireless Gateway have a cable plugged into the Cable Line port? (See figure B.)If you answered yes to all the questions above, follow the instructions for disconnecting an outside phone line (figure A).If you follow steps A and B below but are unable to successfully Connect your home phone jacks , OR if you answer no to any of the questions in step A below, then you must schedule an appointment with an AT&T U- verse service technician in order to Connect your home phone jacks to your AT&T U- verse Voice service.
6 Call Additional charges will apply for professional installation services. 911 AcknowledgmentTerms of ServiceUser Guide2. Do you have a monitored security system or health alarm? If either of these apply to you, you will need an AT&T technician to install your service. Call to schedule an appointment. Additional charges will apply for professional installation services from an AT&T U- verse service SlipAT&T U-verseComputer or TVTo cable jackComputer or TVTo cable jackPHONESLINES 1 & 2 phone LINEAUX. LINE LOCAL ETHERNETRESETPOWER2341 PHONESLINES 1 & 2 phone LINEAUX. LINE LOCAL ETHERNETRESETPOWER2341 Computer or TVComputer or TVATT91800646-4 FPOATT102700746-3(UV_VOIP_3801_CSI_GUIDE ) 10/12AT&T U - v e r s e VoiceGo to for more detailed installation installation: Do not attempt to install your service until your service activation date.
7 You can find this date on your packing guide UVE458_VoIP_3801_Install_Guide_Inside_Re leaseUVE458_VoIP_3801_Install_Guide_Insi de_ReleaseSwitch to convenient, free paperless billing. Reduce your risk of identity theft, plus retrieve up to 12 months of bills online. Go to and select Stop Paper learn more about the benefits and features of your U- verse service, visit Connect the gray phone cord from the Lines 1 & 2 port on the Wireless Gateway to your phone (see diagrams below). If you are using a cordless phone , make sure the base station is plugged into an electrical : If you also have AT&T U- verse TV and/or high-speed Internet service, you will temporarily lose your TV/DVR connection and your Internet connection during this the power to On.
8 Within a few minutes you should see a solid green Power light to indicate a successful power : Leave any cables in these ports as they : Existing jacks will not have service at this point. For other jacks in the house to operate, see Connect your home phone jacks on the back of this Check your all cables and cords to ensure they are connected properly and Power down, power the black power cord from the back of the Wireless Gateway. Leave the Wireless Gateway unplugged for 15 seconds and then plug it back Wait for blinking indicator may need to wait up to two minutes for blinking indicator lights to turn solid trouble? Here are a few common issues to check:Still having problems?
9 Many issues can be resolved with three simple steps:What is your service activation date?Do not attempt to install your service until your service activation date. You can find this date on your packing you activate your service?You must complete activation for your AT&T U- verse Voice service to work correctly. See step 3 above. Habla espa ol? Por favor visite para ver la informaci n en Espa ol. Tambi n pueden ver la siguiente gu a: ATT102700746-3 ( ) para m s : You will have a dial tone after completing step 2, but will be able to make only emergency and toll-free calls until you activate your service in step you ordered a second AT&T U- verse Voice service line (with a different phone number), follow the instructions below:A.
10 Disconnect the phone cord from your primary phone and Connect a voice line splitter to the Connect the phone cables of both phones to the first and second ports of the Complete the mandatory activation call (step 3 above) from the phone you just Power down your Wireless Gateway by unplugging the power cord from the wall and the gateway. You will no longer need this power Connect the battery backup unit (BBU) by plugging it into an electrical outlet. Then plug the round connector into the Power port on the Wireless : If you already have a phone connected to your AT&T U- verse Voice service line and want to add a second phone line, skip to Adding a second line under step 2 Line 1 Power CordBBUNote: If you order two separate lines with your initial installation, Connect the first as explained in step 1 and the second as described !
