Transcription of Contents
1 Contents General information, 1-2-3-4-5. Technical Information, 2-3. For your safety, 4. Introduction, 5. installation requirements, 6-7. Attention / Grounding instructions, 6. Electrical, location and draining, 7. Installing the washer-dryer, 8-9-10-11. 210oXC. Unpacking the washer-dryer, 8. Removing the transit screws, 8. Connecting the water inlets, 9. Connecting the drain hose, 9. Installing the exhaust ducting, 10. Leveling the washer-dryer, 10. Completing the installation , 11. About your appliance, 12-13-14-15. Washer-dryer special features, 12. Control panel, 13. Option buttons, 14. Program key, 14. Detergent and laundry aids, 15. Dispenser drawer, 15. Washing and drying, 16-17-18-19. Cycle Description Chart, 16. Before starting a cycle, 17. Determining load sizes, 17. Setting a wash', dry' or wash-to-dry' cycle, 17. Splendide laundry tips, 18.
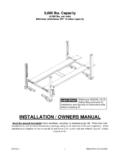
2 For best results, 18. Combo laundry FAQ's / Sample loads, 19. Care and maintenance, 20-21. Turning off the water or electricity supply, 20. Cleaning the dispenser drawer, 20. Checking the water inlet hoses, 20. Cleaning the pump pre-chamber, 21. Checking the dryer vent, 21. No lint filter to clean, 21. Troubleshooting, 22-23. Troubleshooting Chart, 22. If you need assistance, 23. General Information As an Energy Star Partner, This appliance was tested by UL and Splendide Division of Westland conforms with both Canadian and Sales has determined that Energy UL safety requirements and Star labeled models meet the displays their mark. Energy Star guidelines for energy efficiency. 2 General Information Technical information Model WD2100XC(P) Splendide 2100XC, Splendide 2100 XCP. Weight 148 lbs. Width: ( cm). Dimensions Height: ( cm). Depth: 22 ( cm).
3 Minimum installation Sides: 0 . Clearances Front / Back: 1 . Washing: 2 to 15 lbs. (1 to 7 kg). Capacity Drying: 2 to 11 lbs. (1 to 5 kg). Voltage: 120 Volts, Amp, 60 Hz Electrical Connection Max. Absorbed Power: 1300 Watts Max. Pressure: .69 MPa ( bar), 100 PSI. Water Connection Min. Pressure: MPa ( bar), PSI. Max. Spin Speed Up to 1200 RPM. Min. installation Spacing This appliance may be installed in a recessed area, closet or alcove. The installation spacing is in inches and is the minimum acceptable. *Additional spacing should be considered for easy installation , servicing and compliance with local codes and ordinances. Installations must conform with the minimum dimensions indicated. Dryer Exhaust WARNING! To reduce the risk of fire, this Requirements appliance must be exhausted to the outdoors. NOTE: The manufacturer reserves the right to make any improvements to its appliances without giving prior notice.
4 General Information 3. For Your Safety Save These Instructions Your washer-dryer has been built in compliance with the strictest international safety regulations. However, for your safety, the information in this manual must be followed to minimize the risk of fire or explosion, electric shock, or to prevent property damage, personal injury, or loss of life. Read all instructions before using any appliance. Do not wash or dry articles that have been previously cleaned in, washed in, or spotted in gasoline, dry cleaning solvents, other flammable/explosive substances as they emit vapors that could ignite or explode. Before the appliance is removed from service or discarded, remove the door to the washing/drying compartment. Do not repair or replace any part of the appliance or attempt any servicing unless specifically recommended in the user-maintenance instructions or in published user- repair instructions that you understand and have the skills to perform.
5 Do not allow children to play on or in the appliance. Do not add gasoline, dry cleaning solvents, items contaminated with cooking oil or other flammable or explosive substances to the wash water. Do not install or store this appliance where it will be exposed to weather or in an area where gasoline or other flammables are stored. Under certain conditions, Hydrogen gas may be produced in a hot water system that has not been used for 2 weeks or more. HYDROGEN GAS IS EXPLOSIVE. If the hot water system has not been used for such a period, before using the appliance, turn on all hot water faucets and let the water flow from each for several minutes. This will release any accumulated hydrogen. Do not use heat to dry articles containing foam rubber or similar textured rubber-like materials. Turn off water faucets to relieve pressure on hoses and valves and to minimize leakage if a break or rupture occurs.
6 Do not reach into the appliance if the drum is moving. Do not tamper with controls. Repair or replacement of a part should be made only by a qualified service technician to prevent personal injury or damage to the machine. Contact Splendide to locate an authorized repair service company near you. Disconnect power to the washer at the circuit breaker or fuse box, or unplug the machine in an emergency or when servicing is required. Have the installer show you and label the proper switch or fuse at the electrical disconnect box. Good, safe practices and caution MUST be applied when installing, operating, and maintaining any appliance. Follow basic precaution. Before loading the washer, make sure the drum is empty. 4 General information Congratulations Introduction For your records Congratulations on your purchase of a Write model and serial numbers here.
7 You can find Splendide. Your Spendide washer-dryer takes them on the front of the machine and inside of the the drudgery out of doing laundry - simply toss door opening. dirty laundry in and get clean, dry laundry out! Model: ( WD2100XP). Whether it's installed in a luxury RV, yacht, or apartment closet, your new Splendide is designed to fit where others won't and deliver outstanding washing and drying performance (all while conserving more energy and water Serial No: than other brands). Enjoy your new Splendide! S/N. Read this manual Please read this manual carefully. If you need further assistance, please contact Splendide Laundry Centers (Mon-Fri 7am-5pm PST). 1-800-356-0766. General information 5. installation Requirements ATTENTION! GROUNDING INSTRUCTIONS. This appliance must be grounded. In the For your own protection and to prevent event of malfunction, or breakdown, accidents, injury, and fire, please read the grounding will reduce the risk of electric following carefully before installing the shock by providing a path of least resistance washer-dryer.
8 For electric current. This appliance is installation and grounding must be done in equipped with a cord having an equipment accordance with local codes and by a qualified grounding conductor and grounding plug. installer. installation Instructions provided in The plug must be plugged into an appropri- this booklet are for the installers' reference. ate outlet that is properly installed and Washer-dryer MUST be installed on a strong, grounded in accordance with all local codes level floor and in a protected dry and well- and ordinances. DO NOT modify the plug ventilated area close to a power supply and provided with the appliance. If it will not fit drain outlet of sufficient capacity. DO NOT the outlet, have a proper outlet installed by a install on carpet. qualified electrician. IMPORTANT: installation on WARNING! Improper carpet floors will cause the connection of the equipment machine to vibrate and may -grounding conductor can result in excessive machine result in a risk of electric vibration during the spin cycles shock.
9 Check with a qualified and loss of performance. electrician or serviceman if you are in doubt as to whether the appliance is properly The washer-dryer should be plugged into a grounded. properly grounded (3) prong electrical outlet capable of 120 Volt, 60 Hz, 1300 W, and Amp. It shouldn't be controlled by a wall switch or pull cord which could be turned off accidentally. For your safety, the third or round grounding prong must never be removed. DO NOT USE AN EXTENSION. CORD. DO NOT install or store this appliance where it will be exposed to weather or in an area where gasoline or other flammables are stored. ! WARNING. ELECTRICAL SHOCK HAZARD. Disconnect power before servicing. Replace all panels before operating. Failure to do so can result in death or electrical shock. 6 installation requirements Electrical If you You'll Machine Voltage/Amperage - 120V, 60 Hz, no access to Hot/Cold water hookups Splendide Faucet Adapter Kit, or equivalent.
10 1300 W, Amp. to install a dryer vent Splendide Vent Kit, or and ducting in your Connection - 3-prong plug with 6' cord is RV or boat equivalent. provided with the machine. concerns about the Splendide SecureFit bracket appliance shifting in kit, or equivalent. Circuit/Protector - 3-wire single phase, 120V, your RV or boat 60 Hz, AC, on a separate 15 Amp circuit. water damage Splendide Drain-A-Way Pan, concerns or equivalent. to make a 90 duct Splendide 90 offset elbow, or turn in less than equivalent. Location This machine may be installed free standing as well as in a recessed area, closet, or alcove Drainage Minimum installation Spacing - 0 on Standpipe Diameter/Capacity - Needs a 1 . sides and 1 in front and back. NOTE: minimum diameter standpipe with a minimum Additional installation spacing needs to be carry-away capacity of 7 gallons per minute.