Transcription of Custom Settings for Maestro Occupancy Sensing Switches …
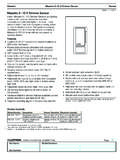
1 Custom Settings for Maestro Occupancy sensor SwitchesApplication Note #461 Revision CAugust 20191 Customer Assistance NumbersMS-OPS2 MS-VPS2MS-OPS5M MS-VPS5 MMS-OPS6M2-DV MS-VPS6M2-DVMS-OPS6M2U-DV MS-VPS6M2U-DVUMS-OPS6M2-DV UMS-VPS6M2-DVOverviewMaestro Occupancy sensor Switches have Custom Settings that can be adjusted to the user s preference. The Settings include Timeout, sensor Mode, and Advanced Settings (see the Custom Settings section for descriptions of these Settings ).General InstructionsSetting options vary depending on model number. Use the model number to identify which options are available and then follow the instructions under each Custom Settings all instructions before proceeding. 1. Press and hold the button(s) indicated in the picture below. 2. The lens will flash once at each setting; it will always start at setting 1. 3. The setting will be saved after releasing the button(s).
2 On/Off ButtonAuxiliary ButtonLensApplication Note # SettingsSelect your preferred Settings from the instructions on the following pages before proceeding. Note: User is required to remove the wallplate in order to gain access to the Auxiliary Timeout: Programmable setting that determines how long the lights will remain on after the room has been vacated, and motion has not been detected. Test Mode: Temporary, short timeout (less than 15-seconds) that can be used to test the sensor s coverage. After entering test mode, the device will exit test mode automatically after 5 minutes, or when any button is pressed. If no motion is detected for more than 15 seconds, the light will turn off. If motion is detected, the light will turn on and continue to stay on for as long as motion is detected. The lens will flash periodically, indicating that motion has been NumbersMS-OPS6M2-DV MS-VPS6M2-DVMS-OPS6M2U-DV MS-VPS6M2U-DVUMS-OPS6M2-DV UMS-VPS6M2-DVNumber of flashes1 Test mode21 minute35 minutes415 minutes530 minutesExample 1b: Changing the Timeout to 30 minutes 1.
3 Press and hold the On/Off button. 2. Release the button after the lens flashes for the fifth NumbersMS-OPS2 MS-VPS2MS-OPS5M MS-VPS5 MNumber of flashes1 Test mode21 minute35 minutes415 minutes530 minutesExample 1a: Changing the Timeout to 15 minutes 1. Press and hold the On/Off button. 2. Release the button after the lens flashes for the fourth : Default Settings are shown in Note #4613 sensor Mode Auto-On daylight Sensing *: Mode in which the light turns on only if natural light in the room is low. If the switch turns on when there is enough natural light, or if the switch does not turn on when there is not enough natural light, press the On/Off button within 5 seconds of entering the room. The sensor will learn your preferred light level over time. Manual Off-While-Occupied*: Feature that can be enabled or disabled to accommodate different lighting scenarios. Enabled: The sensor automatically turns on when you enter the room, and turns off when you vacate the room.
4 When this mode is enabled, if you turn the lights off when you enter the room, they will remain off as long as the room remains occupied and the Timeout has not expired. Disabled: The sensor automatically turns on when you enter the room, and turns off when you vacate the room. When in this mode, if you turn the lights off while in the room, they will automatically turn back on after a 25 second period if motion is detected. Auto-ON / Auto-OFF ( Occupancy Mode)*: This is the default setting of the Occupancy sensors. The sensor automatically turns on when you enter the room, and turns off when you vacate the room. This setting is also known as Occupancy mode. Manual-ON / Auto - OFF (Vacancy Mode): This is the default setting for vacancy sensors. The sensor will only turn on when the On/Off button is pressed, but will still turn off automatically, when you vacate the room. This setting is also known as Vacancy Off-While-Occupied ActionsSequence of EventsEnabledDisabledRoom is occupiedLight is ONLight is ONOccupancy sensor switch is manually turned offLight turns OFFL ight turns OFF Room remains occupiedLight remains OFFL ight turns ON after 25 secondsRoom is vacatedLight remains OFFL ight remains OFFT imeout period expiresLight remains OFFL ight turns OFFRoom becomes occupiedLight turns ONLight turns ON* These features are not available in the vacancy Assistance Note # Mode (continued)Model NumbersMS-OPS2MS-OPS5 MNumber of flashes1 Auto-On and Auto-Off ( Occupancy mode);Off-while-occupied DISABLED2 Manual-On and Auto-Off (Vacancy mode)3 Auto-On daylight Sensing and Auto-Off; Off-while-occupied ENABLED4 Auto-On and Auto-Off ( Occupancy mode);Off-while-occupied ENABLEDE xample 2: Changing the sensor Mode to Auto-On daylight Sensing and Manual Off-While-Occupied enabled.
5 1. Press and hold the Auxiliary button. 2. Release the button after the lens flashes for the third NumbersMS-OPS6M2-DV MS-OPS6M2U-DVUMS-OPS6M2-DV Number of flashes1 Auto-On and Auto-Off ( Occupancy mode);Off-while-occupied ENABLED2 Manual-On and Auto-Off (Vacancy mode)3 Auto-On daylight Sensing and Auto-Off; Off-while-occupied ENABLED4 Auto-On and Auto-Off ( Occupancy mode);Off-while-occupied DISABLEDNote: Default Settings are shown in Note #4615 Advanced Settings Sensitivity: A programmable setting to adjust the level of sensitivity your sensor will have to detect NumbersMS-OPS2 MS-VPS2MS-OPS5M MS-VPS5 MMS-OPS6M2-DV MS-VPS6M2-DVMS-OPS6M2U-DV MS-VPS6M2U-DVUMS-OPS6M2-DV UMS-VPS6M2-DVNumber of flashes1 Motion sensitivity low2 Motion sensitivity high3 Return all Settings to defaultExample 3: Changing to Low Sensitivity 1. Press and hold On/Off and Auxiliary buttons simultaneously.
6 2. Release both buttons after the lens flashes for the first is a registered trademark of Lutron Electronics Co., Electronics Co., Suter RoadCoopersburg, PA 18036-1299 048461 Rev. C 08/2019 Lutron Contact NumbersWORLD HEADQUARTERSUSAL utron Electronics Co., Suter RoadCoopersburg, PA 18036-1299 TEL: + : & South America Customer AssistanceUSA, Canada, ( )Mexico:+ America:+ HEADQUARTERSU nited KingdomLutron EA Limited125 Finsbury Pavement4th floor, London EC2A 1 NQUnited KingdomTEL: +44.(0) : +44.(0) (UK): Support: HEADQUARTERSS ingaporeLutron GL Havelock Road#07-04 King s CentreSingapore 169662 TEL: + : + Support: Technical HotlinesNorthern China: China: Kong: : : + : : : Countries: +
