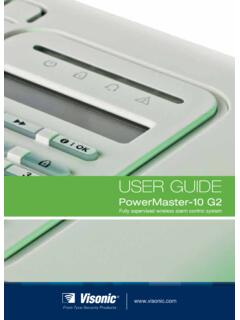
Transcription of D-303984 PowerMaxComplete User's Guide
1 Fully supervised wireless alarm control systemUSER D-303984 PowerMaxComplete User's Guide 1 PowerMaxComplete user Guide Table of Contents Compatibility of this Manual .. 2 Quick Guide To Primary Alarm Control Operations .. 2 Contact list form .. 2 Luminous Indicator Signals .. 2 Siren Signals .. 3 Useful Hints For PowerMaxComplete Users . 3 1. Introduction .. 4 Overview .. 4 System Features .. 5 Terms of the Trade .. 6 Control Pushbuttons .. 6 Multi-Function 7 Voice Announcements .. 7 Proximity Tags .. 8 Screen Saver Option .. 8 2. Securing The Protected Site .. 9 Security-Related Pushbuttons.
2 9 Partition selection process .. 9 Preparing to Arm .. 9 Arming AWAY .. 9 Arming HOME .. 9 Switching from HOME to AWAY .. 10 Switching from AWAY to HOME .. 10 Arming Instant .. 10 Forced Arming .. 10 Arming in the Latchkey Mode .. 11 Initiating a Panic Alarm .. 11 Initiating Fire Alarm .. 11 Initiating Emergency Alarm .. 11 Disarming and Stopping Alarms .. 11 Siren Behavior .. 12 3. Speech And Sound Control .. 13 Speech & Sound Cont. Push-buttons .. 13 Adjusting the Speech Volume .. 13 Voice ON/OFF .. 13 Message Exchange .. 13 Message Playback .. 14 Chime ON/OFF .. 14 4. Electrical Appliance Control.
3 15 Control Options and Pushbuttons .. 15 Automatic ON/OFF Control .. 15 5. Reading Alarm Memory And Trouble Data . 16 Reviewing Alarm/Tamper Memory .. 16 Reviewing Trouble Information .. 16 Reviewing Memory & Troubles at the Same Time .. 17 Correcting Trouble Situations .. 17 6. Special Functions .. 18 Looking after People Left at Home .. 18 Emergency Calls for Help .. 18 Remote Control by Telephone .. 18 Reporting to Private Telephone .. 20 Remote Control by SMS .. 20 Reporting by SMS .. 21 Conducting a Walk Test .. 21 7. user Settings .. 23 What are the Settings You Need? .. 23 Entering the user Settings Menu.
4 23 Bypassing zones .. 24 Reviewing the Bypassed Zone List .. 25 Recalling the Last Bypass Scheme .. 25 Programming Private Report .. 25 Setting the user Codes .. 26 Enrolling Keyfob Transmitters .. 29 Deleting Keyfob Transmitters .. 29 Enrolling Proximity Tags (optional) .. 29 Deleting Proximity Tags .. 30 Setting the Voice Options .. 30 Automatic Arming Option .. 30 Setting Arming Time .. 31 Enabling the Squawk Option .. 31 Setting Time and Time Format .. 31 Setting the Date and Date Format .. 32 Scheduler Function .. 32 Installer Mode .. 32 8. Reading The Event Log .. 33 Event Log Description .. 33 Reading Procedure.
5 33 9. Maintenance .. 34 Replacing the Backup Battery .. 34 Replacing Wireless Devices Batteries .. 34 Periodic Testing .. 35 Cleaning the Control Panel .. 35 10. Performance Limits .. 36 APPENDIX A. PARTITIONING .. 37 Selecting a 37 Arming / Disarming the System .. 37 The Show Function .. 37 Siren .. 38 Partition Status display .. 38 MCT-237 .. 38 MCM-140+ .. 39 MKP-150/151/152 .. 39 MKP-160 .. 39 APPENDIX B. GLOSSARY .. 40 APPENDIX C. HOME FIRE ESCAPE PLANNING .. 42 2 D-303984 PowerMaxComplete User's Guide Compatibility of this Manual This manual should be used with PowerMaxComplete and above. Quick Guide To Primary Alarm Control Operations QUICK REFERENCE TO PRIMARY ALARM CONTROL OPERATIONS Active Partition Selection (when partition is enabled) + [PARTITION NO.]
6 ] Arming AWAY .. + [Code]* Arming AWAY-INSTANT .. + [Code]* + Arming HOME .. + [Code]* Arming HOME-INSTANT .. + [Code]* + Arming AWAY-LATCHKEY .. + [Code]* + Force Arming AWAY (system not ready) + [Code]* + (to silence the protest buzz) Force Arming HOME (system not ready) + [Code]* + (to silence the protest buzz) Disarming and stopping alarms .. + [Code] * The factory default master user code is 1 1 1 1. The code is not required if quick arming has been permitted by the installer. Change the factory default code to a secret code without delay (see section 7) Contact list form Dear Customer, Thank you for choosing PowerMaxComplete , a highly advanced wireless alarm control system produced by Visonic Ltd.
7 Please note below the installer's telephone number to facilitate obtaining assistance. Company Name: _____ Telephone Number: _____ Person to Contact: _____ Also please make sure that you have the name and telephone number of the central station your system will report to. If you ever call the central station to ask questions, you should be able to come up with your "ACCOUNT NUMBER" used to identify your alarm system to the central station. Obtain this information from your installer and write it. Monitoring Station s Name _____ Telephone Number: _____ My Account Number: _____ If you or your installer set the system to contact private telephone numbers, note down the 4 telephone numbers that your installer programmed to be called: Phone No.
8 1: _____ Phone No. 2: _____ Phone No. 3: _____ Phone No. 4: _____ Luminous Indicator Signals Indicator Behavior Significance (red) Lights steadily The system / a system partition(s) is in the armed state (AWAY MODE) Flashes The system / a system partition(s) is in the armed state (HOME MODE) No light The system is presently in the disarmed state Note (*): Refers to the selected partition(s). If control panel is set to a single partition, then operation performed on other partitions will not be displayed. (orange) Lights steadily The system / a system partition(s) (*) is presently in a state of trouble No light No trouble - all is well Note (*): Refers to the selected partition(s).
9 If control panel is set to a single partition, then operation performed on other partitions will not be displayed. (green) Lights steadily The chime function is active - chime zones will chime when disturbed. Note: The chime indicator lights steadily when at least one partition is enabled. No light The chime function is inactive - chime zones will not chime when disturbed. (green) Lights steadily AC power is supplied to the control panel No light The system is operating on backup battery power D-303984 PowerMaxComplete User's Guide 3 Siren Signals Alarm Type Graphic Representation of Signal Verbal Description of Signal Burglar / 24 hour/ Panic ON continuously Fire.
10 ON - ON - ON - pause - ON - ON - ON - pause .. Test* (both external and internal sirens) ON for 2 seconds (once) * Supplementary use only. Useful Hints For PowerMaxComplete Users Stopping an alarm: When the alarm sounds - press the DISARM () button on your key-ring transmitter or press on the keypad and then enter your access code (1 1 1 1 by default). Stopping trouble beeps: When trouble occurs in the system, the TROUBLE indicator on the front panel will light, and a sequence of 3 beeps will sound once per minute. If you do not wish to eliminate the trouble immediately and the beeps are bothersome, press the DISARM () button on your key-ring transmitter, or press on the keypad and then enter your access code (1 1 1 1 by default).