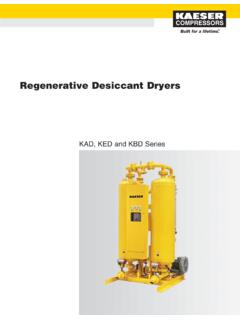
Transcription of DAD-500 (130026) DESICCANT AIR DRYING SYSTEM
1 SB-6-156-OSERVICE BULLETINR eplaces SB-6-156-NRef. ReplacementIndividualNo. Part Separator Filter1(HAF-502)2 HAF-505 Oil Coalescing Filter13 --- DESICCANT Dryer14 HAR-507 Air Regulator15GA-288 Gauge16VA-542 Ball Valve1*7 DAD-1 Replacement DESICCANT (Not1 Shown) (1 Humidity IndicatorPaper Included)8 DAD-8 Air Filter, (inside of tank)29 DAD-400 Humidity Indicator (1 Humidity1 Indicator Paper Included)10PT-417 DESICCANT Tank (without DESICCANT )1(Includes Ref. No. 8)11 HAF-404 Filter Change Indicator112 DAD-600 Dessicant Tune-Up Kit (Not1shown) Includes 1 each: DAD-1,DAD-3, and Kit (2)114PT-96 Pipe Plug, Special, 1-1/2 NPT215VA-595 Main Air Supply Shut Off Valve1(Not Shown)*The Material Safety Data Sheet (MSDS) is available upon 1 DAD-500 25 CFM DESICCANT Air DryerDESCRIPTIONThe 25 CFM DAD-500 DESICCANT Air DRYING SYSTEM isdesigned to be a point of use SYSTEM . It is capable ofremoving dirt, water, oil and water vapor fromcompresssed air.
2 It consists of a filter separator,coalescing filter, DESICCANT dryer, air regulator andmain air supply shut off (130026) DESICCANT AIR DRYING SYSTEMSPECIFICATIONS13-0041 (HAF-502) Water Separator Filter - See page 3:Air Inlet1/2" NPT(F)Air Outlet1/2" NPT(F)Air Flow Capacity100 CFMM aximum Operating Pressure150 PSIG ( Bar)Maximum Temperature150 F ( C)Automatic DrainStandardFilter5 micronHAF-505 Oil Coalescing Filter - See page 4:Air Inlet1/2" NPT(F)Air Outlet1/2" NPT(F)Air Flow Capacity 55 CFMM aximum Operating Pressure150 PSIG ( Bar)Maximum Temperature150 F ( C)Automatic Mechanical DrainStandardPressure Differential MicronDesiccant Dryer - See page 2:Air Inlet1/2" NPT(F)Air Outlet1/2" NPT(F)Air Flow Capacity 25 CFMM aximum Operating Pressure150 PSIG ( Bar)Maximum Temperature150 F ( C)Humidity IndicatorStandardWater Vapor Removal-40 F Dew PointHAR-507 Air Regulator - See page 4:Air Inlet3/8" NPT(F)Air Outlet1/4" NPT(F) (3 ea.)
3 Air Flow 60 CFMM aximum Operating Pressure150 PSIG ( Bar)Maximum Temperature120 F ( C)VA-595 Main Air Supply Shut Off Valve - Not Shown:Air Inlet and Air Outlet1/2" NPT(M)Maximum Operating Pressure175 PSIG ( Bar)Shipping Weight: DAD-500 = 35 LISTAir In146 Air Out583281091113131414 Page 2 SB-6-156-ORisk of personal of property as otherwise specified bythe manufacturer, this product isspecifically designed for com-pressed air service and use withany other fluid (liquid or gas) is amisapplication. For example, usewith or injection of certain hazard-ous gases in the SYSTEM (such asoxygen or liquid petroleum gas)could be harmful to the unit orresult in a combustible conditionthat may cause fire or 's warranties arevoid in the event of misapplica-tion and manufacturer assumesno responsibility for any of injury. Release all air pres-sure from SYSTEM before servicingsystem.
4 Be sure to read and un-derstand all Service Bulletins onthe separate components beforeusing the SYSTEM . Use only speci-fied DeVilbiss solvents, paints andchemicals may attack plastic fil-ter bowl and can cause bowlfailure. Do not use near of equipment damage! Donot install your DAD unit whereit is subjected to sudden depres-surization cycles exceedling 20 PSIG. Quick relieving air solenoidvalves, typical in some spraybooths, will eventually fail pres-sure gauges and filters, and pro-duce DESICCANT "dusting".To minimize sudden depressur-ization effect, replace the exist-ing solenoid with a "slow closingsolenoid valve". (One source: Au-tomatic Switch Co.) Or, install anair adjusting valve at the existingsolenoids Plumbing Guide on page sure to read all "Warnings" and"Cautions" in this manual and com-ponent manuals on the unit beforeinstallation or using this air DRYING SYSTEM as close aspossible to the point where the air isbeing used.
5 Use template to positionlocation of main air supply shut off valveand piping union fitting (supplied byuser) upstream of air DRYING SYSTEM toallow maintenance to the unit with air flow through filterin direction of arrow on top of 1/2" NPT piping is recom-mended. Avoid using fittings, cou-plings, etc. that restrict air inlet pressure and operat-ing temperature is: 150 PSIG ( bar)and a150 F ( C) tank with DESICCANT materials (seeparagraphs 4, 5, 6 under "MAINTE-NANCE". 6' lengths of vinyl tubing areshipped loose with the SYSTEM . Slideover automatic drains which protrudefrom bottom of the water/separatorand the oil coalescing filters. Place theother end of vinyl tubing into appropri-ate receptacle. Prevent vinyl tubingfrom becoming kinked which wouldprevent free movement of liquids dis-charged from the automatic optional manual drain (HAF-11) canbe installed in place of the the SYSTEM is installed and ready to air hose(s) to outlet main shut-off valve upstream regulator to desired setting byturning "T" handle in or ball valve to supply air to sprayguns or tool being used.)
6 With airflowing, readjust air pressure at regu-lator if use, shut off ball valve and bleedoff residual air in of injury. Components underpressure. Relieve air pressure be-fore performing any solvents, paints and chemi-cals may attack plastic bowl andcan cause bowl failure. Do not usenear these materials. When bowlbecomes dirty, wipe only with aclean, dry cloth. Immediately re-place any crazed, cracked, dam-aged or deteriorated plastic bowlwith a new plastic bowl. Reinstallmetal bowl of injury. Do not place unitin service without metal bowlguard SYSTEM at least once per shift toinsure proper drainage. Look for waterin the drain performing maintenance onsystem, close main shut-off valvelocated upstream. Bleed off residualair in - DESICCANT DAD-1 NOTEThe DESICCANT tank contains an in-ternal filter (DAD-8) at the inlet andoutlet.
7 Be careful not to damagethem when changing the DESICCANT when the hu-midity indicator changes to a pink orwhite color. Remove the pipe plug atthe bottom of the tank. Allow the mate-rial to drain into a two (2) gallon orlarger all the material has been removed,replace the pipe plug (see "Note" fol-lowing) and tighten (do not overtighten) securely (air tight).NOTEUse Teflon tape on pipe plug threadsand all threaded fittings to facili-tate removal in the future. Do notuse loctite or any material that maybond and make removal of injury. Only use a socketwrench to remove the DAD-400humidity indicator from the desic-cant tank. Immediately replacethe DAD-400 humidity indicatorif the humidity indicator paper(supplied with DAD-1 Dessiccant) byremoving the DAD-400 humidity indi-cator. Pry out the old paper and push inthe new paper (printed side facing awayfrom the glass).
8 The pipe plug on top of the DESICCANT material, DAD-1 (19-0831). Two bags are supplied. Holdbag pointed upward and cut bag ondotted line. Grasp and hold bag wherecut and rotate over opening on top oftank. Empty both bags into tank.("Note" tank must be filled completelyto prevent damage to DESICCANT .) pipe plug with 2 wraps of teflontape. Replace the pipe plug and tightenuntil air tight (do not over tighten). humidity indicator will return to ablue color within five DESICCANT material should be dis-posed of to the appropriate service bulletinfor checking the filters and DESICCANT Tune-Up Kit Part , is available. Contains thefollowing parts to completely recon-dition a DESICCANT air station:SB-6-156-O Page 3 Part No. DescriptionQty. SuppliedDAD-1 Desiccant1 HAF-6 Water Separater Filter Element and O-Ring1 DAD-8 In-Tank Filters Replacement Instruc-tions (for filter between the coalescing filter(stage 2) and the DESICCANT tank air inlet (stage3).)
9 These filters keep the DESICCANT within thetank: Replacing the air filter is not normallyneeded. It is required only when the filter hasbeen damaged or plugged because the unitwas not properly Be sure air supply to unit is shut off andbleed off all air pressure from the DAD Make sure the DESICCANT material is drainedfrom unit per above Remove the air supply line from thewater separator inlet (first stage).13. Remove the filter bowls and filter elementsfrom both the first and second stage filtersof the Use an open end 7/8" wrench and removethe hex nipple between the DAD tank andthe coalescing filter. The nipple shouldunscrew out of the Using a large #3 Phillips screwdriver, un-screw the Use a large #3 Phillips screwdriver andreverse the above procedures to install anew DAD-8 filter. Install about halfway intothe tank Reverse procedure to reassemble.
10 Refillwith In-Tank Filter Replacement Instruc-tions (for the filter between the air regula-tor and the DESICCANT tank). sure air supply to unit is off andbleed all air from the DAD sure all DESICCANT material isdrained from the air regulator from tank byplacing a 7/8" wrench on tank bushing anda 1-1/8" wrench on Remove the brass bushing from the tankusing a 7/8" wrench. Using a large #3 Phillipsscrewdriver, unscrew the Use a large #3 Phillips screwdriver andreverse the above procedures to install anew DAD-8. Install about halfway into thetank air regulator can be installedback on the tank or additional pip-ing can be installed to pipe the air toa different location. Rememberthat the volume of air flow can beaffected by the pipe and distanceto the new location. All fittings areregular pipe procedure to with Before placing unit back into service, makesure plastic bowl and metalbowl guard are properly installed and se-curely locked in automatic drain operatesproperly after unit is in operation.