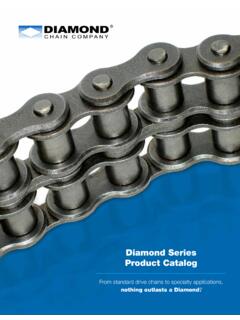
Transcription of Diamond Chain Product Guide - Roller Chain Manufacturer
1 Table of ContentsProduct Performance 4 Chain Components 5 Selecting the Right Chain 6 Ordering Roller Chain 7 Chain Assembly & Disassembly Tools 8 ASME/ANSI Series Chain 10 Heavy Series Chain 12 High Strength Series Chain 13 Double-Pitch Roller Chain 14 Maintenance Free Chain 15 Coupling Chain 16 Additional Products 17 Conversion Chart 18 Trouble Shooting 19 Roller Chain Wear 21 Measuring Chain Wear 22 NOTHING OUTLASTS A Diamond Diamond Chain ACCELERATED WEAR TESTINGAs the global expert in the design and manufacturing of Roller Chain , and presented with the challenge of taking the guesswork out of selecting the right Roller Chain , Diamond Chain has partnered with an independent test lab to assess the performance of Diamond Chain products versus those of the competition.
2 The results speak for themselves. 4 These tests were performed by Diamond Chain using protocols and methodology that were reviewed, verified, and approved by an independent third party. 5 Spring Clip Connecting Link Spring clip connecting links come packaged with slip-fit cover linkplates. The cover link-plate is held in place by a spring clip, split at one end to permit easy installation and removal. This style of connecting link is standard for up to ANSI 60 chains. Press-fit cover linkplates are also available and are recommended for heavy duty Center LinkplateConnecting Link (BCL)This connecting link is standard for all press-fit multiple strand chains of ANSI 50 and larger. The bushings are press fit in the centerplate pitch holes and slip-fit on the pins. The BCL cover linkplate is press fit on the LinkStandard for all sizes of Roller Chain , these links are furnished as complete assemblies.
3 The bushings are press fit into each of the linkplates. Four-Pitch Press-fitOffset Link AssemblyFor Multiple Strand Chain OnlyThe pins of this assembly are press fit into the offset links. A four-pitch length permits the use of BCL connecting links on either end, giving maximum capacity to the Chain COMPONENTSR iveted Connecting LinkRiveted connecting links are available for all Roller Chain sizes. This connecting link is press-fit on the pins. Pins should be riveted or peened on the ends once the cover linkplate is in place. Cottered Connecting LinkThis connecting link is available in either a press-fit or slip-fit construction and is stan-dard on ANSI 80 and larger. Press-fit connect-ing links are recommended for heavy duty applications and press-fit cover linkplates are standard on multiple strand oil field Offset LinkFor Single Strand Chain OnlyThis link is available for all sizes of single strand Chain and consists of an offset link and Roller link assembled together.
4 This link s pin is press fit in the offset linkplates and is riv-eted for a secure fit. The press-fit construction of this assembly greatly increases its structur-al rigidity, reliability, and durability. For these reasons, the two-pitch offset assembly is rec-ommended over a single-pitch offset Offset LinkThis link is packaged unassembled with one slip-fit pin. One end of the connecting pin is milled flat to prevent the pin from turning in the linkplate. Spring clips should be installed with the closed (solid) end toward the direction of Chain You Know?When selecting Roller Chain for a drive system, it is important to understand the difference between tensile strength and working load. Tensile strength is a measurement of the static load required to break a Chain while working load is the amount of force exerted on a Chain by a drive sys-tem.
5 Roller chains with equal tensile strengths can have significantly different working loads as there is no consistent relationship between these two measurements. Tensile strength should not be used as a indication of a Chain s quality or as a substitute for allowable working load. Calculating Allowable Working Load Allowable working load can be calculated using one of the following equations. Note that the load or tension applied to a Chain in service should never exceed 1/6th of the minimum ultimate tensile strength. For chains utilizing slip-fit connecting links, and/or offset links, the load should not exceed 1/9th of the MUTS. A Chain that is loaded above 50% of the MUTS value will be permanently damaged after only one cycle. Additional Terminology: Average ultimate tensile strength is the load required for a sample of chains to break.
6 Minimum ultimate tensile strength, or MUTS, is the static load required for a single Chain to break. Ultimate tensile strength is the maximum load a single Chain will withstand before breaking. SELECTING THE RIGHT Chain FOR YOUR APPLICATION6 Load/ Chain Pull =Horsepower to be Transmitted x 33000 Speed of Chain (feet/minute)Load/ Chain Pull =Horsepower to be Transmitted x 39600 Pitch of chains (inches) x Number of Teeth on sprocket x Speed of sprocket (rev/min)Load/ Chain Pull =Horsepower to be Transmitted x 126050 Pitch of Diameter of sprocket (inches) x Speed of sprocket (rev/min)When ordering Roller Chain , include information on Chain size, length of Chain or number of pitches, and construction style riveted or cottered. For multiple strand Chain , the construction must be specified press-fit or slip-fit construction.
7 When ordering attachment Chain , attachment and attachment spacing must be specified. NOTE: All chains are furnished with connecting links unassembled unless otherwise following are examples of configurations in which chains can be Roller CHAINThe left-hand digit in the two-digit part number denotes the number of 1/8 segments in the pitch. For example, ANSI 80 Chain would be 8 segments of 1/8 for a total of 1 .Did You Know?If a specific length of Chain is not required, order a stock length. Stan-dard lengths are 10 feet, 50 feet, and 100 feet. One extra connecting link is furnished with every 5 feet of ANSI 25 through 50 riveted a specific length of Chain , the length should be given in number of pitches. The connecting link should be included in this an odd number of pitches are required for an endless length, in-dicate whether a single-pitch offset or two-pitch offset link is Chain requires two connecting links to attach the ends to other pieces of equipment, the Chain should be ordered as x number of pitches including connecting link each the Chain does not require connecting links, it may be specified as x pitches long Roller link each end.
8 Odd number pitch lengths are preferable, even number pitch lengths will require an offset may be ordered as x pitches endless. Indicate whether they are to be riveted endless (permanent connection), or connected with a connecting link (detachable). Chain length should always be the complete length, including any connecting or offset links required. If anything other than a connect-ing link is required, please ASSEMBLY AND DISASSEMBLY TOOLSC onnecting ToolsPin Extractor ToolsCT35 Connecting Tool - SmallFor use with ANSI 35 through 60H Roller Tool - LargeFor use with ANSI 80 through 240 single strand Chain and most conveyor and engineered chains with a width of 5/8 or wider between the inside links. For multi-strand chains, a second connecting tool will aid in the alignment of the Connecting Tool - LargeFor use with ANSI 80 through 240 single strand, multi-strand and double-pitch Chain , and most conveyor and en-gineered chains with a width of 5/8 or wider between the inside links.
9 This tool holds the ends of a Chain together during the connection Extractor - SmallFor use with ANSI 25 through 60H Roller Chain . PE135 Pin Extractor - LargeFor use with ANSI 80 through 100H Roller Chain . PERE157 Pin Extractor - Extra LargeFor use with ANSI 120 through 160 Roller ToolsCT35 & CT80 Hook the two arms of the connecting tool onto each end of the Chain . Turn the screw clockwise to bring the two ends of Chain towards each other. Insert the connecting link and complete assembly. Note: This tool is not made to stretch Chain but to hold Chain in place for the hooks of the connecting tool on the rollers past the link or links to be removed or replaced. The slack in the cable should be taken up with a wrench until the Chain between the hooks is relieved of tension. This will allow for the removal of the link with a Roller Chain pin extractor.
10 A new master or replacement link can then be inserted. The cable can then be released with the lock lever and the tool can be ExtractorsPE113, PE135 & PERE157 It is recommended that the side-mashed or spun pin heads be ground flush to the pin linkplate prior to pin extraction to ensure that the Chain bushing will not be damaged. Place the jaws of the tool over the Roller with the push-out pin centered on the Chain pin. Tighten down by turn-ing the top handle clockwise until the Chain pin loosens, driving it partially through the linkplate. Follow the same procedure on the other pin. Return to the original pin and force completely through the pin linkplate. Do the same on second pin, freeing linkplate from the pins. Remove disassembled pin link from the THE ASSEMBLY AND DISASSEMBLY TOOLSWARNING WHEN ASSEMBLING OR DISASSEMBLING Chain : ALWAYS SHUT OFF POWER AND LOCK OUT GEARS AND SPROCKETS BEFORE ATTEMPTING TO REMOVE OR INSTALL CHAINS.