Transcription of DIGITAL CAMERA TG-2 - Olympus Corporation
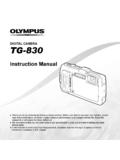
1 DIGITAL CAMERAI nstruction ManualTG-2 Thank you for purchasing an Olympus DIGITAL CAMERA . Before you start to use your new CAMERA , please read these instructions carefully to enjoy optimum performance and a longer service life. Keep this manual in a safe place for future reference. We recommend that you take test shots to get accustomed to your CAMERA before taking important photographs. In the interest of continually improving products, Olympus reserves the right to update or modify information contained in this the contents of the boxorDigital cameraStrapLithium Ion Battery (LI-90B)USB-AC adapter (F-2AC)USB cable (CB-USB8) Olympus Setup CD-ROMLens ringNames of PartsNames of Parts123546781091213111431 Connector cover2 Connector cover lock3 LOCK knob4 Speaker5 Multi-connector6 HDMI micro connector7 Strap eyelet8 Self-timer lamp/LED Illuminator/AF illuminator9 Flash10 Lens11 Lens ring12 Tripod socket13 Battery/card cover14 Battery/card cover lockOther accessories not shown.
2 Warranty cardContents may vary depending on purchase Stereo microphone2 GPS antenna3 Monitor4 Shutter button5 Indicator lamp6 n button7 Zoom buttons8 R button (shooting movies)9 Mode dial10 q button (switching between shooting and playback)11 Arrow pad INFO (changing information display) # (fl ash) Y (self-timer) (erase)12 A button (OK)13 buttonAttaching the CAMERA strapAttaching the CAMERA strap123 Pull the strap tight so that it does not come padH (left)G (down)F (up)I (right)A FGHI instruct to press the up/down/left/right arrow Inserting and removing the battery and card (commercially available)1 Follow Steps 1, 2 and 3 to open the battery/card coverBattery/card cover lockLOCK knob Turn off the CAMERA before opening the battery/card Insert the battery while sliding the battery lock knob in the direction of the lock knob Insert the battery as illustrated with the C mark toward the battery lock to the battery exterior (scratches, etc.)
3 May produce heat or an explosion. Slide the battery lock knob in the direction of the arrow to unlock, and then remove the Insert the card straight until it clicks into switch Always use SD/SDHC/SDXC/Eye-Fi/FlashAir (with Wireless LAN function) card with this CAMERA . Do not insert other types of memory cards. Using the card (p. 79) Do not touch the metallic parts of the card remove the cardTo remove the card21 Press the card in until it clicks and comes out slightly, then remove the Follow Steps 1, 2 and 3 to close the battery/card When using the CAMERA , be sure to close and lock the battery/card cover. Charging the batteryConnect the USB cable and USB-AC adapter to the CAMERA and charge the charging the battery abroad, see Using your charger and USB-AC adapter abroad (p.)
4 79). The battery is not fully charged at shipment. Before use, be sure to charge the battery until the indicator lamp turns off (up to 4 hours). Connecting the CAMERA Connecting the camera12AC outletUSB cable (supplied)Connector coverMulti-connectorLOCK knobConnector cover lockIndicator lampOn: ChargingOff: Charged6 ENWhen to charge the batteriesWhen to charge the batteriesCharge the battery when the error message shown below EmptyError messageFlashes in red Never use any cable other than supplied or Olympus -designated USB cable. This may cause smoking or burning. The included F-2AC USB-AC adapter (hereafter referred to as USB-AC adapter) differs depending on the region where you purchased the CAMERA .
5 If you received a plug-in type USB-AC adapter, plug it directly into AC outlet. The included USB-AC adapter has been designed to be used for charging and playback. Do not take pictures while the USB-AC adapter is connected to the CAMERA . Be sure to unplug the power plug of the USB-AC adapter from the wall outlet when the charging is complete or the playback ends. For details on the battery, see Battery Handling Precautions (p. 98). For details on the USB-AC adapter, see USB-AC adapter (p. 99). If the indicator lamp does not light, check the USB cable and USB-AC adapter connections. The battery can be charged while the CAMERA is connected to the computer via USB. The charging time varies depending on the performance of the computer.
6 (There may be cases in which it takes approx. 10 hours.)7EN Turning on the CAMERA and making the initial settingsWhen you turn on the CAMERA for the fi rst time, a screen appears enabling to set the language for the menus and messages displayed in the monitor, and the date and change the selected date and time, see Setting the date and time d [X] (p. 49).1 Press the n button to turn on the CAMERA , press FGHI of the arrow pad to select your language and press the A Press FG of the arrow pad to select the year for [Y].XMENUBackY/M/DYMDTime--------:..2013 Date and time setting screen3 Press I of the arrow pad to save the setting for [Y].XMENUBackY/M/DYMDTime--------:..2013 4 As in Steps 2 and 3, press FGHI of the arrow pad to set [M] (month), [D] (day), [Time] (hours and minutes), and [Y/M/D] (date order), and then press the A button.
7 For precise time setting, press the A button as the time signal strikes 00 Press HI of the arrow pad to select time zone and then press the A button. Use FG to turn daylight saving time ([Summer]) on or 12:30 BackSummerSeoulTokyo8 ENBefore Using GPSThe CAMERA s GPS (Global Positioning System) feature determines your position (latitude and longitude) and stores this information with pictures taken with the CAMERA . The CAMERA uses supplementary orbital data (assisted GPS or A-GPS) for improved signal data must be updated every 14 using GPS, you will need to set the CAMERA clock to the correct date and time. (p. 49)Updating A-GPS DataUpdating A-GPS Data1 Install the update software ( Olympus A-GPS Utility).
8 Download the update software from the following website and install it on your update software can also be installed from the supplied PC Connect the CAMERA to the computer and launch the update software. Connecting with a computer (p. 56) Once the software has started, follow the on-screen instructions . Using GPS Using GPS1 Select [On] for [GPS Settings] > [GPS] in the d (Settings Menu 3) tab. (p. 55) Once the CAMERA has determined the position, and location coordinates will appear in the :340 :3 Blink: Searching GPS signal Light: Receiving GPS signal The CAMERA may take a few minutes to determine position after a period of the icon is still fl ashing after several minutes, the CAMERA is probably having diffi culty detecting a signal.
9 Move to an unobstructed outdoor area or otherwise change your Press INFO button in the shooting display. The displays change in the order of Normal Detailed No info. Measurement position information each time F (INFO) is pressed. Nearby landmarks in the GPS database will be 1 min ago2013/02/2612:30 Latitude/LongitudeN123 56' 78''E123 56' 78''Barometer877hpaAltitude/Water Depth1200mLOGMENUBackUpdate GPS43210987651 Landmark name2 Landmark information position3 Electronic compass4 Update status5 GPS tracking active6 Latitude7 Longitude 8 Atmospheric/Hydraulic pressure 9 Altitude/Water depth0 Current date and timeHISelect a GPS data. Some countries or regions may regulate the use of GPS devices.
10 Follow all local regulations. Turn GPS off when on board aircraft and in other locations in which the use of GPS devices is prohibited. The provision of A-GPS data may be terminated without prior notice. Position data may be unavailable or contain errors in the following locations: Locations without a clear view of the sky (indoors, underground or underwater, or near trees or tall buildings) Locations subject to strong magnetic or radio interference (near high-voltage power lines, magnets, electronic devices, or cell phones operating in the GHz band) GPS data may take more time acquire or be unavailable in some locations or at certain times of day. Do not cover the GPS antenna with your hands or metal objects.