Transcription of Digital Mug Press Instructions - MDP Supplies
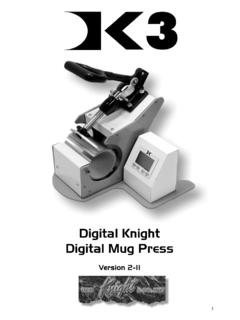
1 Power SwitchTemperature / Time DisplayFusePressure AdjusterPressing HandleWrap ConnectorDigital Mug PressInstructionsStart ButtonHeating ElementInitial SetupThe mug Press has 2 temperature settings, one is the Idle Temperature and the 2nd is the Pressing - the SET indicator will be lit. To set the Idle Temperature use the buttons, we recommend you set this to 100 again and the TEMP & SET indicators will be lit. Set the Pressing Temperature using the buttons. We recommend this is set to 180 again and the TIME & SET indicators will be lit. Set the Pressing Time using the buttons. The time can be adjusted depending on the coverage of the mug design, eg a small logo would take around 50 seconds whereas a full colour wrap around design may take up to 120 again to exit the set up. All indicators on the right should now be Press will now heat up to the Idle Temperature.
2 The main display will show the current temperature. When the Idle Temperature has been reached the Press will make an intermittent beep. The temperature will slightly fluctuate. C / FMODEMODEMODETo help maintain the shape of the element we recommend that you keep a blank mug in the clamp whenever the mug Press is on but not being The PressureFor a mug to be successfully pressed you need to ensure the pressure applied by the clamp is easiest way to know that this has been achieved is to insert a blank mug into the Press and pull down the Pressing Handle. This should lock around the mug without a strong force being applied but when locked into place the mug should not be able to be rotated using the mug adjust, use the Pressure Adjuster The Temperature To CelciusPress the button to set the mug Press to Celcius. MODEFor pressing different sizes of mugs other heating elements are available from MDP Supplies .
3 These plug into the Wrap Connector To Press A MugPressing A MugTo produce a printed mug you need a print out that has been produced on a printer using dye sublimation inks, eg. Sawgrass, and a sublimation coated using A4 paper you can get 2 print outs to a single you turn on the mug Press it will begin toheat up to the Idle Temperature. Once this has been reached the Press will make anintermittent beep. You can now insert a mug forpressing, close the clamp by pulling forward on thePressing the Start button on the front of theunit. The SET indicator will flash and the Press willheat the element to the Pressing Temperature. Once the Pressing Temperature is reached, theTIME indicator is lit and the countdown timer willstart. When the timer reaches zero the Press willmake a continuous lift up the Pressing Handle,remove the mug, peel back the printed paperfrom the mug and then Press the Start Press another mug wait for the temperatureto fall below the Pressing Temperature and repeat the above Trim dye sublimation print outsPlace in Press and pull pressing handle forward to lockTrim dye sublimation print outsAfter pressing remove print outfrom the mug immediately3 Trim dye sublimation print outsTrim dye sublimation print outsTrim dye sublimation print outsFix with heat tapeTrim dye sublimation print outsWrap print out around mugPossible IssuesWarrantyHealth & SafetyThere may be a little bit of trial and error when you initially start using the mug Press but some of the most common issues are.
4 After removing the mug the print appears to happens when the mug continues to cook after it has been removed from the Press . You could either reduce the temperature slightly or to immediately halt the effect place the hot mug directly in a water blacks look a bit can occur if you are pressing at too higher temperature or you have pressed the mug for too of the image are looking a bit this can be prevented by increasing the pressing is recommended that the heat Press is turned off at regular intervals, eg every hour and allowed to ElementThe heating element is classed as a consumable as it will deteriorate after time. As an average you will generally get several thousand pressings from an element however the manufacturer s guarantee is for pressing 500 mugs or 3 months warranty, whichever comes Press WarrantyAll parts of the mug Press , except the heating element have a 12 month return to base pressing element will get hot socare is needed when operating not leave the mugpress unattended atany guide has been produced by MDP Suppliesfor the benefit of our customers and is for informationpurposes only.
5 MDP Supplies cannot be held responsiblefor any errors, omissions or any loss, whether actual orconsequential, from following the advice given in this trademarks are the property of their respective owners. MDP Supplies 2016