Transcription of DStv A7 Remote
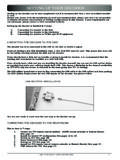
1 DStv A7 Remote Advanced Options Quick Guide Page 2 of 6 THE A7 Remote + HINTS AND TIPS The LED on the Remote referred to in these instructions is the STANDBY button in the centre top of the Remote . The colour of this LED can be GREEN, AMBER or RED The mode that the A7 Remote will be used in, must be the same mode that the Remote is in when programmed. Example : If you have set your DStv Explora to respond to mode 3, set your A7 Remote to mode 3 before programming it. You must also ensure that the DStv Explora is set to respond to the mode that the Remote is in when programming it. Example : if you have set the Remote to mode 3, the DStv Explora must be set to respond to mode 3.
2 To change Remote control settings on the DStv Explora, press DStv, and go to System Settings in the Setting menu. When using any of these advanced features, the A7 Remote must be pointed at the device it s controlling. If you get a new TV you will need to re-programme the necessary sequences. For queries and support when using the Advanced Options on your A7 Remote , please make use of our forums on Page 3 of 6 PROGRAMMING TV MODES (AUTOMATIC SETUP) This feature is a quick setup and TV brands are assigned to the numbers on the Remote . For example, the TV brands beginning with letters ABC will have codesets (modes) under number 1 (since we have ABC printed for this number on the keypad).
3 The codeset IDs will be on priority of coverage and not alphabetical. Programming steps The TV that you re trying to programme must be on before you start these steps Step 1 Press and hold TV POWER and ARC for more than 3 seconds The LED will give 2 short RED blinks and remain RED to indicate the Remote is now in programming mode. Step 2 Press and hold one of the number buttons. This will begin the search mode for the device brand that the number represents. Do not release the number until the target device (TV) turns off. Example : If you have a Samsung TV, press and hold 7 While the number is held down, the LED will be GREEN. The LED will blink GREEN each time a power function is sent.
4 Step 3 Once the target device (TV) turns off, release the number button If the programming has gone through the entire database of codes and your TV has not switched off, then your TV model cannot be found. In this instance, the LED will just stop blinking green and you will need to refer to the manual option (listed next). The LED will blink GREEN 3 times. Summary <<TV POWER + ARC for more than 3 secs>> (LED 2 red blinks, remain red) < NUMBER button corresponding with TV manufacturer> (LED green, plus 1 green blink each time a power function is sent) <release NUMBER button when TV turns off> (LED 3 green blinks) If during this process, the Remote displays one long RED blink on the LED, it has exited programming and restored the last pre-programmed code.
5 This happens when: If any other button is pressed besides those indicated Upon entry of an invalid button sequence or invalid code If 30 seconds elapses between button presses The TV POWER button on the A7 is now programmed to turn your TV power on and off. Page 4 of 6 LEARNING TV SIGNALS OF THE Remote (MANUAL SETUP) For device brands or models not covered in Learning / Simple Mode, the Remote can learn the other IR signals for TV POWER, AV, VOL+, VOL- and MUTE. Programming steps The TV that you re trying to programme must be on before you start these steps. You will need the TV Remote for this process Step 1 Press and hold TV POWER and ARC for more than 3 seconds The LED will give 2 short RED blinks and remain RED to indicate the Remote is now in programming mode.
6 Step 2 Hold the source Remote close to the A7 Remote Press and release the button you want the TV to learn (TV POWER / AV / VOL+ / VOL- / MUTE) The LED will go off when the button is pressed and show AMBER when the button is released. The LED will give 2 GREEN blinks if the learning is successful and the new learnt code will replace the previous one. After learning, the LED will be RED for approximately 30 seconds, blinking 3 times before exiting learning mode. The LED will give 4 AMBER blinks if the learning has failed. To continue, start this step again. The previous learnt code will remain when new learning fails. Repeat steps 1 and 2 for each button you want learnt Summary <<TV POWER + ARC for more than 3 secs>> (LED 2 red blinks) < TV POWER / AV / VOL+ / VOL- / MUTE> (LED off, then AMBER when button released.)
7 2 green blinks. Red 30 secs, 3 red blinks) If during this process, the Remote displays one long RED blink on the LED, it has exited programming and restored the last pre-programmed code. This happens when: If any other button is pressed besides those indicated Upon entry of an invalid button sequence or invalid code If 30 seconds elapses between button presses The TV POWER / AV / VOL+ / VOL- / MUTE button on the A7 are now programmed for your TV. Page 5 of 6 BUTTON LOCK AND UNLOCK Now that you ve programmed the buttons, you can switch them to either control the DStv Explora or your TV. Note Once locked or unlocked, all three buttons (VOL+, VOL- and MUTE) will either work on the DStv Explora or TV depending on what mode you selected.
8 The buttons cannot be set up to control different devices at the same time, ie. VOL+ cannot control the TV at the same time MUTE controls the DStv Explora. To control your TV Press ARC plus VOL+ for more than 3 seconds The LED will give 2 short RED blinks. The VOL+, VOL- and MUTE buttons are now configured for your TV. To control your DStv Explora Press ARC plus VOL- for more than 3 seconds The LED will give 4 short RED blinks. The VOL+, VOL- and MUTE buttons are now configured for your DStv Explora Page 6 of 6 MANUFACTURING RESET Programming steps Step 1 Press and hold STANDBY and OPTIONS simultaneously for more than 3 seconds.
9 The LED will give 2 short RED blinks to indicate the Remote is now in programming mode. Step 2 Press 9 and then 8 then 1 The LED will blink RED once when you press 9 and 8 and twice RED once you have entered all digits. Step 3 Then press and hold OK for more than 3 seconds. The LED will blink RED 4 times to finish Manufacturing Reset. Summary <<STANDBY + OPTION for more than 3 secs>> (LED 2 red blinks) < 9> (LED 1 red blink) <8> (LED 1 red blink) <1> (LED 2 red blinks) <<OK for more than 3 secs>> (LED 4 red blinks) If during this process, the Remote displays one long RED blink on the LED, it has exited programming and restored the last pre-programmed code.
10 This happens when: If any other button is pressed besides a number button Upon entry of an invalid button sequence If OK is not held for more than 3 seconds after entering programming sequence If 30 seconds elapses between button presses