Transcription of DVI/USB/RS-232 and Audio - Opticis
1 User s Manual for the M5-1003 Doc No. : OMM-D130903-M51003 / DVI/USB/RS-232 and Audio Optical Extender 2013 Opticis Co., Ltd. All Rights Reserved Revision 3, Sep, 2013 Opticis Locations Headquarters Opticis Co., Ltd. # 16Fl, Kins Tower 8 Sungnam-daero, 331 beon-gil, Bundang-gu, Seongnam-si, Gyunggi-do, 463-844 South Korea Te l: +82 (31) 719-8033 Fax: +82 (31) 719-8032 For order support, please contact your Distributor or Reseller. For technical support, check with the Opticis web site or contact Manual Contents _____ Manual Contents 1-0 Welcome, Product Description 1-1 System Requirements for Setup 1-2 Installation 1-3 Operation Guide 1-5 Self-EDID Programming Procedure 1-6 RS-232 cabling 1-7 Troubleshooting, Maintenance, Technical Support 1-8 Product Specifications 1-9 Warranty Information 1-10 Regulatory Statements 1-11 Pictorials Figure 1 Overall Connection of M5-1003 Optical KVM Extender 1-1 Figure 2 Connection of DVI, USB.
2 RS-232 and Audio Cable to Transmitter 1-3 Figure 3 Connection of Local Display and Keyboard/ Mouse 1-3 Figure 4 Connection of DVI Cable, Keyboard and Mouse to Receiver 1-4 Figure 5 Connection of Two(2) Duplex LC Optical Fibers 1-4 Figure 6 Connection of AC/DC Power Adapter 1-4 Figure 7 Switch for Selection Control Position 1-5 Figure 8 Connection of Remote Switch and Indicator 1-5 Figure 9 Position of EDID PRGM. Button and Self-EDID LED 1-6 Figure 10 RS-232 cable type around M5-1003 1-7 1- 0 Manual Contents Welcome! Congratulations on your purchase of the M5-1003, DVI/USB/RS-232 and Audio optical extender. This manual contains information that will assist you in installing and operating the product.
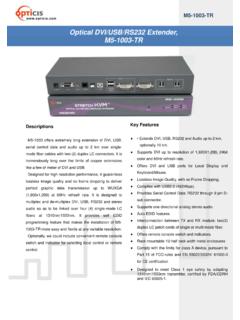
3 Product Description M5-1003 offers extremely long extension of DVI, USB, serial control data and Audio up to 2 km over single-mode fiber cables with two (2) duplex LC connectors. It is tremendously long over the limits of copper extensions like a few of meter of DVI and USB. Designed for high resolution performance, it guarantees lossless image quality and no frame dropping to deliver perfect graphic data transmission up to WUXGA (1920x1200) at 60Hz refresh rate. It is designed to multiplex and de-multiplex DVI, USB, RS232 and stereo Audio so as to be linked over four (4) single-mode LC fibers at 1310nm/1550nm. It provides Self-EDID programming feature that makes the installation of M5-1003 more easy and flexile at any variable resolution. Optionally, we could include convenient remote console switch and indicator for selecting local control or remote control.
4 Shipping Group of M5-1003 DVI/USB/ Audio and RS-232 optical extender Tx and Rx boxes: One Transmitter module & One Receiver module. AC/DC power adapter: Two +12V/3A units (including AC cord). User s Manual Option: Remote console switch and indicator, Duplex LC Patch Cord (Single or Multi mode glass fiber). Figure 1 Overall connection of M5-1003 Optical KVM Extender 1-1 Welcome, Product Description System Requirements for Setup Hardware requirements Local display and remote display should have same graphic resolution. You have a graphic controller card with a DVI port in your Windows/Mac (Mac is option), or SUN system. It should support the maximum graphic resolution feature of the display to be connected.
5 In case of using a computer, no special memory size, CPU speed and chipsets are required. Proper initial trial of the entire platform with its application using a short length copper cable is recommended prior to install with the optical link. Software requirements No special needs, if the DVI graphic controller and display peripheral are operational with the platform s OS and application. AC/DC Power Adapter Technical Advisory The power of M5-1003 is designed to supply to each module of Transmitter and Receiver modules by plugging to each of the power plugs. 1-2 System Requirements for Setup Installation Important: Please use the installation procedure below. Improper or no operation may result if the start-up sequence is not correctly followed.
6 Step 1 Carefully unpack the contents of the shipping group. Step 2 With system power turned off, connect the Transmitter module to the DVI receptacle of PC or other video source equipment by a DVI copper cable. If necessary, connect the RS-232 cable and the Audio cable to D-sub 9-pin connector and Audio jack. Figure 2 Connection of DVI, USB, RS-232 and Audio Cable to Transmitter Module Step 3 Connect the Transmitter module to the display, keyboard and mouse for local control. You may skip Step 3 if you don t need local control. In this case, please see instructions on page 1-6 for Self-EDID programming. Figure 3 Connection of Local Display and Keyboard/Mouse 1-3 Installation Operation Guide Selection of Control Position Switch for decision of control position Figure 7 Switch for Selecting Control Position Graphic data is always transmitted to both local DVI out and remote DVI out.
7 However, USB port for keyboard and mouse is selectable for control at specific position. Controllable site is like the table below with the position of switch on the front panel of transmitter. The position of Switch Local Keyboard/Mouse (2 USB ports on Tx) Remote Keyboard/Mouse (4 USB ports on Rx) Remote Disable Enable Local Enable Disable Console Control position is decided by console switch. Use of Console Switch and Indicator Console switch and indicator are optionally provided for easy and convenient control conversion. Connection is like below picture. Caution Please DO NOT look directly into the LC receptacles of Uplink module, while they are powered on, although they are regulated strictly enough to operate under the Laser Class 1, classified by CDRH/FDA for eye safety.
8 1-5 Operation Guide Step 4 Connect the Receiver module to the remote display, keyboard and mouse. If necessary, connect the RS232 cable and the Audio cable to Audio output device and RS-232 device. For proper RS-232 cable type, please refer to Fig 10. Figure 4 Connection of DVI cable, keyboard and mouse to Receiver Module Step 5 Remove dust covers and connect two(2) duplex LC fibers to LC receptacles of the Transmitter and Receiver modules, as shown in Fig. 5. Ensure the order of the duplex LC connectors is correct. Figure 5 Connection of Two (2) Duplex LC Optical Fibers Step 6 Connect an AC/DC power adapter to both Transmitter and Receiver modules as your availability of AC outlets. You can find power indication LED lit on in the both modules.
9 Figure 6 Connection of AC/DC Power Adapter Step 7 Power ON the PC and display. Power on connected USB, Audio and RS-232 devices too. For proper RS-232 cable type, please refer to Fig 10. Tip 1: Avoid hot plugging the Uplink as this is not recommended practice with live digital voltages. 1-4 Installation Self-EDID Programming Procedure The graphic source equipment generally requires communication of display information (EDID). Display information (EDID) contains resolution and timing information for your display. Basically, M5-1003 supports DDC2B with the local display. M5-1003 also offers Self-EDID programming. Self-EDID programming means that the EDID from the display is stored in the transmitter.
10 You should use Self-EDID feature if you don t connect local monitor. Follow these steps to record the EDID of the display into the transmitter unit. Note1: If you know that EDID is not required by the source, Auto-EDID programming is not necessary. Note2: The default EDID in factory ship-out is programmed in the VESA standard of UXGA (1600x1200) Step 1 Power on the display. Step 2 Insert the included 12V DC power adapter into the transmitter. Step 3 Push the EDID PRGM. button of the transmitter with a narrow pin. After three times blinking of Self-EDID LED, it will stay on. Self-EDID LED EDID-PRGM. Button Figure 9 Position of EDID-PRGM. Button and Self-EDID LED Step 4 Connect the Local Display port in transmitter to the display while turned on over DVI cable.