Transcription of ED - Bassani.com
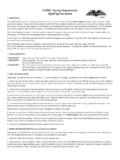
1 FLH-747 FLH-747B REV. 04-20-15 pw Page 1 HARLEY DAVIDSON 1995 UP DRESSER & ROAD KING INSTALLATION INSTRUCTIONS PART# FLH-747 and FLH-747B Congratulations on owning a Genuine set of Bassani Xhaust Pipes. Bassani Pipes are designed for maximum sound and performance. Please follow the instructions below for installation. If you have any questions please call our tech line at 714-630-1821. Thank you! CAUTION: WRAPPING of Pipe with Heat Tape may adversely affect the pipe & will Void Warranty! TOOLS REQUIRED 5/16 Nut Driver 1/2 & 9/16 Sockets Snap Ring Pliers , 9/16.
2 7/8 & 13mm Wrenches Ratchet with Extension Flat Head Screwdriver Socket Swivel & 5/16 Allen Socket READ ALL INSTRUCTIONS BEFORE BEGINNING INSTALLATION PARTS LIST 1 = -16 Serrated Flange Nut 2 = -16 x 1 Hex Head Bolts 1 = Spring Lock Washer 2 = 12mm 0 Plugs 2 = 18mm 0 Plugs 2 = Flat Washers 1 = TB-238 Breeze T-Bolt Clamp 7 = # 24 Hose Clamps 1 = # 36 Hose Clamp 1 = Mounting Bracket Extension BKT-F07 1 = 5 Speed Mounting Bracket BKT-F01 BASSANI ROAD RAGE II B4 HIGH PERFORMANCE EXHAUST SYSTEM EXHAUST SYSTEM 1. Front Heat Shield 2.
3 Rear Upper Heat Shield 3. Rear Lower Heat Shield 4. Collector Heat Shield 5. Front and Rear Head Pipe Assembly 6. Megaphone Muffler Housing with Baffle (B25195) and Black Anodized Billet End Cap (BELMR) Now Available to Customize your Bassani Exhaust System End Caps: BELMT ENDCAP-LM BELMU Shhhhhhh!! Designed for those who need a Quieter baffle 2 ID x 19 long - Wrapped in woven roven fiberglass is removable and serviceable.
4 B22195 2 ID x 19 long - Wrapped in woven roven fiberglass is removable and POWER YOU CAN FEEL 1 2 4 3 5 6 FLH-747B will have Black Ceramic Heat Shields and Muffler FLH-747 FLH-747B REV. 04-20-15 pw Page 2 HARLEY DAVIDSON 1995 UP DRESSER & ROAD KING INSTALLATION INSTRUCTIONS PART# FLH-747 and FLH-747B If you have any questions please call our tech line at 714-630-1821. Thank you! STOCK EXHAUST REMOVAL INSTRUCTIONS 1. Unclip 0 sensor wires from the front and rear cylinder connections. Carefully remove the 0 sensors from the front and rear head pipes, using 0 sensor socket or a wrench.
5 (Label them to identify which is for the front pipe and which is for the rear pipe.) 2. Remove the heat shields. 3. Remove stock right side saddlebag; loosen the clamp at the muffler inlet with a 9/16 socket. With a socket remove the two hex head bolts at the rear of the muffler. Slide the mufflers off, keeping the two hex head bolts, as you will re-use them. 4. Remove the right side forward floorboard. Use a allen socket on both bolts that hold the mounting brackets in place. 2009 models have the bolts are on the outside of the frame. 5. Remove left down pipe from rear head pipe. Remove P Clamp from front head pipe using a 9/16 socket. (A flat head screwdriver inserted between the open ends of the clamp with a twist, will cause the flat blade to open the clamp.)
6 Now slide the clamp off the head pipe) 6. Remove the front and rear flange nuts from the head pipes with the socket. Remove both head pipes and save the flange nuts, flanges, and the cir-clips for reuse. 7. With our new style formed head pipe end, on the 2009 and later models it is no longer necessary to replace your stock exhaust port gasket with a flat gasket. On the other year models {2008 and earlier} you may use the stock gasket or a gasket of your choice. INSTALLATION OF BASSANI EXHAUST SYSTEM 1. Remove the right side forward floorboard. Use a allen socket on both bolts that hold the mounting brackets in place. On the 2009 models the bolts are on the outside of the frame. 2. Thread one of the supplied hex head bolts through a spring lock washer, a flat washer and into the nut on the rear of the extension bracket.
7 Secure loosely. 3. On the earlier model 5 speed bikes, remove the stock bracket mounted to the transmission and replace it with the supplied 5-speed bracket using the stock hardware. If you have a 6 speed, you will use the stock-mounting bracket. 4. Install the stock flanges and carefully fit the cir-clips onto the head pipes using a snap ring pliers. (Fig. 1) Slide the head pipe assembly up into the ports and using the stock hardware bolt up to the heads loosely. (Fig. 2) On the 6-speed bike, using the other supplied hex head bolt, a flat washer, and the serrated flange nut, loosely fastens the mounting bracket extension to the stock-mounting bracket. (Fig. 3) On the 5 speed models attach it to the supplied 5-speed bracket.
8 5. Spray lubricant onto the muffler inlet and slide the T-Bolt clamp over the muffler. Slide the muffler over the collector on the head pipes, (Fig. 4) sliding forward so the mounting location at the rear of the muffler lines up with the bracket on the bike. (Fig. 5) Tighten down the collector clamp, but do not fully tighten. Install the stock muffler mounting bolts and also leave loose. 6. Install the 0 sensors in the pipes, using the 0 sensor socket or a wrench. There are two different locations with different size sensors installed on your bike. Plug the two unused sensor sockets with the plugs supplied. Use a small amount of anti-seize compound on the threads, then feed the wires (that you marked with front or rear before installation) into their appropriate locations and plug in.
9 7. Thread the appropriate hose clamps, according to the diagram in Fig. 6 through the brackets on the inside of the heat shields. When doing so keep in mind that you will want the adjustment screw to be accessible once the shields are installed on the bike. 8. Attach the #1: front heat shield (Fig. 7) to the front head pipe. Attach the #3 (lower-rear) shield to the bottom area of the rear head pipe. (Fig. 8) Next attach the #2 (upper-rear) so that the #2 shield will overlap the #3 shield. Finally mount the collector shield #4 overlapping the two head pipe shields. (Fig. 9) Slide the two tabs inside the collector shield (circled) under the head pipes shields. 9. Starting at the front cylinder and moving back and forth, tighten down all the hardware a little at a time, while checking for adequate clearance between the exhaust and engine parts.
10 This will help to align the header pipes for a proper seal. Reattach the saddlebag and the forward floorboard. 10. Before starting the motorcycle, clean and wipe down the pipes with a non-residue or similar type of cleaner and a soft clean cloth. Removal of fingerprints and any oil base residue is necessary to avoid staining the finish when the exhaust system heats up. POWER YOU CAN FEEL FLH-747 FLH-747B REV. 04-20-15 pw Page 3 HARLEY DAVIDSON 1995 UP DRESSER & ROAD KING INSTALLATION INSTRUCTIONS PART# FLH-747 and FLH-747B Note: Any modification to the factory (stock) installed intake or exhaust system alters the air/fuel Ratio.