Transcription of EHE0200361 RF Programmable Room Thermostat
1 1 User GuideEHE0200361 RF Programmable room ThermostatThe EHE0200361 RF Programmable room Thermostat is designed to control your heating system efficiently, providing comfortable temperatures when you are at home and energy savings when you are away. The following instructions explain how to program and use the Thermostat to provide the most home comfort at the least Ergonomic user interface featuring an OK-button . Large LCD (Liquid Crystal Display) Screen. 7-day heating program to match your lifestyle, whilst maximising energy savings.
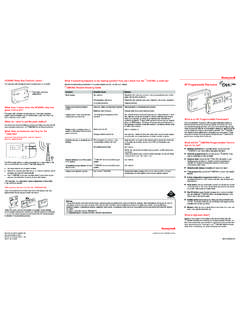
2 4 independent temperature levels per day (from 5 C to 35 C). Built-in Memory holds the user program of the EHE020036150039991-011 A ScreenBattery Low IndicatorTime DisplayBurner On IndicatorDay IndicatorTemperature DisplayTemperature Change ButtonsTemperature Enquiry Button1239101145 Operating Mode ButtonsOK ButtonBattery CompartmentBattery CoverProgram ButtonsCopy Day ButtonSet Day ButtonTime Change Buttons12131415 Controls Layout6712435891071213111561416168 This section shows you how to setup and run the Thermostat in 3 simple steps:STEP 1: Installing the BatteriesNote.
3 Please follow the instructions in this section only if the Thermostat screen is blank (no symbols or digits are displayed). If the room temperature is already displayed move on to Step 2: Setting the Date and install the Batteries:a. Lift up the front cover of the Thermostat to reveal the battery cover and product Remove the battery cover by pressing down and sliding Insert the 2 x AA LR6 Alkaline Batteries supplied with the Thermostat , ensuring the correct orientation (see Controls Layout on page 2).d. After a short pause the Thermostat will display information on the screen and is now ready for Replace the battery cover by sliding it firmly back into the front of the 2: Setting the TimeTo set the Date and Time:a.
4 Press the D AY button once and the day indicator will begin to Press the D AY button until the correct day is reached (Day 1 = Monday). Press the button to Press either of the or buttons once to enter time setting mode. The LCD screen flashes the time digits (when the unit is powered for the first time the display shows 12:00).e. Use the or buttons to set the correct time then press the button to confirm. Each press of the buttons will change the time by one minute and holding them down will change the time slowly at first and get progressively quicker.
5 Note: If this mode is entered accidentally then press the AUTO, MAN or OFF buttons to 3: Running the Built-in Heating ProgramThe Thermostat is now ready for operation. Press the AUTO button and the built-in heating program will start : The built-in heating program has been designed to provide normal comfort requirements, but if you want to customise the settings please see the next section Programming the EHE0200154 .Setting-up the EHE020036145 Reviewing the Heating ProgramTo review or edit the heating program use the PROGRAM or buttons to navigate between the 4 individual programming periods for that day.
6 Use the DAY button to step through each day of the week, so the complete 7 day heating program can be reviewed or the Heating ProgramTo change the heating program:a. Press either of the PROGRAM or buttons to enter the programming mode. The time / temperature settings for period 1 on Monday (Day 1) will be flashing as shown. The active period is highlighted by a flashing square around the numbers at the bottom of the screen and the selected day is shown with the day To adjust the period start time use the or buttons, the OK?
7 Indicator will be displayed to confirm the change. Holding the button down will change the time quickly. Note: If you are pressing the or buttons and the display flashes the next period, it means the next period will be pushed Once the required time is reached press the button to confirm. Note: If the original time setting did not require adjustment press the button to move to step d .MonTueWedThuFriSatSun4321 The Built-in Heating ProgramThe built-in heating program has 4 temperature level changes per day that can be set between and the following day - allowing you to maintain the evening temperature after midnight.
8 Each temperature level can be set between 5 C and 35 C, and adjusted in C increments. The factory default program for heating is as the EHE0200361 Period 1 2 3 4 Time 6:30 8:00 18:00 22:30 Temperature 21 C 18 C 21 C 16 CPeriod 1 2 3 4 Time 8:00 10:00 18:00 23.
9 00 Temperature 21 C 21 C 21 C 16 CMonday to Friday (Day 1 to 5)Saturday & Sunday (Day 6 & 7)Programming the EHE0200361d. The temperature setting for period 1 on Monday (Day 1) will now be flashing. To adjust this press the or buttons and confirm the setting again by pressing the The next time and temperature period will now be active. Adjust this by repeating steps b - d above until all 4 periods are set for Monday or press the AUTO button to run the program as set, at any now have a choice of how to set the program for the next day:f.
10 I) Press the COPY DAY button to copy Monday s program into Tuesday. The display will go blank apart from the non flashing day indicator, which indicates the day copied and the flashing target day to copy the program to. To accept this day press the button. To select a different target day press the D AY button until the flashing day indicator is under the required day, then accept it by pressing the button. Note: Once the target day is confirmed it becomes the day that is copied if the COPY DAY button is pressed again.